This site is supported by our readers. We may earn a commission, at no cost to you, if you purchase through links.
A gear sitting slightly off-center, a strap cutting across the armpit, a dog that freezes the moment you clip the leash—these aren’t minor issues. Poorly fitted gear cause chafing, restrict shoulder movement, and in some cases, let dogs back right out and bolt.
Most owners get the basics right. The gear goes on, the leash attaches, the walk happens. But "on" and "on correctly" are two different things, and that gap is where injuries and frustration quietly build.
Putting on a dog gear correctly takes about two extra minutes once you know what to look for—and those minutes protect your dog’s joints, skin, and safety every single time you head out the door.
Table Of Contents
- Key Takeaways
- Choose The Right Harness Style
- Prepare Your Dog and Harness
- Put on a Step-in Harness
- Put on an Overhead Harness
- Put on a Vest Harness
- Adjust Straps for Proper Fit
- Check Comfort and Safety
- Fix Common Harness Problems
- Frequently Asked Questions (FAQs)
- What words do dogs hear best?
- What is the best harness for a Havanese dog?
- Can pugs wear a harness?
- What is the best dog harness for a Chihuahua?
- Which is the front of a dog harness?
- What are common harness fitting mistakes?
- Can a harness be worn during car travel?
- How do you clean and maintain a dog harness?
- What materials are best for sensitive skin dogs?
- Are harnesses suitable for puppies and small breeds?
- Conclusion
Key Takeaways
- Choosing the right harness style—step-in, vest, front-clip, or back-clip—depends on your dog’s size, temperament, and walking behavior, and getting this match right is the foundation of a safe, comfortable walk.
- The two-finger rule (sliding two fingers under every strap) is the single most reliable way to confirm your harness fits correctly—snug enough to prevent escape, loose enough for free movement and breathing.
- Calm preparation before harnessing—settling your dog, opening all buckles, and using high-value treats—makes the process faster, safer, and far less stressful for both of you.
- Common problems like twisting, slipping, skin chafing, and dogs refusing to move almost always trace back to poor fit or uneven strap tension, not the harness itself.
Choose The Right Harness Style
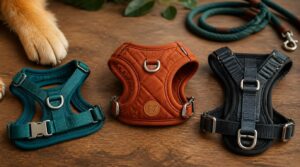
Before anything else, you need to pick the gear that actually suits your dog. The right style depends on your dog’s size, temperament, and how they walk on a leash. Here are the most common types to look out for:
For a deeper breakdown of what to look for, our guide to the best dog leashes walks through which styles work best for different breeds, pullers, and everyday situations.
Step-in Harnesses
Dogs that tense up when something passes over their head are perfect candidates for a step-in gear. Your dog simply places each front paw into a ground-level loop, then you lift the straps up and clip the buckles at the back.
This design distributes pressure across the chest, not the throat, and many models include reflective stitching for low-light visibility. Using these step-in dog harnesses can help reduce physical strain on your pet.
Over-the-head Harnesses
If your dog doesn’t mind a loop sliding over their head, an over-the-head gear is a solid everyday choice. You slip the wider chest loop over first, then the neck loop settles naturally into place.
Nylon or polyester straps keep it lightweight, while padding at the chest prevents chafing. Adjust the straps for a correct gear fit, then clip the buckles at the side.
Vest-style Harnesses
Where the over-the-head style is simple, a vest-style gear does more. It wraps around the chest and torso, spreading pressure over a larger area — a solid pick for puppies and small breeds.
- Padded comfort panels reduce rubbing on long walks
- Breathable mesh body prevents heat buildup
- Reflective night safety trim for low-light visibility
- Integrated gear storage holds treats and bags
Front-clip Harnesses
A vest spreads pressure, but pulling is a different problem. That’s where a front-clip gear earns its place.
The leash attaches at the chest, so when your dog lunges forward, their momentum redirects sideways — back toward you. It’s a simple mechanic that teaches loose leash walking faster than correction ever could. Built from nylon webbing with metal D-rings, these setups hold up daily.
Back-clip Harnesses
Back-clip harnesses keep things simple. The leash connects at the back, between the shoulder blades, so there’s no neck or throat pressure during walks. That rear attachment works with your dog’s natural gait — great for calm walkers who don’t pull.
Many models include reflective trim and breathable mesh panels, while reinforced stitching and metal D-rings hold firm through daily use.
Prepare Your Dog and Harness
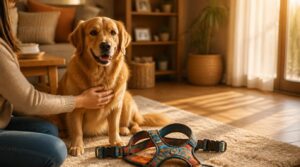
Before you put the gear on your dog, a little prep goes a long way. Getting both your dog and the gear ready first makes the whole process smoother and less stressful for everyone. Here’s what to do before you even think about buckling anything up.
Check for Twists
Before you put on dog gear, run it through your hands and check that every strap lies flat. Twisted webbing changes how the gear sits on your dog’s body, which can cause rubbing almost immediately. Straighten any sections where the fabric folds or crosses itself.
A quick visual check for strap symmetry takes ten seconds and prevents a lot of discomfort.
Open All Buckles
Open every buckle and clip before bringing the gear near your dog. Side release buckles separate when you press both wings at once — you’ll feel or hear a click when they engage or disengage. Some buckles include a secondary safety latch you must flip first, so check for that.
Fully open means fully ready.
Calm Your Dog First
A tense dog makes every step harder. Before reaching for the leash, give your dog 1–2 minutes to settle in a quiet, low-traffic space away from other pets or loud sounds.
Speak softly and move slowly. If your dog seems restless, schedule the session after a walk — a tired dog cooperates far better than an energized one.
Use Treats for Cooperation
Treats are your secret handshake with your dog during walk time. Slip one out the moment your dog stays still — reward within one second to lock in that calm behavior.
- Rotate between two or three high-value treats
- Use small, soft bites to keep momentum
- Switch to verbal praise occasionally to avoid treat saturation
Variable rewards keep your dog genuinely engaged, not just expectant.
Identify Front and Back
Flip the gear over — the side with the raised D-ring is the back, always sitting along your dog’s spine. The front shows the chest panel, usually wider and sometimes padded. Brand tags and care labels hide on the back.
Get this right before tightening anything, or your adjustment efforts won’t matter.
Put on a Step-in Harness
Step-in harnesses are one of the easiest styles to work with, especially if your dog gets nervous about things going over their head. The process breaks down into a handful of simple moves that go quickly once you’ve done it a couple of times. Here’s exactly how to get it on correctly.
Lay Harness Flat
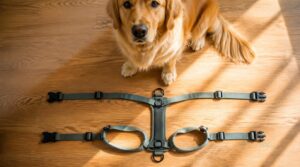
Before anything else, set the gear down on a flat, clean surface in front of your dog. Straighten every strap so there are no twists or crossed sections. Correcting loop twists now takes seconds — ignoring them means an uncomfortable, lopsided fit later. Both loops should face up, open, and ready.
Place Paws in Loops
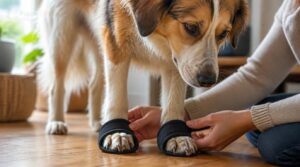
With the gear flat and ready, gently guide one front paw into each loop. Aim for placement just behind the paw pads to allow natural stride without restriction.
- Loops should sit snug, not tight
- Two fingers should slide between loop and paw
- Watch for toe crowding inside the opening
- Smooth fabric prevents chafing during movement
Don’t rush — steady paws mean a correct fit from the start.
Lift Straps Upward
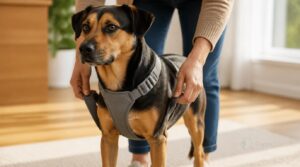
Once both paws are settled, lift the straps upward along your dog’s forelegs. Think of it like raising sleeves — the straps should sit high on the foreleg, not bunched near the paws.
Keep the strap fabric flat against the leg, with no twisting. This reduces pressure on the joints and holds everything stable before you buckle up.
Buckle Over The Back
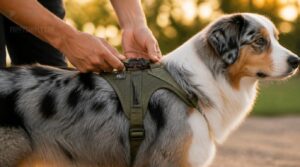
With the straps sitting high and flat, bring the two strap ends together at the top of your dog’s back. Press the buckle firmly until it clicks. That click confirms the latch has locked — don’t skip it.
The back position keeps pressure off the chest and armpits, spreading load evenly across the torso for a comfortable, secure fit.
Attach Leash to D-ring
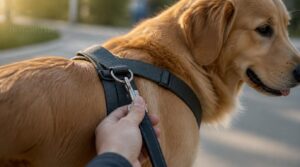
Locate the metal D-ring on your dog’s back — it sits near the shoulder blades once the buckle is clipped. Snap the leash clip upward from below so the clasp seats flush against the ring, then give it a firm tug to confirm it’s locked.
A worn or loose clip can slip mid-walk, so check the hardware for bending or corrosion before every outing.
Put on an Overhead Harness
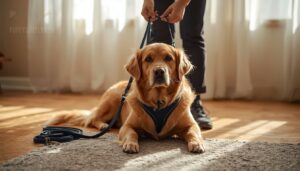
Overhead harnesses go on a little differently than step-in styles, so getting the sequence right makes the whole process smoother for both of you. Once your dog is calm and the gear is untangled, it only takes a few quick steps. Here’s exactly how to do it.
Slide Loop Over Head
Hold the wider chest loop open with both hands and guide it gently over your dog’s head. Start at the muzzle and slide it back smoothly toward the neck.
Move slowly to avoid startling your dog. The loop should settle comfortably around the neck — not tight, not loose. Keep the motion calm and steady throughout.
Position Chest Strap
Once the loop settles around the neck, guide the chest piece down between your dog’s front legs. It should rest just below the pectoral muscles for stable contact and even pressure.
Get this right every time:
- Center the panel along the sternum for consistent contact
- Keep strap tension snug but not constricting
- Confirm no twisting disrupts correct gear fit
Flat placement prevents rubbing and keeps the gear secure.
Guide Straps Behind Legs
With the chest strap settled, route each behind-leg strap around the back of your dog’s upper thighs. The breathable webbing sits flat against the skin, while elastic components flex with leg movement to prevent restriction.
This controls lateral drift and locks hindquarter stability in place. A proper fit follows thigh circumference sizing — snug, never pinching.
Buckle Side Closures
Snap each side release buckle until you hear a firm click. That sound means the male and female pieces are fully locked. Press both tabs simultaneously to release — anything less and the buckle stays shut, which is exactly what you want.
Plastic buckles rated over 150 newtons handle everyday walks safely, but replace any buckle showing cracks immediately.
Check Leash Attachment Point
Once the buckles are secure, find the D-ring or front clip before attaching your leash. Metal hardware should close fully with no visible gap.
The back D-ring suits casual walks, distributing force across your dog’s shoulders evenly. If your dog pulls, clip to the front chest ring instead — it redirects momentum sideways, giving you better control.
Put on a Vest Harness
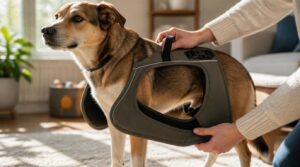
Vest harnesses are one of the easiest styles to put on because they open up completely, letting you wrap the gear around your dog rather than wrestling it over their head. The extra padding also makes the whole process more comfortable for your dog, which means less squirming for you. Here’s how to do it right, step by step.
Open Vest Completely
Start by spreading the vest flat and opening it completely before bringing it anywhere near your dog.
Unfasten everything:
- Zipper guard safety pull from top to bottom
- Magnetic or snap fasteners released fully
- Reinforced seam edges laid flat, not folded
- Reflective edge visibility strip facing upward
A fully open vest slides on far easier — no fumbling, no stress for your dog.
Place Chest Panel Correctly
With the vest fully open, slide it under your dog and center the chest panel over the sternum — not pressing on the throat or jugular area.
The panel should lie flat against the skin, clip facing upward toward the spine. Check that both shoulders can move freely. No gaps, no twisting — just firm, flush contact so the panel stays stable when your dog steps forward.
Secure Velcro Closures
Once the chest panel sits flush, press each Velcro closure firmly until you feel distinct tactile feedback — that satisfying resistance means the hooks have locked.
Run your thumb across each strip:
- Press flat, not at an angle
- Check loop texture feels smooth against skin
- Avoid hair caught in hooks
- Re-press any lifted edges
- Confirm no gaps remain
Quality closures hold reliably across temperature changes without losing strength.
Fasten Safety Buckles
After the Velcro strips are set, locate the side release buckles on each shoulder strap. Press the male end firmly into the female housing until you hear a clean click — that sound means the spring-loaded latch has fully engaged.
Give each buckle a quick tug to confirm it won’t release unexpectedly before your dog takes a single step.
Smooth Padded Areas
Run your fingers along every padded section to make sure the foam cushioning sits flat against your dog’s chest and underarms — no bunching, no gaps.
Smooth padding reduces friction where the vest meets skin, which helps prevent chafing before it starts. The closed-cell foam also resists moisture, so a muddy walk won’t leave your dog in a damp, irritating wrap.
Adjust Straps for Proper Fit
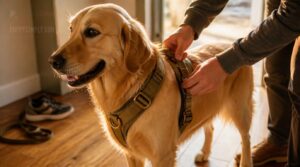
Getting the gear on is only half the job — a poor fit can cause just as many problems as the wrong style. A few quick adjustments make all the difference between a comfortable walk and one that leaves your dog sore or squirming to escape. Here’s what to check and correct before you head out the door.
Putting on the harness is only half the job — a poor fit can hurt just as much as the wrong style
Use Two-finger Rule
Slide two fingers flat under every strap after putting on dog gear. That’s your correct gear fit test. If your fingers feel squeezed, loosen the strap. If they slide out freely, tighten it.
Girth tension safety and neck strap clearance both depend on this check — snug enough to prevent slipping, loose enough that your dog breathes and moves comfortably.
Tighten Loose Straps
Pull each strap’s free end until it sits snug against your dog’s body. Check that strap tension distribution stays balanced across both sides, not bunched on one.
For buckle slot alignment, thread the tongue fully into the slot before pulling — a half-seated buckle won’t hold. With slider grip maintenance, hold the slider still and draw the strap through until tension feels even.
Loosen Tight Areas
A gear that’s too snug can pinch without obvious signs. Leave two finger widths between the chest strap and your dog’s body to protect breathing space.
- Ease the strap behind each armpit to reduce friction
- Shift side buckles away from the ribcage
- Reposition the chest strap below the upper chest
- Switch leash clips if tension re-tightens loosened zones
Check for redness after your walk.
Keep Straps Flat
Twisted straps create hidden pressure points. Check flat strap alignment along every channel before your walk. Proper strap routing keeps the load even and prevents kinks during movement.
| Strap Issue | Quick Fix |
|---|---|
| Twisted strap | Unthread, rethread flat |
| Bunched fabric | Smooth along strap channel |
| Excess slack | Tuck into webbing grooves |
| Raised ridge | Reroute away from overlap |
| Armpit curl | Reposition keeper clip |
Avoid Armpit Rubbing
The armpits are the first place to show wear. When you put on dog gear, check that no strap cuts across that fold of skin.
Breathable, moisture-wicking fabric reduces sweat buildup that makes rubbing worse. If redness appears after a walk, apply a protective barrier ointment before the next outing and recheck the fit immediately.
Check Comfort and Safety
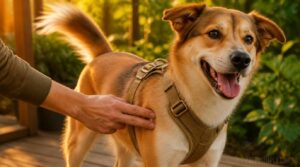
Getting the straps right is only half the job — now it’s time to make sure your dog is actually comfortable wearing it. A well-fitted gear should let your dog move freely without any rubbing, slipping, or resistance. Here are the key things to check before and after every walk.
Watch Walking Movement
Once the gear is on, let your dog take a few steps and watch their natural gait. The gear shouldn’t restrict shoulder movement or cause a shortened stride.
Look for these signs of a poor fit:
- Uneven steps or hesitation mid-walk
- Stiff shoulders limiting full arm swing
- Irregular cadence suggesting discomfort
A well-fitted gear lets your dog move freely and consistently.
Check for Slipping
Good movement doesn’t guarantee a secure fit. Watch for strap alignment checks as your dog changes posture.
| What to Check | What It Means |
|---|---|
| Spine verticality | Leash ring stays centered over the back |
| Posture stability tests | Gear holds when dog sits or twists |
| Tension shift monitoring | No sudden slide toward neck or sides |
| Flat strap contact | No gaps that allow gear slip |
| Post-walk fur inspection | Pushed fur signals repeated movement |
Adjust the fit if anything shifts.
Inspect Skin After Walks
Once you’re back inside, take a moment to run your hands along the strap paths.
- Check for redness or warmth on the chest and shoulders.
- Look for dry, flaky patches where straps pressed repeatedly.
- Part the fur to spot thinned or bald areas from hidden pressure.
Skin that stays pink after rest signals a fit problem worth fixing soon.
Look for Pawing Signs
Skin checks reveal a lot, but your dog tells its own story too. If it keeps pawing at the gear mid-walk, that’s a direct complaint — not habit, not boredom.
Watch for pawing paired with whining or freezing. That combination often signals pressure or chafing somewhere. A dog that paws repeatedly at one spot is pointing you right to the problem.
Prevent Backing Out
Backing out happens fast — one startled step backward and your dog slips free. A properly sized body gear with front-clip design pulls their momentum forward, making escape much harder.
Measure girth accurately before buying. Keep shoulder straps snug with no slack, and confirm the chest opening sits flush. Practice a calm "stay" cue each time you fasten up.
Fix Common Harness Problems
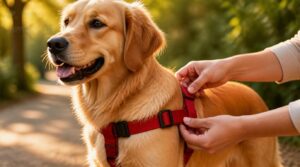
Even the best gear can run into a few hiccups once you’re out on a walk. Most problems are easy to fix once you know what to look for. Here are the most common issues and how to handle them.
Harness Twists During Walks
A twisting vest is usually a sizing problem in disguise. When there’s too much slack, the vest rotates as your dog changes direction. Measure chest girth and apply the two-finger rule to every strap. Uneven tension on one side pulls the whole vest off-center.
Train loose leash walking to reduce the abrupt turns that make twisting worse during outdoor walks.
Dog Refuses to Move
When your dog plants their feet and won’t budge, the gear is often the first suspect. Check the fit immediately — a pinching strap or armpit rub stops dogs cold. Pain from joints or an ill-positioned chest panel can trigger the same freeze.
Remove the gear, inspect for redness, then reapply correctly. Use treats to rebuild positive associations before trying again.
Straps Rub Skin
Chafing is friction in disguise. Stiff nylon or polyester straps rub hardest when new, and sweat makes it worse by softening skin while stiffening fibers.
Three quick fixes:
- Flatten any twisted straps before each walk
- Apply a pet-safe balm on red contact points
- Switch to a padded vest style to spread pressure evenly
Check skin after every outing.
Harness Slips Sideways
A sideways slip usually means uneven strap tension. When the girth strap sits looser than the shoulder straps, lateral tension from the leash pulls the chest panel off-center mid-walk.
Recheck both straps after your dog runs. When they’re moving fit more than standing still reveals. Crisscrossing chest straps or switching to a wider vest panel keeps everything square.
Dense fur hides the problem — always refit seasonally.
Buckles or Rings Fail
A snapped buckle mid-walk isn’t just inconvenient — it’s a safety failure. Plastic buckles crack from UV exposure and repeated stress, while metal rings develop corrosion pits that quietly weaken over time.
Before every outing, test each buckle’s latch spring by pressing and releasing it. If it feels loose or gritty, replace it. Don’t wait for a full failure to act.
Frequently Asked Questions (FAQs)
What words do dogs hear best?
Say "cookie" near any dog and watch their ears perk up almost instantly. Words built around hard consonants — K, P, and T — delivered with a high-pitched tone are the ones your dog hears most clearly.
What is the best harness for a Havanese dog?
A vest-style gear works best for a Havanese. Its padded chest panel protects the delicate trachea, while breathable mesh prevents overheating under that long coat. Lightweight hardware keeps the fit comfortable without adding bulk.
Can pugs wear a harness?
Yes, pugs can wear a gear — like a lifeline for their sensitive airways. A well-fitted gear protects against tracheal irritation and distributes pressure across the chest instead of the neck.
What is the best dog harness for a Chihuahua?
A vest-style gear works best for Chihuahuas. It spreads pressure across the chest, suits their small, sensitive frames, and keeps straps from digging in. Choose lightweight, breathable mesh for summer comfort.
Which is the front of a dog harness?
The front of a dog gear is the chest side — where the D-ring or clip sits against your dog’s sternum. If you spot a label or chest hardware, that’s your front.
What are common harness fitting mistakes?
Too-loose straps let dogs slip free, while too-tight ones restrict breathing. Skipping proper measurements and relying on weight alone causes poor fit. Always check uneven tension across every strap before heading out.
Can a harness be worn during car travel?
A dog gear doubles as a seatbelt anchor in the car. Use only a crash-tested travel gear attached to vehicle anchor points — never a regular walking gear. It keeps your dog safe if you stop suddenly.
How do you clean and maintain a dog harness?
Wash nylon or fabric harnesses with mild soap and warm water, then air dry fully. Wipe leather with a damp cloth and condition it every few months. Check buckles and D-rings for rust or wear each time.
What materials are best for sensitive skin dogs?
Cotton, hemp, and bamboo are top choices for sensitive skin. They’re soft, breathable, and naturally antimicrobial. Look for padded inner linings and smooth edges to reduce friction and prevent irritation during walks.
Are harnesses suitable for puppies and small breeds?
Yes, harnesses suit puppies and small breeds well. Like a well-fitted vest, they spread pressure across the chest. Vest-style and padded designs protect delicate skin, while adjustable straps accommodate growth and prevent escape.
Conclusion
A gear that fits well is like a well-worn hiking boot—you stop thinking about it and just move. Learning how to put on a dog gear correctly changes every walk you take together.
The two-finger rule, flat straps, calm preparation—these small habits quietly eliminate chafing, slipping, and escape risks before they ever start. Get the fit right once, and your dog’s comfort becomes something you never have to second-guess again.
- https://ezydog.co.nz/blogs/news/how-to-put-on-a-dog-harness
- https://www.kurgo.com/3-easy-steps-to-put-on-a-dog-harness
- https://wolfpak.com/blogs/news/tips-for-properly-fitting-your-dogs-harness
- https://rockymountaindog.com/blogs/news/how-to-properly-fit-a-dog-harness-for-ultimate-fit-and-comfort
- https://www.neewadogs.com/blogs/blog/how-a-dog-harness-should-fit