This site is supported by our readers. We may earn a commission, at no cost to you, if you purchase through links.

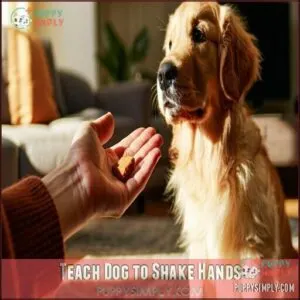
Start by having your dog sit. Hold a treat in your closed fist near their paw. When they reach out to touch your hand with their paw, praise them and give the treat.
Repeat this a few times. Once they understand, add the word “shake” right before they touch your hand. With practice, they’ll connect the command to the action.
Keep sessions short, end on a positive note, and soon they’ll be shaking like a pro. Ready for the next trick?
Table Of Contents
- Key Takeaways
- Teach Dog to Shake Hands
- How to Teach a Dog to Shake
- Training Techniques for Success
- Refining The Shake Technique
- Advanced Training and Challenges
- Frequently Asked Questions (FAQs)
- How do you teach a dog to shake hands?
- How to teach a dog a lesson using a dog shake?
- How do you teach a dog to shake outside?
- How do you teach a dog to shake paws?
- What is the hardest command to teach a dog?
- How to make a dog shake the body naturally?
- What is the hand trick for dogs?
- Should I teach my dog shake or paw?
- Which procedure is most effective for teaching a dog to shake hands?
- How to teach a dog to high five?
- Conclusion
Key Takeaways
- Hold a treat in a closed fist near your dog’s paw, say “shake,” and reward immediately when their paw touches your hand.
- Keep training sessions short and practice in a quiet, distraction-free space for better focus.
- Add a verbal cue, like “shake,” right before the behavior, and gradually phase out treats as your dog masters the command.
- Practice with both paws, vary hand positions, and use shake in daily routines to reinforce learning and build confidence.
Teach Dog to Shake Hands
You’ll need your dog to sit and focus before teaching them to shake hands.
Make sure your pup can sit calmly and focus—it’s the perfect starting point for teaching the shake trick!
Hold a treat in your closed fist near their paw and wait for them to touch it with their paw to get the reward.
Gather High-Value Treats
Start your training with treats your dog won’t refuse. Choose rewards that motivate them to participate enthusiastically in the shake training.
- Small bite-sized treats work best to prevent overfeeding
- Use soft treats like cheese or chicken for faster consumption
- Consider dietary restrictions before selecting treats
- Try homemade options like cooked turkey or carrot pieces
Remember, treat size matters. Tiny rewards allow for multiple repetitions without filling up your pup too quickly. You can also find quality reward options online.
Choose a Quiet Training Area
Finding a quiet training area will set your dog up for success.
Choose a familiar environment with minimal distractions where your dog can focus solely on you.
Turn off TVs, keep other pets away, and limit interruptions from family members.
A calm, distraction-free space helps your dog concentrate on learning the shake command without getting overwhelmed by noise or activity.
For some dogs, using a den-like crate environment can further minimize distractions.
Your bedroom or a quiet living room works perfectly.
Ensure Your Dog Knows Sit Command
Now that you’ve set up your quiet space, make sure your dog has mastered the sit command. This is a must-have skill before teaching your dog to shake.
Your dog should:
- Stay seated for at least 10 seconds
- Maintain calm focus while sitting
- Respond to the sit command consistently
- Keep all four paws on the ground
- Sit reliably without treats every time
Practice the sit command beforehand if your dog needs more work on this reliable sitting foundation. Teaching this command strengthens the dog-owner bond.
Selecting Reward Methods
Now that your dog sits reliably, you’ll need effective rewards.
Choose between treat training or clicker training for positive reinforcement. Treat variety keeps your dog interested – try small soft treats for faster consumption.
Reward timing matters – give treats immediately after the correct paw movement. Plan for phasing out treats gradually as your dog learns.
Some dogs respond better to praise or toys than food rewards, so it’s essential to consider alternative rewards.
Avoiding Toxic Foods
When selecting treats for dog training, avoid toxic foods that can harm your pet.
Chocolate toxicity, grape concerns, onion risks, and xylitol dangers are serious threats to dog safety.
Never use these items as rewards during shake training.
Stick to commercial dog treats or safe alternatives like small pieces of cooked chicken, carrots, or apple slices.
Your dog will enjoy these treats while staying healthy.
How to Teach a Dog to Shake
You’ll need to train your dog step by step to master the shake command. First make sure your dog can sit and stay calm before starting the training process.
Hold a Treat in Closed Fist
Now that your dog is sitting calmly, it’s time for the first training step.
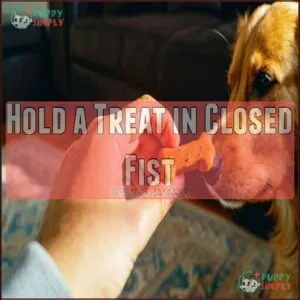
Take a small treat and make a fist around it. Hold your closed hand about an inch from your dog’s nose. The scent will work for capturing attention while keeping the reward hidden.
Your dog can smell the treat but can’t see it, encouraging pawing rather than sniffing or licking.
Choosing the right treats can make a difference, so consider high-value training incentives.
Wait for Dog to Paw at Hand
Hold your fist near the dog’s paw while staying still. Ignore licking, sniffing, or mouthing—it’s about patience. Wait quietly until the dog tries the pawing action you’re after.
Patience is key—stay still and reward only when your dog offers the perfect pawing action.
Use consistent reinforcement here to help them connect the behavior.
- Extend your hand close enough for focus.
- Use a clicker for precision timing.
- Only reward proper paw action.
Reward and Praise for Correct Behavior
Use positive reinforcement the moment the dog’s paw touches your hand.
Pair clicker training or praise with a treat for effective reward-based training.
Consistent reward timing builds a strong association.
Gradually use treat fading and rely on verbal cues.
This approach encourages repeat behavior while boosting your dog’s confidence during training.
| Technique | Action | Outcome |
|---|---|---|
| Positive Reinforcement | Reward correct action on time | Builds strong association |
| Clicker Training | Use a clicker to mark correct behavior | Reinforces learning faster |
| Reward Timing | Reward immediately after paw contact | Clear communication of success |
| Treat Fading | Slowly reduce treat usage | Builds long-term results |
| Verbal Cues | Introduce words like "Shake" | Establishes clear commands |
Repeat Process to Reinforce Learning
Repetition is key to mastering the dog shake trick. Practice consistently by repeating steps daily.
Confirm each session reinforces the paw shake command. Use gradual reinforcement to build a positive association.
Avoiding plateaus is possible with short, focused sessions. Keep training fun and rewarding.
Positive reinforcement, like verbal praise, also works wonders. Repeated efforts make the paw shake smooth and reliable, proving patience pays off in dog training tips.
Introduce Verbal Cue for Shake
Now that your dog’s paw touch is steady, add a verbal cue like “shake.”
Say the word as their paw touches your hand. Keep using the same phrase each time for command consistency.
This builds verbal association. Timing is everything here—match the cue to the action.
With practice, your dog will connect the paw shake command to your words naturally.
Training Techniques for Success
You can make training smoother by focusing on simple steps and clear rewards. Use patience and keep practicing to help your dog learn quickly and correctly.
Gradually Phase Out Treat Luring
Once your dog reliably performs the shake, start reducing treat frequency.
Use variable reinforcement—sometimes offer a treat, other times praise or petting.
Alternate rewards keep the trick fun and fresh. Maintain consistency by rewarding only correct shakes.
Empty hand practice reinforces the behavior without treats. Gradually phase out luring, ensuring the focus stays on perfecting the dog paw trick.
Practice With Empty Hand
Now that treat lures are fading, work on using just your hand.
Show the hand gesture without a treat and wait for the paw command response. Reward once they touch your hand.
Remember that consistent verbal cues are also helpful during training.
Follow these steps:
- Use the same hand signals they’ve learned.
- Keep up praise when they succeed.
- Practice until they generalize behavior.
Increase Time Before Rewarding
Once your dog paws confidently, start waiting a few seconds before rewarding.
This Delaying Gratification helps build focus.
Use consistent timing. Gradually increase the wait to encourage an Extended Paw-Hold. Praise softly to avoid reducing excitement.
| Step | Reward Time | Dog’s Action | Trainer’s Cues | Goal Achieved |
|---|---|---|---|---|
| Step 1 | Immediate | Paw placed quickly | Verbal praise & treat | Basic association |
| Step 2 | 2 seconds | Holds paw briefly | Calm voice, treat after wait | Builds patience |
| Step 3 | 4 seconds | Paw remains longer | Praise during hold | Extended paw-hold |
| Step 4 | Random timing | Focuses longer | Treats given inconsistently | Reducing excitement |
| Step 5 | 8 seconds or more | Paw steady | Verbal praise, final reward | Delayed gratification |
Encourage Higher Paw Lift
Hold your hand higher to increase height when teaching the dog trick.
Use the verbal cue “shake” and wait for your dog to lift its paw higher. Reward immediately to reinforce the behavior.
Extend duration gradually by pausing before rewarding. Reduce excitement to help your dog stay focused.
These dog training paw tips make the dog trick tutorial easier.
Shape Paw Placement on Hand
Flatten your hand to guide the paw’s correct placement.
Use a verbal cue like “shake” just before the paw touches. Reward when the paw rests firmly in your hand.
Gradually increase paw duration and practice gentle shaking. These dog training steps help reinforce the trick.
Stick with consistency, and soon your “teach dog shake” tutorial will succeed!
Refining The Shake Technique
To refine the shake, start by varying how and where you offer your hand.
Practice with both paws and use this trick in simple daily tasks to build your dog’s skills.
Vary Hand Position and Height
Once your dog has mastered the basic shake with paw, adjust your hand’s position or height.
Training at different angles helps them understand commands more clearly.
Try offering your hand sideways or elevated slightly.
- Lift your hand higher for a “reaching up” challenge.
- Practice a sideways shake to build coordination.
- Test hand targeting from different angles and positions.
Positive reinforcement, like treats and praise, is essential for success.
Practice With Both Paws
You’re refining your dog’s shake technique.
Now practice with both paws for ambidextrous shaking. This improves bilateral coordination and paw discrimination.
Use command differentiation to teach your dog to shake with either paw, making them a master of dog tricks, specifically the shake, and opposite paw training.
Use Shake for Practical Purposes
Once your dog masters shaking with both paws, you can make it useful.
Use the shake command during nail trimming or vet visits to build cooperative care. It’s handy for greeting visitors or inspecting an injury.
Plus, it enhances your dog’s trick skills. Practice regularly with treats and praise to keep the behavior consistent and reliable.
Incorporate Into Daily Routines
Using the shake command in real-life scenarios makes it stick.
Add it to daily routines, like greeting your dog when you come home or before meals.
Consistent reinforcement during these moments helps with generalization skills.
Keep a dog training treat handy for proper encouragement.
This routine integration builds confidence in the behavior and boosts the dog’s response to training cues.
Building Trust and Confidence
Trust develops when you use positive reinforcement and watch your dog’s cues.
Keep training simple and focus on consistent training. Motivation builds confidence.
Here’s how:
- Praise your dog whenever they show progress.
- Read body language to avoid stress signs.
- Avoid punishment to foster bonding.
- Use high-value treats to strengthen motivation.
Advanced Training and Challenges
Once your dog has mastered the basics, it’s time to tackle new challenges. You’ll practice in busier spaces, teach both paws, and build consistency without treats.
Practice in Different Environments
Start in controlled environments like your home.
Slowly introduce training in public settings with mild dog training distractions.
Practice consistency to help your dog generalize the skill.
Gradually increase complexity by including new dog training environments.
Distraction control is key.
Test shake commands in real-world applications like parks or busy areas to build confidence and make certain your dog stays focused.
Teach Other Paw for Opposite Paw
Once your dog masters shaking one paw, teach the opposite paw for amb dexterity.
Switch the treat to your other hand. Use the same “shake” command, but now guide paw placement to your free hand.
Paw preference may cause hesitation, so reward attempts quickly. Practice hand coordination consistently until the dog reliably switches paws when asked, demonstrating complete mastery of the command.
Overcoming Common Training Challenges
To tackle dog training challenges, patience and consistency are key. If paw mouthing occurs, ignore it and only reward a proper paw touch.
Break up sessions to maintain dog attention. Use enthusiastic commands to build motivation.
Treat dependency fades by slowly increasing gaps between rewards. Ignoring distractions helps your dog focus. Avoid inconsistent commands to guarantee learning sticks, ensuring proper paw touch is maintained.
Perfecting The Shake Command
To perfect the shake command, focus on paw duration and reward consistency.
Flatten your hand to guide proper paw placement.
Verify cue timing is precise for clear communication.
Practice in public settings to reinforce behavior.
Gradually increase the time your dog holds their paw on your hand.
Repetition and patience are key to mastering this dog training shake technique.
Maintaining a Strong Bond Through Training
A strong bond helps with training and trust. Stay consistent when teaching the dog to shake. Use reward-based training and keep communication clear.
Praise your dog often and try shared activities to build a connection.
- Show affection with gentle touches or dog praise.
- Practice the shake command during daily routines.
- Use positive reinforcement to deepen your dog’s trust.
Frequently Asked Questions (FAQs)
How do you teach a dog to shake hands?
Hold a treat in your closed hand.
Let your dog sniff, then say "shake" as you extend your hand.
Reward when the paw touches your hand.
Repeat until they respond reliably without the treat.
How to teach a dog a lesson using a dog shake?
Teaching a dog a lesson with a shake uses trust, patience, and timing.
Start with a calm setting, give a clear command, and reward when the paw touches your hand.
Repeat until they reliably respond.
How do you teach a dog to shake outside?
Start in a quiet outdoor spot.
Make sure your dog is sitting and focused. Use a treat in one hand and the "shake" command.
Reward immediately when they lift their paw. Repeat consistently.
How do you teach a dog to shake paws?
Imagine this: your dog offers a paw like a polite handshake.
Sit them down, hide a treat in your fist, say “shake,” and reward their paw touch.
Repeat until they master the friendly gesture.
What is the hardest command to teach a dog?
The hardest command to teach a dog is usually "stay."
It needs focus, patience, and consistency.
Dogs often get distracted or excited, so building self-control to remain still can take time and repeated effort.
How to make a dog shake the body naturally?
To encourage your dog to shake its body naturally, play upbeat music or splash water lightly during bath time.
These stimulate natural shaking.
Always keep the environment stress-free and make certain your dog feels comfortable.
What is the hand trick for dogs?
Teaching a dog the hand trick is like building trust step by step.
Hold a treat in a closed fist, say “shake,” and reward when they paw your hand.
Repeat until it’s routine, this process helps to establish a routine.
Should I teach my dog shake or paw?
It’s up to you.
"Shake" and "paw" are the same trick with different names.
Use whichever feels natural. Just stick to one word so your dog doesn’t get confused during training.
Consistency matters most.
Which procedure is most effective for teaching a dog to shake hands?
When a treat’s in your closed fist, it’s like waving gold.
Use “shake” as the cue, reward paw contact, and repeat.
Timing is key—praise immediately.
Stay consistent, and your dog learns fast!
How to teach a dog to high five?
Start with your dog sitting.
Hold a treat in your palm above its head.
When the paw raises to touch your hand, say “high five!” Reward immediately, repeating until your dog masters the trick.
Conclusion
Learning how to teach a dog to shake is simple, yet rewarding. With patience and practice, your dog’s new skill can strengthen your bond and boost their confidence.
Start slow, use treats, and always celebrate progress. Short sessions will keep them focused, and adding the verbal cue connects the action to your command.
Over time, try using both paws and practicing in new places. Stick with it, and your dog will master shaking paws in no time.


