This site is supported by our readers. We may earn a commission, at no cost to you, if you purchase through links.

Most dogs tolerate ear checks about as well as they tolerate bath time—which is to say, not well.
But here’s the thing: floppy‑eared breeds like Cocker Spaniels and Basset Hounds develop ear infections at nearly twice the rate of erect‑eared dogs, largely because trapped moisture turns their ear canals into the perfect environment for bacteria and yeast.
A five‑minute cleaning routine can stop that cycle before it starts.
Knowing how to clean your dog’s ears the right way—with the right supplies and a steady hand—protects their hearing, cuts down on vet bills, and keeps them comfortable year‑round.
Table Of Contents
- Key Takeaways
- Why Dog Ear Cleaning Matters for Health
- How to Inspect Your Dog’s Ears First
- Breed-Specific Ear Care You Should Know
- Top 3 Dog Ear Cleaning Supplies to Use
- How to Choose a Safe Ear Cleaning Solution
- Step-by-Step Dog Ear Cleaning Process
- How Often Should You Clean Your Dog’s Ears
- Common Dog Ear Cleaning Mistakes to Avoid
- Warning Signs That Require a Vet Visit
- Frequently Asked Questions (FAQs)
- Can you clean your dog’s ears at home with Q-tips?
- How do you clean wax out of a dog’s ears?
- What are the common mistakes cleaning dog ears?
- What can I clean my dog’s ears with at home?
- How do you get brown gunk out of a dog’s ear?
- Can you use hydrogen peroxide to clean a dog’s ears?
- Should I clean the gunk out of my dogs ears?
- How do I remove ear wax from my dog?
- How do you clean a dog ear?
- How to clean your dog’s ears at home?
- Conclusion
Key Takeaways
- Floppy-eared breeds like Cocker Spaniels and Basset Hounds are nearly twice as likely to get ear infections, so they need more frequent cleaning than erect-eared dogs.
- Always inspect your dog’s ears before cleaning — dark discharge, strong odor, or a pain response means stop and call your vet instead.
- Never use Q-tips inside the ear canal; cotton balls or gauze wiped no deeper than one knuckle are the safe tools for the job.
- Overcleaning is just as harmful as neglect — stripping natural wax triggers dryness, irritation, and the exact infections you’re trying to prevent.
Why Dog Ear Cleaning Matters for Health

Cleaning your dog’s ears isn’t just about hygiene — it’s one of the simplest ways to protect their long-term health. A lot of ear problems are completely preventable with a little routine care.
Understanding the most common dog ear infection causes and prevention tips can make a real difference in keeping those vet visits to a minimum.
Here’s why it’s worth making this a regular habit.
Preventing Bacterial and Yeast Infections
Moisture management is your first real defense against bacterial ear infections and yeast infections in dogs. When your dog’s ear canal stays damp, it creates the perfect environment for yeast and bacteria to thrive.
Simple hygiene protocols — like drying ears after swimming and using safe ear cleaning supplies for dogs — protect that ear canal barrier naturally. Environmental controls and antifungal prevention start with just keeping things clean and dry.
Reducing Wax and Debris Buildup
Wax doesn’t build up overnight — it’s a slow, steady accumulation of shed skin, environmental debris, and natural secretions.
Good ear canal debris removal starts before you ever reach for a cleaner.
Trim hair around the ear opening, wipe after outdoor time, and dry ears thoroughly after baths.
Controlled cleaner volume and light cotton wipe pressure keep things moving out, not deeper in.
Monitoring Ear Health During Grooming
Grooming time is your built-in checkpoint. A quick ear inspection takes seconds but catches problems early — before they turn costly.
While you’re already handling your dog, check for these behavioral cues and physical changes:
- Pain Response: flinching or pulling away when you touch the ear
- Swelling Detection: puffiness or warmth inside the ear flap
- Wax Scoring: unusual color, texture, or odor
- Behavioral Cues: new head shaking or scratching post-groom
Be aware that water retained in ear canal after grooming can lead to infection.
How to Inspect Your Dog’s Ears First

Before you grab the ear cleaner, take a moment to actually look inside your dog’s ears. A quick visual check can tell you a lot about what’s going on in there.
what to look for before you get started.
Identifying Signs of Infection
Some infection signs are impossible to miss. Ear warmth, redness, and a painful response when you touch the ear base are classic signs of ear infection in dogs, often linked to otitis externa.
Excessive scratching, head tilting, and balance issues signal deeper trouble.
Pus consistency — thick, dark, or foul‑smelling — means you should stop cleaning and call your vet immediately.
Checking for Debris and Discharge
Wiping your finger gently along the ear entrance tells you a lot before you even grab the cleanser.
Watch for these five Entrance Debris Mapping clues:
- Wax Color Indicators — tan is normal, dark brown needs attention
- Discharge Texture Types — flaky is mild, stringy or pus-like means stop
- Smell Strength Rating — mild is fine, strong odor signals infection
- Flap Redness Check — pink is okay, deep red warrants a vet call
- Cotton residue — repeated dark smears mean ear debris persists deeper
Recognizing a Healthy Ear Canal
Once you know what’s wrong, it helps just as much to recognize what’s right.
A healthy ear canal has light-pink Color Texture — smooth, not swollen or crusty. Odor Indicators stay neutral; no sour or yeasty smell lingers. Entrance Comfort means your dog doesn’t flinch during checks. Lining Integrity looks clean and unbroken, with Sound Openness showing a clear passage inward.
That’s your baseline for safe ear cleaning steps.
Breed-Specific Ear Care You Should Know

Not every dog’s ears need the same care — your dog’s breed plays a bigger role than most people realize. Some dogs are naturally more prone to ear problems based on the shape of their ears or how much hair grows around them.
Here’s what you should know before settling into a cleaning routine.
Floppy-Eared Breeds and Higher Infection Risk
Floppy-eared breeds like Basset Hounds, Cocker Spaniels, and Beagles face real anatomical vulnerability — their hanging ear flaps create airflow restriction that keeps the canal warm and damp. moisture retention turns the ear into a breeding ground for bacteria and yeast.
Royal Veterinary College research from the Royal Veterinary College confirms these floppy-eared canines carry considerably higher breed risk statistics for recurring ear infections than erect-eared dogs.
Dogs Prone to Hair-Trapped Debris
Poodles, doodles, and similar curly-coated breeds carry a hidden challenge — their dense, wavy fur traps seasonal debris like burrs and foxtails right near the ear opening. Coat length impact matters here more than most owners realize.
Good ear hair management is part of any solid dog ear care routine:
- Trim hair at the ear opening regularly
- Use grooming tools selection wisely — fine-tooth combs reach mat roots
- Apply mat prevention techniques before tangles tighten
- Check for debris after every outdoor walk
Erect-Eared Breeds and Cleaning Frequency
Erect-eared breeds actually have a quiet advantage — their upright ear position creates natural airflow that keeps moisture from settling in. That Upright Airflow Advantage means less dampness, fewer flare-ups, and easier Dry Wax Management overall.
For most erect-eared breeds, a simple Dog Ear Care Routine every two to four weeks covers it, adjusting only when Environmental Dust Exposure or Seasonal Moisture Impact visibly changes things.
Top 3 Dog Ear Cleaning Supplies to Use
Having the right supplies on hand makes the whole process much easier — and safer for your dog. You don’t need a lot, just a few basics that actually do the job well.
Here are the top three supplies worth keeping in your grooming kit.
1. Vedco Dog Ear Drying Gel
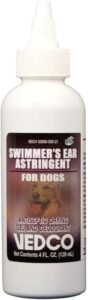
If your dog swims often, moisture sitting in the ear canal is basically an open invitation for yeast. That’s where the Vedco Swimmer’s Ear Astringent Gel comes in handy.
It’s a drying gel and deodorant in one, designed to clear out residual moisture after swimming or bathing.
You just apply a thin coating into the ear canal and massage the base. At $10.99 for 4 oz, it’s an affordable addition to your routine — just skip it if the ear looks irritated or raw.
| Best For | Dogs that swim or bathe frequently and are prone to moisture buildup or mild yeast issues in their ears. |
|---|---|
| Material | Gel formula |
| Net Weight | 4 oz (113g) |
| Quantity | 1 bottle |
| Price | $10.99 |
| Pet Use | Primary use |
| Home Use | Yes |
| Additional Features |
|
- Dries out the ear canal fast after water exposure, helping prevent yeast from taking hold
- Doubles as a deodorant, so ears stay fresh between cleanings
- Easy to apply at home, gentle on most dogs, and won’t break the bank at $10.99
- Active ingredients aren’t listed, so you’ll want to patch test if your dog has sensitive skin
- The 4 oz size goes quickly if you have multiple dogs or a heavy swimmer
- Won’t cut it for real infections — those still need a vet
2. Amazon Basics Hypoallergenic Cotton Balls
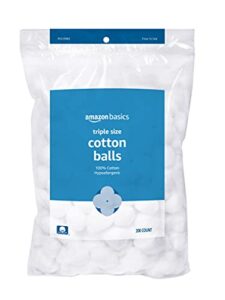
Once you’ve handled moisture, you need soft and reliable to wipe things out. Amazon Basics Hypoallergenic Cotton Balls do that job well.
Each ball is 100% cotton, holds its shape when wet, and won’t shred mid-wipe — which matters more than you’d think mid-cleaning. They’re hypoallergenic, so gentle enough for sensitive ear tissue.
At $4.34 for 200 balls, you get plenty for regular use. Just wrap one around your finger and wipe — never push it deeper than one knuckle.
| Best For | Anyone looking for a gentle, affordable everyday cotton ball for skincare, baby care, first aid, or light cleaning tasks. |
|---|---|
| Material | 100% cotton |
| Net Weight | 4.66 oz (132g) |
| Quantity | 200 balls |
| Price | $4.34 |
| Pet Use | Ear cleaning |
| Home Use | Yes |
| Additional Features |
|
- 100% cotton and hypoallergenic — safe for sensitive skin, including babies
- Holds its shape when wet and won’t shred or leave lint behind
- Great value at $4.34 for 200 balls, with a resealable bag to keep them fresh
- Slightly smaller than some competing brands, which may matter for certain tasks
- Packaged in non-biodegradable plastic — not a great pick if you’re eco-conscious
- Resealable bag can get a little awkward if you need quick, bulk access
3. Medline Four Inch Cotton Gauze Sponges
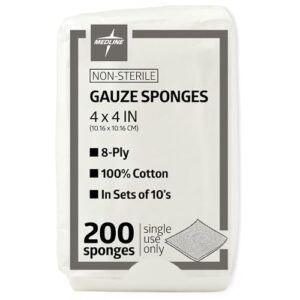
For deeper cleaning or bigger ears, cotton balls don’t always give you enough coverage. That’s where Medline’s 4×4 inch cotton gauze sponges come in handy.
Each sponge is 8-ply woven cotton — soft, absorbent, and sturdy enough to hold up during a thorough wipe. The C-fold design keeps loose threads minimal, so nothing unravels inside the ear. You can fold one into a smaller pad or wrap it around your finger for better control. At 200 sponges per pack, you won’t run out anytime soon.
| Best For | Anyone who needs more coverage than a cotton ball provides — great for households, clinics, or anyone doing regular wound care or ear cleaning at home. |
|---|---|
| Material | 100% cotton |
| Net Weight | 5.6 oz (159g) |
| Quantity | 200 sponges |
| Price | Not listed |
| Pet Use | Wound/ear cleaning |
| Home Use | Yes |
| Additional Features |
|
- 200 sponges per pack means you’re stocked up for a long time without constant reordering
- Soft 8-ply cotton with a C-fold design stays intact and won’t leave threads or lint behind
- Flexible enough to fold, stack, or wrap around a finger for easy handling
- Not sterile, so they won’t work in situations where that matters
- The packaging is a basic paper envelope that can tear easily in shipping or storage
- On the thinner side, so you may need to layer a few together for heavier bleeding or deeper wounds
How to Choose a Safe Ear Cleaning Solution

Not all ear cleaners are created equal, and picking the wrong one can do more harm than good. The good news is that finding a safe option doesn’t have to be complicated.
Here’s what to look for when choosing the right solution for your dog.
Selecting a Veterinary-Formulated Ear Cleaner
Not all ear cleaners are created equal — picking the right one makes a real difference. Look for a veterinary-formulated ear cleaning solution that matches your dog’s specific needs:
- Ceruminolytic Action dissolves wax so debris flushes out naturally
- Alcohol-Free Formulas reduce stinging in sensitive ears
- Antimicrobial Ingredients like cetrimide help fight bacterial and fungal buildup
- Odor Control Drying properties remove trapped moisture that worsens problems
- Veterinary Label Warnings tell you exactly when to stop and call your vet
When to Use Medicated Solutions Instead
Sometimes a regular cleaner isn’t enough.
If you’re noticing infection indicators like redness, strong odor, or a pain response when you touch the ear, that’s your signal to stop and call your vet.
Discharge severity matters too — yellow or bloody discharge needs veterinary diagnosis, not a home rinse.
Your vet will recommend medication types and ear medication if prescribed, like a veterinarian-approved ear cleaner such as Epic Clean.
Step-by-Step Dog Ear Cleaning Process
Now that you’ve got supplies ready, it’s time to put them to work. The actual cleaning comes down to three simple steps that work together to clear out wax and debris without irritating your dog’s ear.
Here’s exactly what to do.
Filling The Ear Canal With Cleaning Solution

Start with the bottle tip placed at the entrance of the ear canal — never shoved inside. Dropper positioning matters more than people realize.
Aim toward the canal wall, not straight down.
Solution temperature control is key; room-temperature fluid prevents discomfort.
Squeeze gently for a slow, gentle flow rate, then let it sit for about five minutes.
That contact time optimization lets the cleaner soften debris before draining.
Massaging The Ear Base to Loosen Debris

Once the solution is in, it’s time to massage the ear. Use Gentle Base Pressure — fingertips only, light circular finger motions at the base where the ear meets the head.
You should hear a soft squelching sound. That’s the cleaner working. Keep it steady for 20–30 seconds.
Watch your dog’s reaction; Pain Cue Detection matters here. Flinching or yelping mean stop immediately.
Wiping Away Debris With Cotton or Gauze

Once your dog shakes, grab a cotton ball or dampened gauze and wipe what you can see. Use Cotton Ball Rotation — one cotton ball per pass, never reusing it.
Gauze wins for Lint-Free Materials and grips wet debris better thanks to its open weave.
Keep Gentle Pressure light, wipe outward, and don’t go deeper than one knuckle.
Fiber-Free Wiping keeps sensitive tissue calm.
How Often Should You Clean Your Dog’s Ears

Cleaning frequency isn’t one-size-fits-all — it really depends on your dog.
A few key factors determine how often you should be reaching for that ear cleaner.
Here’s what to think about when building your routine.
Establishing a Routine Cleaning Schedule
A consistent ear cleaning routine is one of the simplest ways to stay ahead of problems.
Pick a Weekly Cleaning Day and stick to it — same day, same time.
Pair your Daily Check Habit with something you already do, like an evening walk.
After Grooming Consistency keeps things from slipping.
Keep a Monitoring Log and respect Safe Frequency Boundaries.
Following basic ear cleaning frequency guidelines protects your dog long-term.
Factors That Affect Cleaning Frequency
Not every dog needs the same schedule — and that’s actually the point.
Several factors shift your ear cleaning frequency guidelines up or down:
- Ear Canal Anatomy — narrow or curved canals trap moisture and debris faster
- Moisture Exposure — frequent swimming raises infection and ear mites risk substantially
- Ear Hair Length — longer hair reduces airflow, accelerating buildup
- Allergy Severity and Prior Infection History — both drive more inflammation, meaning allergies and recurring infections demand earlier, more frequent intervention
Adjusting Frequency After Swimming or Bathing
After a swim or bath, drying first isn’t optional — it’s the whole strategy. Moisture monitoring matters because water left in the canal invites yeast quickly.
Your wet-day frequency should follow a simple bathing aftercare schedule: blot the outer ear immediately, wait until it’s mostly dry, then do a gentle swim debris removal wipe.
Ear cleaning after swimming doesn’t need to be aggressive — just consistent and calm.
Common Dog Ear Cleaning Mistakes to Avoid

Even with the best intentions, a few easy-to-make mistakes can actually do more harm than good to your dog’s ears. Some of them are surprisingly common, so you’re not alone if you’ve been doing one without realizing it.
Here are the three biggest ones to watch out for.
Using Q-Tips Inside The Ear Canal
Skip the the Q-tips. Even gentle swabbing can cause ear canal trauma — cotton swabs push wax deeper, raise the eardrum puncture risk, and leave behind cotton fiber retention that adds to blockage. That’s a lot of damage from small tool.
Skip the Q-tips — cotton swabs push wax deeper and risk real ear canal damage
For safe ear canal cleaning, stick to cotton balls or gauze. They’re your best alternative tools for ear cleaning steps and techniques that actually protect your dog.
Overcleaning Healthy Ears
More isn’t always better — and that’s especially true with ear cleaning safety. Overcleaning healthy ears removes protective wax, triggering ear canal dryness and skin irritation risk. Here’s that spiral looks like:
- Protective wax loss strips the canal’s natural defense
- Dryness causes microbial overgrowth conditions to develop
- Inflammation leads to a behavioral stress response like head shaking
- Irritated skin produces excess secretions
- More cleaning worsens everything
Cleaning Infected Ears Without Veterinary Guidance
Cleaning an infected ear without knowing what’s causing the problem can make things much worse. Infection type identification matters — bacterial, yeast, and mite infections each need different treatment.
DIY remedy hazards are real: vinegar, peroxide, and alcohol can damage already‑inflamed tissue. Symptom‑driven cleaning without a diagnosis is guesswork that delays proper care.
| Symptom | What It May Signal | What to Do |
|---|---|---|
| Yellow or pus-like discharge | Bacterial infection | Stop cleaning, call vet |
| Dark crumbly debris | Ear mites | Vet exam required |
| Yeasty or musty odor | Yeast overgrowth | Vet‑prescribed antifungal needed |
| Redness and swelling | Inflammation or allergy | Avoid further irrigation |
| Pain response monitoring triggered | Possible deep infection | Immediate veterinary consultation |
Warning Signs That Require a Vet Visit

Sometimes, no matter how careful you are, dog’s ears send signals that go beyond what cleaning can fix.
A few specific signs mean it’s time to put down the cotton balls and call your vet instead.
Here’s what to watch for.
Discharge, Odor, and Swelling to Watch For
Some ear issues announce themselves loudly. Watch for these ear infection signs before your next cleaning session:
- Discharge Color Changes — yellow, green, or gray pus-like drainage signals trouble.
- Foul Odor Indicators — a smell that lingers after cleaning isn’t normal.
- Canal Swelling Symptoms — puffiness, warmth, or tightness around the canal.
- Painful Ear Tenderness — flinching when you touch the ear means stop immediately.
Ear inflammation rarely stays quiet.
Behavioral Signs Like Head Shaking or Tilting
Your dog’s behavior often speaks before symptoms do. Head shaking, moisture after swimming, sudden scratching, or persistent pawing at one ear are early ear infection signs worth noting.
Tilt direction clues matter too — a consistent lean toward one side signals one-sided pain.
Vestibular balance signs like wobbling or clumsiness mean the inner ear may be involved.
Don’t wait.
When Home Cleaning Should Stop Immediately
Stop home cleaning right away if any of these show up:
- Painful ear response or yelping when you touch the ear
- Blood is present or redness with visible swelling
- Discharge that’s thick, dark, or pus‑like
- A suspected foreign object, canal obstruction, or a "sealed" opening
- Neurologic symptoms like head tilt, weaving, or loss of balance
Persistent ear scratching after cleaning? That’s your cue to call the vet.
Frequently Asked Questions (FAQs)
Can you clean your dog’s ears at home with Q-tips?
Skip the Q-tips. They push wax and debris deeper into the L-shaped canal, risking trauma. Cotton balls are the safer alternative your vet recommends for gentle, effective cleaning.
How do you clean wax out of a dog’s ears?
Fill the ear canal with vet-approved solution, massage the base for 30 seconds, let your dog shake, then wipe visible wax gently with cotton or gauze.
What are the common mistakes cleaning dog ears?
Common ear cleaning mistakes include using household cleaners, applying excess pressure, neglecting drying, improper ear flap handling, overcleaning, and using excessive solution.
Risks of overcleaning dog ears include irritation and infection — ear cleaning safety starts with knowing what not to do.
What can I clean my dog’s ears with at home?
Cotton balls, gauze, and a vet‑approved ear cleaner are your safest at‑home ear cleaning supplies. Witch hazel dabs and olive oil softener work gently for mild buildup.
Avoid hydrogen peroxide — it irritates sensitive tissue.
How do you get brown gunk out of a dog’s ear?
Soak a cotton ball with ear cleaning solution, let it dwell briefly, then use gentle ear patting technique to lift brown gunk.
That softens allergy debris and wax without pushing it deeper.
Can you use hydrogen peroxide to clean a dog’s ears?
Skip the hydrogen peroxide — it’s a silent troublemaker for dog ears. It irritates sensitive tissue, risks chemical burns, and can worsen inflammation. Stick to vet-approved ear cleaning solution instead.
Should I clean the gunk out of my dogs ears?
Not always. Some gunk is just normal wax. Look first — if the ear smells fine, looks pink, and your dog isn’t bothered, leave it alone.
How do I remove ear wax from my dog?
Fill the ear canal with a vet-formulated cleaner, then massage the base for 30 seconds.
Let your dog shake, then wipe loosened ear wax away with cotton or gauze — never push deeper.
How do you clean a dog ear?
Oddly enough, the gentler you go, the better it works. Use a vet-formulated cleaner, massage the base, let your dog shake, then wipe debris away with cotton or gauze.
How to clean your dog’s ears at home?
Start with a vet-approved ear cleaner, cotton balls, and a calm dog. Apply solution, massage the base for 30 seconds, let them shake, then gently wipe away loosened debris.
Conclusion
As you now know, cleaning your dog’s ears is a simple yet important part of their care. By following these steps and using the right supplies, you’ll be able to help prevent infections and keep your dog comfortable.
Remember, learning how to clean your dog’s ears safely is a process that takes patience and practice. With time, you’ll become a pro at giving your dog’s ears the TLC they need, and they’ll thank you for it every time you master how to clean dog’s ears.
- https://www.akc.org/expert-advice/health/how-to-clean-dogs-ears/
- https://www.aspcapetinsurance.com/resources/dog-ear-infections-causes-symptoms-and-prevention/
- https://finepethealth.com/products/vedco-swimmers-ear-astringent-for-dogs-antiseptic-gel-4-oz
- https://dailymed.nlm.nih.gov/dailymed/archives/fdaDrugInfo.cfm?archiveid=944291
- https://www.veterinary-practice.com/article/using-ear-cleaners-for-otitis-externa