This site is supported by our readers. We may earn a commission, at no cost to you, if you purchase through links.
Don’t worry, with a guillotine trimmer, you’ve got this!
To master the technique, start by holding your dog’s paw firmly and placing the tip of their nail in the stationary ring.
Hold the cutting blade facing you, then squeeze the clippers to trim.
Watch for your dog’s reaction – if they’re calm, you’re good to go!
You’re on your way to becoming a pro at dog Nail Trimming with a guillotine.
Now, let’s get into the nitty-gritty…
Table Of Contents
- Key Takeaways
- Benefits of Using Guillotine Nail Trimmers for Dogs
- Preparing Your Dog for Nail Trimming
- Proper Technique for Using Guillotine Nail Trimmers
- Identifying the Quick and Avoiding Injury
- Trimming Different Types of Dog Nails
- Post-trimming Care and Nail Maintenance
- Troubleshooting Common Guillotine Trimmer Issues
- Frequently Asked Questions (FAQs)
- How to use guillotine dog nail trimmers?
- Are guillotine nail clippers better for dogs?
- How to use a nail cutter for dogs?
- How to restrain a dog for nail clipping?
- How often should I trim my dogs nails?
- What if I cut the quick during nail trimming?
- Any tips for a nervous dog during nail trimming?
- Are dog nail trims painful for my pet?
- What about grinding versus clipping for dog nails?
- Conclusion
Key Takeaways
- You’ve got this! Mastering the guillotine trimmer technique is a breeze, and with practice, you’ll be a pro at dog nail trimming in no time. Just remember to hold your dog’s paw firmly, place the nail in the stationary ring, and squeeze the handle to trim.
- To avoid cutting the quick, it’s essential to identify it first. For light-colored nails, look for a pinkish tint or a slight curvature. For dark nails, trim in small increments and use a flashlight to illuminate the nail.
- Don’t panic if you cut the quick – it’s an easy mistake to make. Apply styptic powder immediately to stop the bleeding, and remember to reward your dog with treats and praise for staying calm.
- Regular nail trimming is crucial to prevent overgrowth and potential health issues. Trim your dog’s nails every 4-6 weeks, or as needed, and make sure to inspect their nails regularly for signs of infection, splitting, or changes in growth rate.
Benefits of Using Guillotine Nail Trimmers for Dogs
You’re about to discover why guillotine nail trimmers are a game-changer for your furry friend’s pedicure routine. These nifty tools offer precision, ease of use, and reduced risk of injury, making nail trims a breeze for both you and your pup.
Precision and Ease of Use
You’ll love guillotine clippers for your pup’s pedicure! Their ergonomic design fits like a glove, while razor-sharp blades slice through nails like butter. With size options galore, you’ll find your perfect match. It’s like having a mini nail salon in your palm!
Reduced Risk of Quick Injury
- Clear view of the nail
- Precise control over cutting depth
- Smooth, clean cuts that don’t crush the nail
Suitable for Small to Medium-sized Dogs
Guillotine clippers are your go-to for small to medium-sized pooches. They’re a perfect fit for those dainty paws and thinner nails. Let’s break it down:
| Breed Size | Nail Thickness | Suitability |
|---|---|---|
| Toy | Very thin | Excellent |
| Small | Thin | Great |
| Medium | Medium | Good |
| Large | Thick | Fair |
| Giant | Very thick | Poor |
Less Pressure Required for Clean Cuts
You’ll love how guillotine clippers make nail trimming a breeze. With less pressure needed, you’re in control and your pup’s more relaxed. Here’s why they’re a cut above:
- Effortless slicing through nails
- Reduced hand fatigue
- Precise, clean cuts every time
- Minimized risk of over-trimming
Preparing Your Dog for Nail Trimming
Before you pick up those guillotine clippers, let’s get your furry friend on board with the nail-trimming process. Proper preparation can turn a potentially stressful experience into a bonding moment, setting the stage for smoother grooming sessions in the future.
Familiarizing Your Dog With the Clipper
Before diving into nail trimming, let’s get your furry friend comfortable with the clipper. Think of it as a doggy handshake – introduce them slowly. Let your pup sniff and investigate the tool, making it a fun, no-pressure experience.
Creating a Positive Association Through Treats
Reward your furry friend with tasty treats during nail trimming sessions to create a positive association. This clever trick helps your dog link the experience to pleasant outcomes, making future trims a breeze – for both of you!
Choosing a Comfortable and Secure Location
Now that treats are involved, pick a quiet spot with minimal distractions where your dog feels safe and relaxed. Opt for a non-slippery surface, like a table or lap, to prevent accidents and make sure your dog has a stress-free nail-trimming experience.
Establishing a Regular Grooming Routine
Establish a regular grooming schedule to help your dog relax and cooperate. Start with short sessions, gradually increasing time as they become more comfortable. A consistent routine will make nail trimming a breeze, reducing stress for both you and your furry friend.
Proper Technique for Using Guillotine Nail Trimmers
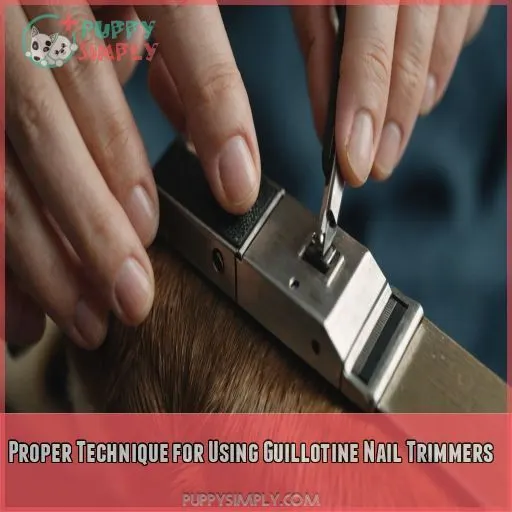
You’re ready to master the art of guillotine nail trimming, a key skill for any dog owner. In this section, you’ll learn the proper technique for using guillotine nail trimmers, ensuring a safe and stress-free experience for both you and your furry friend.
Positioning the Clipper at a 45-degree Angle
Now that your dog is comfy, it’s time to get the clipper in position. Hold the guillotine clipper at a 45-degree angle, with the blade facing the quick. This nail angle is key to avoiding painful cuts and a smooth trim.
Inserting the Nail Into the Stationary Ring
Now that you’ve got your clipper at a 45-degree angle, it’s time to insert the nail into the stationary ring. Here’s what to do:
- Choose the right ring size: Make certain the ring is snug but not too tight.
- Select the correct nail angle: Position the nail to match the natural curve.
- Judge the nail length: Leave about 1/4 inch of nail before the quick.
- Grip the trimmer firmly: Hold the trimmer securely to avoid accidents.
Squeezing the Handle to Activate the Cutting Blade
Now that the nail is in place, gently squeeze the handle to activate the cutting blade. Use a firm but controlled motion, applying gentle pressure to avoid jerking the clipper and startling your dog.
Cutting From Underneath to Avoid Over-trimming
Now that you’ve squeezed the handle, it’s time to cut from underneath. This technique helps you avoid over-trimming and reduces the risk of quick injury. Here’s how to visualize the process:
- Imagine a tunnel: Picture the nail as a tunnel, and you’re cutting from the bottom up.
- See the quick: Locate the quick, and keep it in mind as you cut.
- Cut in small increments: Trim small amounts, checking your progress as you go.
- Stop at the curve: When you reach the natural curve of the nail, stop cutting to avoid the quick.
Identifying the Quick and Avoiding Injury
Mastering the art of using guillotine nail trimmers is crucial for safely trimming your dog’s nails.
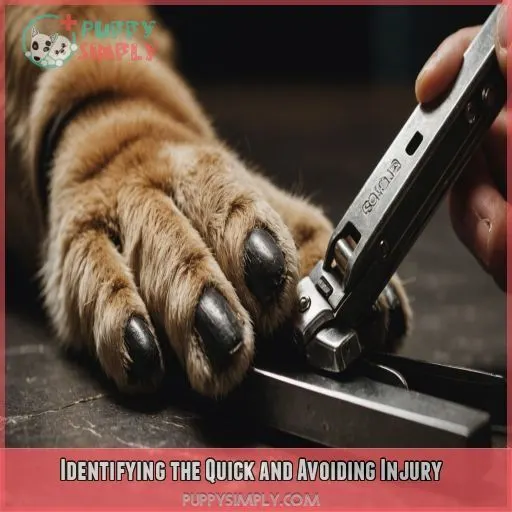
Learning to identify the quick, the sensitive part of your dog’s nail that can be painful if cut, is essential.
Locating the Quick in Light-colored Nails
Now that you’ve mastered the proper technique, it’s time to locate the quick in those light-colored nails! Simply look for a pinkish tint or a slight curvature, and you’ll know you’re getting close – proceed with caution, friend!
Trimming Dark Nails in Small Increments
Now that you’re a pro at locating the quick in light-colored nails, let’s tackle those dark nails! Trim them in small increments to avoid cutting the quick, taking breaks to reassess and adjust as needed to guarantee a safe trim.
Using a Flashlight to Illuminate the Nail
Shine a light on the situation! Use a flashlight to illuminate your dog’s nail, making it easier to spot the quick. This simple trick helps you trim with confidence, ensuring a safe and stress-free experience for both you and your furry friend.
Stopping at the First Sign of Pink Tissue
When trimming your dog’s nails, stop at the first sign of pink tissue to avoid cutting the quick. Here are some indicators to look out for:
- A pinkish tint or dot in the center of the nail
- A slight give when pressing on the nail
- A change in the nail’s texture or density
- A faint line or ridge indicating the quick’s start
- Any visible signs of discomfort or pain in your dog
Trimming Different Types of Dog Nails
You’re ready to tackle the actual nail trimming – now it’s time to learn how to handle different types of nails on your dog’s paws. From front paws to rear paws, and even those pesky dew claws, we’ll break down the techniques you need to master for safe and effective nail trimming.
Front Paw Nail Trimming Techniques
To master front paw nail trimming, position the paw securely, extending the nail. Hold the guillotine clipper at a 45-degree angle and snip, taking care not to cut too short. Reward your dog with treats for staying calm.
Rear Paw Nail Trimming Techniques
Time to tackle those rear paws! Position your dog’s paw with the nail facing upwards, then place the clipper at a 45-degree angle. Trim thick nails with caution, using scissor clippers for better control and safety.
Dew Claw Trimming Safety Precautions
When tackling dew claw trimming, safety comes first! Understand dew claw anatomy and trim frequently to prevent overgrowth. Use scissors-type trimmers, and always keep styptic powder on hand to prevent injury. Trim carefully, taking small snips to avoid the quick.
Handling Thick or Overgrown Nails
When handling thick or overgrown nails, consider using thick nail clippers or nail grinding options to avoid crushing or splitting the nail. Be patient and cautious, as these nails can be challenging to trim and pose risks to your dog’s health.
Post-trimming Care and Nail Maintenance
Now that you’ve successfully trimmed your dog’s nails with guillotine clippers, it’s time to focus on post-trimming care and nail maintenance to keep those nails healthy and prevent any potential complications. By following a few simple steps, you’ll be able to give your dog the TLC they need to stay happy and healthy.
Filing Rough Edges With a Nail File
Now that you’ve trimmed those nails, let’s smooth out the edges. Grab a nail file and gently rub it against the nail at a 45-degree angle. Here are some filing tips:
- Use a nail file with a fine grit for a smooth finish
- File in one direction only to avoid damaging the nail
- Hold the file at a comfortable angle to avoid straining your hand
- File just the tip of the nail to avoid exposing the quick
- Filing regularly can help prevent nail cracks and splits
Applying Styptic Powder for Accidental Bleeding
If you do accidentally cut the quick, don’t panic! Apply styptic powder to the nail to stop the bleeding. This miracle powder contains substances that help control bleeding and promote clotting, saving you and your dog from a messy situation.
Rewarding Your Dog With Praise and Treats
Now that you’ve applied styptic powder, reward your dog with praise and treats to associate nail trimming with positive experiences. This reinforces good behavior and makes future sessions a breeze.
- Use tasty treats to create a positive connection.
- Be consistent with your reward system.
- Praise your dog for staying calm.
- Make nail trimming a fun, bonding experience.
Regular Nail Inspections Between Trimmings
Regularly inspect your dog’s nails between trimmings to catch potential issues early. Look for changes in nail growth rate, signs of infection, or nail splitting. Also, check for nail color changes and paw pad health to make sure their nails are healthy overall.
Troubleshooting Common Guillotine Trimmer Issues
You’re doing great with those guillotine clippers, but sometimes even the best trimmers can go rogue – blades get dull, mechanisms jam, and it’s time to troubleshoot. Let’s get your trimmer back in business with some quick fixes for common issues, so you can focus on giving your furry friend the best nail care possible.
Addressing Dull or Misaligned Blades
Time to tackle those dull or misaligned blades! Regular maintenance is key to smooth trimming. Here’s your troubleshooting checklist:
- Inspect before use: Check for visible damage or dullness.
- Sharpen or replace: Dull blades are a recipe for disaster.
- Align with care: Make sure the blade is properly seated.
- Cleanliness is next to safety: Remove any debris or residue.
Dealing With Stuck or Jammed Mechanisms
Now that you’ve tackled dull blades, let’s get unstuck! If your guillotine clipper’s mechanism is jammed, don’t force it. Instead, carefully disassemble the clipper and inspect for blockages or debris, then reassemble and try again.
Cleaning and Lubricating the Trimmer
Now that you’ve tackled stuck mechanisms, it’s time to keep your guillotine trimmer in top shape! Establish a regular cleaning schedule, selecting a gentle lubricant and soft-bristled brush to remove debris and prevent rust, ensuring seamless nail trimming sessions.
When to Replace Your Guillotine Nail Trimmer
Now, inspect your trusty guillotine trimmer for signs of wear. If the blades are dull or rusty, or the trimmer’s performance is lacking, it’s time to replace it. Typically, you should replace your trimmer every 6-12 months.
Frequently Asked Questions (FAQs)
How to use guillotine dog nail trimmers?
The infamous guillotine nail trimmers! Don’t worry, you won’t be executing a French Revolution on your pup’s paws. To use them, simply place the nail in the stationary ring at a 45-degree angle and squeeze the handle.
Are guillotine nail clippers better for dogs?
You’re wondering if guillotine nail clippers are better for dogs? For smaller dogs with thinner nails, yes! Guillotine clippers are a great choice, as they’re easier to handle and less likely to cause pain or bleeding.
How to use a nail cutter for dogs?
To use a nail cutter for dogs, grip each toe firmly, place the nail at a 45-degree angle, and squeeze the handle to cut, being cautious not to cut the quick to avoid bleeding and pain.
How to restrain a dog for nail clipping?
To restrain your dog for nail clipping, drape your arms and upper body over them, keeping their head still with a forearm over the neck, and hold each toe firmly with your thumb and forefinger.
How often should I trim my dogs nails?
You should trim your dog’s nails regularly to prevent overgrowth, ideally every 4-6 weeks, or as needed based on their lifestyle and nail growth rate, to keep them comfortable and prevent potential health issues.
What if I cut the quick during nail trimming?
Don’t panic if you cut the quick! Apply styptic powder immediately to stop the bleeding. If you don’t have any, it may take about 5 minutes to stop. Stay calm, and remember, it’s an easy mistake to make.
Any tips for a nervous dog during nail trimming?
When in Rome, do as the Romans do" – move at your dog’s pace! For nervous dogs, start with small, gentle touches, and gradually introduce nail trimming. Reward calm behavior with treats and praise.
Are dog nail trims painful for my pet?
Don’t worry, nail trims don’t have to be painful for your pet! When done correctly, with the right tools and techniques, nail trims can be a breeze for your dog. Just remember to avoid cutting the quick!
What about grinding versus clipping for dog nails?
If you’re thinking about cutting your dog’s nails, you’re likely wondering about grinding versus clipping. Grinding is considered less stressful for dogs and smooths the nail, but it can be noisy; clipping is quick, but requires caution to avoid the quick.
Conclusion
You’ve nailed it – literally!
With the guillotine trimmer technique mastered, you’re now a pro at dog nail trimming.
As you put down the clippers, imagine the confidence boost you’ve given your furry friend.
With every snip, you’ve strengthened your bond and made sure their comfort.
Dog nail trimming: how to use a guillotine is no longer a tough task.
You’ve got the skills, and your dog has got the perfectly trimmed nails to prove it!

