This site is supported by our readers. We may earn a commission, at no cost to you, if you purchase through links.
 Trimming your dog’s overgrown nails doesn’t have to be a hassle.
First, gather the right tools – nail clippers or a grinder, styptic powder, and treats for positive reinforcement.
Then, create a calm, quiet environment with non-slip surfaces and good lighting.
Identify the quick (the sensitive part) and trim gradually, avoiding cutting it.
Be patient and go slowly – your dog will thank you for it!
Overgrown nails can cause pain, mobility issues, and even infections, so it’s important to keep them well-trimmed.
With the right approach, you can help your pup feel more comfortable and confident on their feet.
Table Of Contents
- Key Takeaways
- Recognizing Signs of Overgrown Dog Nails
- Essential Tools for Trimming Overgrown Nails
- Creating a Safe Environment for Nail Trimming
- Assessing The Severity of Overgrown Nails
- Step-by-Step Guide to Trimming Overgrown Nails
- Handling Nervous or Anxious Dogs During Trimming
- Addressing Complications During Nail Trimming
- Aftercare for Newly Trimmed Overgrown Nails
- Preventing Future Nail Overgrowth
- Alternatives to Manual Nail Trimming
- Frequently Asked Questions (FAQs)
- How do you trim overgrown dog nails?
- What causes nails to grow down at the tips?
- Can you chop off an overgrown Dog Nail?
- What should I do if my dog has overgrown nails?
- How do you fix severely overgrown dog nails?
- How do you cut overgrown dog nails that are curled?
- How do you cut a dog’s nails when they’re really long?
- Are overgrown nails painful for dogs?
- How often should you trim overgrown dog nails?
- What are signs of nail trimming anxiety?
- Can diet impact nail growth in dogs?
- How to choose the right nail clipper?
- What to do if nail trimming causes injury?
- Conclusion
Key Takeaways
- You’ll need the right tools: nail clippers or a grinder, styptic powder, and treats for positive reinforcement.
- Create a calm environment with good lighting and non-slip surfaces to make the trimming process easier for you and your dog.
- Trim gradually, avoiding the quick (the sensitive part of the nail), and use positive reinforcement to keep your dog relaxed.
- If you’re unsure or your dog is extremely anxious, don’t hesitate to seek professional help from a groomer or veterinarian.
Recognizing Signs of Overgrown Dog Nails
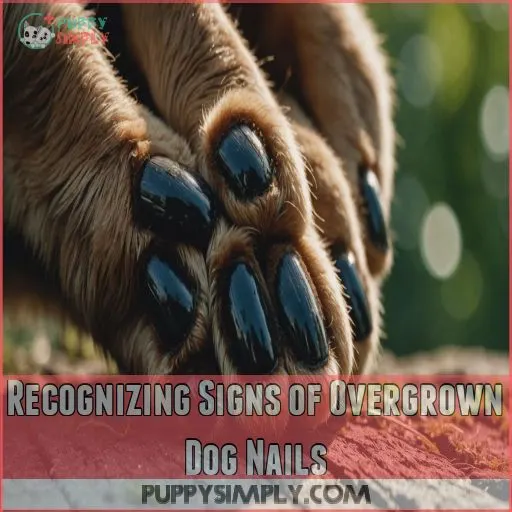
You’ll know your dog’s nails are too long when you hear clicking on the floor or notice changes in their walk.
Look out for curved nails, discomfort when standing, or your pup avoiding hard surfaces – these are telltale signs it’s time for a trim.
Visual Cues of Excessive Nail Length
How can you spot those pesky overgrown dog nails? It’s easier than you think! Keep an eye out for these telltale signs:
- Curled nails that resemble tiny parentheses
- Nails touching the ground when your pup stands still
- Visible notches in the nail where the quick begins
Compare your dog’s nails to a healthy length chart. If they’re longer than Rapunzel’s hair, it’s time for a trim!
Remember, maintaining proper nail length keeps your furry friend comfortable and prevents floor scratches.
Changes in Dog’s Gait and Posture
You’ll spot a dog’s overgrown nails by keeping an eye on their strut.
When those nails get too long, your furry friend’s gait and posture take a hit.
It’s like they’re walking on eggshells, trying to avoid putting pressure on their paws.
Check out these telltale signs:
| Gait Changes | Posture Shifts |
|---|---|
| Limping | Tucked hind legs |
| Altered stride | Front legs behind perpendicular |
| Reluctance to walk | Hunched back |
| Favoring certain paws | Tense muscles |
Don’t let your pup suffer in silence.
Regular nail trimming keeps them walking tall and proud.
Clicking Sounds During Walking
Listen up, pet parents! Your furry friend’s tappy toes might be telling you something. That clickety-clack on your hardwood floors isn’t just a mini percussion concert – it’s a sign your pup’s nails need attention.
Long nails can lead to:
- Awkward walking or "tip-toeing"
- Instability on slippery surfaces
- Potential for nail fractures
- Difficulty gripping the floor
Don’t let your pooch turn into a four-legged tap dancer. Regular nail care keeps them strutting comfortably and safely.
Discomfort or Pain Indicators
Your dog might be sending you subtle hints that their nails are too long.
If they’re limping, yelping, or constantly licking their paws, those are red flags.
Watch for nail splitting or a reluctance to walk, as these can indicate pain.
Regular trims help avoid dog nail trimming pain and bleeding, ensuring your pup’s comfort.
| Sign | Emotional Response |
|---|---|
| Limping | Sympathy |
| Yelping | Concern |
| Paw Licking | Worry |
Essential Tools for Trimming Overgrown Nails
Spotting overgrown nails means it’s time to gather the right tools.
Grab nail clippers or a grinder, both important for safe trimming.
Clippers, ideal for a quick snip, come in scissor or guillotine styles.
For a smoother finish, a grinder works wonders and prevents mishaps.
Keep styptic powder handy to stop any accidental bleeding.
A first aid kit and treats also help keep the process stress-free, boosting your dog’s cooperation and comfort during these necessary grooming sessions.
To avoid the discomfort and health issues associated with long nails, such as joint pain and nail infections, it’s important to have the right tools, learn more about why long nails are a problem here why long nails are a problem.
Creating a Safe Environment for Nail Trimming
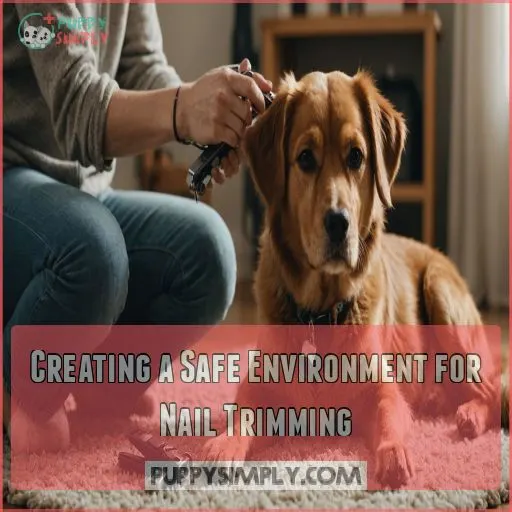
To trim your dog’s nails safely, make sure you’re using the right tools and techniques, such as a clipper or grinder specifically designed for dogs as described in dog nail trimming. To keep your dog calm and cooperative during nail trimming, set up in a quiet space with proper lighting and non-slip surfaces.
Have your treats ready for positive reinforcement, because even your furry friend deserves a reward for good behavior!
Choosing a Calm, Quiet Space
To create a calm, quiet space for nail trimming, choose a room with minimal distractions and noise.
Consider your dog’s sensitivity to noise, as the clipper noise can be like fingernails on a chalkboard for dogs during dog nail trimming. (Source)
Dim the lights, play soothing music, and make sure the area is free from loud noises or sudden movements.
Provide your dog with familiar bedding, toys, and treats to help them feel safe and relaxed during the process.
- Quiet, low-traffic room
- Dim lighting and calming music
- Familiar, comfortable items
- Minimal distractions or noises
Using Non-slip Surfaces for Stability
After choosing a calm space, provide stability with dog-friendly mats or rubber mats.
Towels or bath mats can prevent slipping during dog nail trimming.
Ensuring non-slip flooring boosts safety and control, letting your pup feel secure.
When you gently yet firmly grasp your dog’s paw, it’s essential to make them comfortable with the touch, as some dogs are naturally more anxious and the sensation of nail trimming can be overwhelming, read more about desensitizing your dog. It’s like giving them a firm handshake, letting you trim with confidence and avoid dog nail bleeding or mishaps.
Proper Lighting for Accurate Trimming
Solid footing set, let’s shed some light on the matter. Proper lighting for dog nail trimming keeps things clear and safe.
Aim for:
- Lighting types: Use natural light or a lamp.
- Shadow avoidance: Position light from above.
- Ideal brightness: Make sure you can see the nail quick clearly for a smooth trim. Shadows are a dog’s nemesis!
Preparing Treats for Positive Reinforcement
Proper lighting sets the stage; now, it’s treat time!
Choose high-value treats—chicken or homemade delights work wonders.
Tailor treat types to your dog’s preferences, turning nail trimming into a positive experience.
Consistently reward after each clip, boosting confidence and cooperation.
Remember, frequency is key; timing rewards perfectly enhances motivation and makes sure stress-free dog grooming sessions.
Assessing The Severity of Overgrown Nails
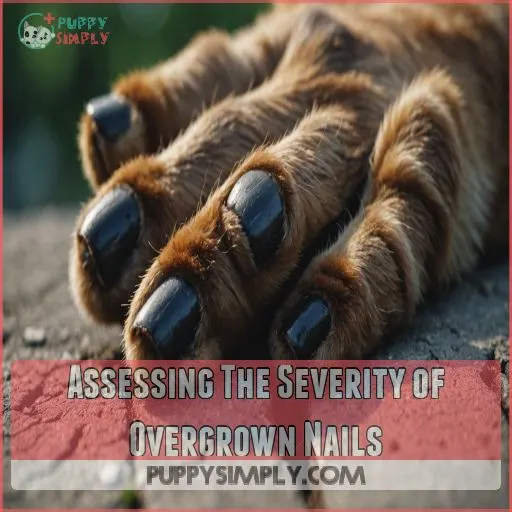
Before you start trimming, it’s important to assess how overgrown your dog’s nails are—whether they’re simply too long, or curling dramatically.
Imagine the distress of trying to walk with shoes several sizes too big; a similar discomfort can affect your furry friend if their nails are neglected.
Mild Overgrowth Characteristics
Picture nail length exceeding that just-right trim.
When nails start clicking on hard floors, it’s a clear sign of mild overgrowth.
Different dog breeds might show nail variations based on their walking pattern or paw shape.
Watch for changes in nail texture, as this could signal impending issues or even a dog nail infection.
Trim often for good dog health.
Moderate Overgrowth Signs
Spotting moderate overgrowth in your dog’s nails can be as simple as listening for clicking sounds during walks.
You’ll notice changes in their posture or walking difficulty, indicating discomfort.
Curled nail shapes often dig into sensitive pads, causing pain.
Keep styptic powder and a nail grinder handy to maintain ideal nail length, avoiding these pesky problems (Source).
Severe Overgrowth Indicators
If your dog’s nails are severely overgrown, you’ll notice some concerning signs: their posture may change, they may have difficulty walking, and there’s a high risk of nail splitting, bleeding, and infection.
Don’t wait – address this issue promptly to prevent further pain and complications for your pup.
Complications of Extremely Overgrown Nails
Extremely overgrown nails in dogs aren’t just unsightly; they’re a recipe for chaos.
You might notice walking difficulties or even posture issues, as your pup struggles to move comfortably.
Nail infections and splitting become more likely, causing pain and hygiene problems.
Keep those nails in check to avoid these dilemmas and maintain your dog’s happiness and health.
Step-by-Step Guide to Trimming Overgrown Nails
If you’re facing the task of trimming your dog’s overgrown nails, which can cause pain and discomfort leading to limping issues, having a clear plan makes the task much easier and safer for both you and your furry friend.
We’ll walk you through each step, ensuring you’re equipped with the right techniques and tips to make nail trimming a breeze.
Positioning Your Dog Comfortably
Once you’ve assessed your dog’s nail overgrowth, it’s time to focus on their comfort.
You might’ve them sit on your lap or use a stable table setup.
Ensuring owner comfort and your dog’s safety go hand in hand.
Calm your dog’s anxiety with treats and soothing words, treating nail trimming like a leisurely stroll rather than a nail-biting event.
Identifying The Quick in Overgrown Nails
After positioning your dog comfortably, your next move is quick identification of the nail anatomy.
Spot the quick—this hidden gem in the nail’s center is important to avoid.
Use visual cues like color; it’s pinkish on light nails and shadowy in dark ones.
A light aids quick location, revealing where it starts and ensuring a light and quick trim.
Proper Angle and Technique for Cutting
To cut your dog’s nails safely, first choose the right clipper type, such as scissor or guillotine clippers, which are both part of the top dog nail clipper picks. Grab a nail clipper—guillotine or scissor type works well.
Aim for a 45-degree angle, avoiding the quick to prevent pain and bleeding.
Use firm, smooth motions for each snip; your confidence keeps things on the up and up.
Remember, a relaxed dog makes for a safer session.
Gradual Trimming Approach for Long Nails
Don’t rush it – take your time with those long nails.
Start by trimming just the tips, then work your way back gradually.
Remember to identify the quick carefully to avoid cutting it.
Keep an eye out for the quick, and stop if your pup seems uncomfortable.
With patience and positive reinforcement, you’ll have those nails looking neat in no time.
Handling Nervous or Anxious Dogs During Trimming
Helping your dog stay calm during nail trimming can be challenging, especially if they have had negative experiences with nail trimming tools, such as guillotine trimmers used incorrectly, especially if they’re nervous or anxious about the process.
By using desensitization techniques and positive reinforcement, you can make the experience smoother and more manageable for both of you.
Desensitization Techniques for Nail Handling
Imagine your dog as the star of a handling game.
Begin with a slow introduction, touching their paws gently.
Use desensitization tools like soft squeezes and introduce gentle pressure gradually.
Positive reinforcement, such as treats or praise, helps turn nail trimming into a fun challenge, not a dreaded chore.
This way, you’re both winning the pawdyssey!
Calming Strategies During Trimming Sessions
Now that your dog is a bit more accustomed to nail handling, let’s ease any lingering nerves.
Use calming music and distraction techniques, like peanut butter on a lick mat, to encourage relaxation.
A gentle touch reassures your pup, while desensitization methods build comfort over time.
Remember, your calmness sets the tone, so keep it cool!
Using Positive Reinforcement Effectively
Staying calm is important, and positive reinforcement makes nail trimming a breeze for nervous pups.
Use treats and praise, paired with patience and consistency, to turn a stressful chore into a bonding experience.
By creating a calming space for dogs, you can help reduce anxiety and make nail trimming more manageable.
Desensitization helps; start by showing the clippers at a distance, rewarding your dog for calmness.
Over time, this builds trust and reduces anxiety during trims.
When to Consider Professional Assistance
Feeling like your dog’s anxiety is reaching new heights during nail trims? It might be time to call in the pros.
Consider professional help if:
- There’s a risk of dog aggression or severe bleeding.
- You notice nail deformities or infections.
- Your anxious dog can’t be calmed despite best efforts.
Seeking help makes sure their safety and comfort.
Addressing Complications During Nail Trimming
Even with careful planning, trimming your dog’s overgrown nails can sometimes lead to bleeding or discomfort, which can feel like a rollercoaster ride for you both.
Don’t panic if you cut a bit too close; understanding how to manage bleeding, pain, and potential infections will keep you prepared and confident.
Dealing With Bleeding From Cut Quicks
Oops, looks like your pup’s nail got a little too short! Don’t worry, it happens.
First, wrap the nail in a clean cloth and apply pressure for 2-3 minutes.
If it’s still bleeding, try a styptic pen or powder – it’ll sting, but it’ll stop the bleeding fast.
If the bleeding persists, it’s best to visit your vet.
| Remedy | Time to Apply |
|---|---|
| Styptic Pen/Powder | 2-3 minutes |
| Cornstarch/Baking Soda | 2-3 minutes |
| Wet Tea Bag | 2-3 minutes |
| Bar of Soap | 2-3 minutes |
| Pressure with Cloth | 2-3 minutes |
Managing Pain or Discomfort
Trimming your dog’s nails can sometimes sting, especially if the quick is touched, and to avoid this, you should learn the proper Guillotine Trimmer Technique. Trimming your dog’s nails can sometimes sting, especially if the quick is touched.
For pain management, try calming techniques to ease anxiety.
Use gentle pressure and praise generously.
If nail sensitivity causes discomfort, consider desensitization exercises between trims.
Always have post-trim care ready—treats and affection can work wonders.
Remember, keeping sessions short helps maintain tranquility and control.
Recognizing Signs of Infection
How do you spot an infection after trimming your dog’s nails?
Keep an eye out for infected nail symptoms like redness or pus discharge.
If your dog starts constantly licking their paws or shows signs of fever, you might’ve a problem.
Addressing these signs early helps prevent further complications and keeps your furry friend’s paws healthy.
When to Seek Veterinary Help
Even pros have nail-trimming mishaps!
If your dog’s nail doesn’t stop bleeding after 30 minutes, or you notice infection signs like swelling, it’s time to call the vet.
Look out for:
- Persistent pain or discomfort
- Nail deformity or resistance to walking
- Uncontrolled bleeding or infection signs
Your vet can expertly assess and address these complications (Source).
Aftercare for Newly Trimmed Overgrown Nails
After trimming your dog’s overgrown nails, it’s important to monitor for any issues and apply protective balms to soothe and protect their paws.
Encourage gentle activities to help your furry friend adjust.
Maintain a regular follow-up trimming schedule to prevent future overgrowth.
Monitoring for Any Issues Post-trimming
You’ve finished trimming your dog’s nails; now it’s time to keep an eye out for any trouble.
Watch for nail bleeding, paw licking, or swelling, as these might indicate infection signs or pain.
Check their movement and mood too.
| Observation | Possible Issue | Action Needed |
|---|---|---|
| Paw licking | Pain or irritation | Monitor closely |
| Swelling | Infection signs | Visit the vet |
| Mood change | Discomfort | Offer reassurance |
Applying Protective Balms or Creams
After trimming your dog’s overgrown nails, consider applying a protective balm. A balm moisturizes and safeguards their paws, helping them heal and stay crack-free. Choose an all-natural product and apply it regularly—think of it as a spa day for their paws!
- Balm Types: Choose organic blends.
- Balm Benefits: Prevents cracks.
- Balm Application: Use daily.
- Balm Alternatives: Petroleum jelly in a pinch.
Encouraging Gentle Activity for Adjustment
Consider post-trim walks to help your dog adjust to newly clipped nails.
Short and sweet, these strolls are great for recovery activities.
During playtime, monitor for discomfort, making adjustments where necessary.
Incorporate gentle exercise, allowing gradual reintroduction to regular activity.
It’s like breaking in new shoes—same paws, better comfort!
Encourage curiosity and exploration to build confidence.
Follow-up Trimming Schedule
Once your pup is comfortable with new nail lengths, establish a trimming schedule that suits their needs.
Consider factors like nail growth, your dog’s age, and breed differences.
Trim every few weeks; for rapid nail growth or older dogs, trim more often.
Seasonal variations might affect this, so adjust as needed to keep their paws safe and sound.
Preventing Future Nail Overgrowth
To keep your dog’s nails from becoming overgrown again, establish a regular trimming routine.
Encourage natural nail-wearing activities like walks on hard surfaces.
Keep an eye on nail growth, feed a balanced diet with supplements if needed, and enjoy those extra belly rubs you’ll earn with a happy, healthy pup.
Establishing a Regular Trimming Routine
You’ve tackled trimming, so let’s chat about keeping those claws at bay.
Set a trimming schedule based on your dog’s age and nail type, using the right tools.
Most dogs need trims every 3-4 weeks.
Choose a calm time of day, like after a walk, and make it a routine.
This keeps nails neat and prevents overgrowth.
Natural Nail-wearing Activities for Dogs
While regular trimming helps, encourage natural nail wear by letting your dog enjoy activities and consider using Dog nail trimming tools for puppies designed for their nail type and size.
Head to dog parks for socializing and play, or hit the hiking trails to wear down those nails.
Fetch games in the backyard offer fun and exercise.
Set up agility courses too, and even a digging spot can keep their nails in check.
- Dog parks
- Hiking trails
- Fetch games
- Agility courses
Diet and Supplements for Nail Health
Feeding your dog nail-friendly foods like eggs and fish can make a world of difference.
Add omega-3 for a shiny, strong nail coat—think of it as a superhero for paw health.
Supplements for growth, such as biotin, also play a major role.
That extra care in their diet means fewer trimming battles and more playtime! .
Monitoring Nail Growth Between Trimmings
Don’t let your dog’s nails sneak up on you.
Check them regularly for signs of overgrowth, like clicking on the floor.
Trim them every 1-2 months, or as often as needed to keep them from touching the ground.
Adjust the frequency based on your pup’s breed, activity level, and the surfaces they walk on.
Alternatives to Manual Nail Trimming
If manual nail trimming feels more like a wrestling match with an alligator than a grooming session, don’t worry—there are alternatives.
You can explore options like nail grinders, professional grooming services, or even nail caps to keep both you and your furry friend stress-free.
Using Nail Grinders for Overgrown Nails
When preventing nail overgrowth, consider using a nail grinder.
It’s safer than clippers and offers better control.
Grind slowly and don’t let the tool heat up.
With practice, both you and your pooch will relax during nail trims.
- Grinder Types: electric, battery-operated
- Grinder Benefits: smooth nails, less quicking
- Grinder Safety: low speed first
- Grinder Technique: short bursts
Benefits of Professional Grooming Services
Nail grinders are nifty, but pondering a change? Professional grooming might be your ticket.
Besides pampering your pup, it offers nail care and reduces stress.
Groomers also detect health issues early and maintain coat health.
It’s like a spa day—without you lifting a paw!
| Benefit | Description |
|---|---|
| Nail Care | Trims and shapes nails |
| Hygiene Benefits | Improves cleanliness |
| Stress Reduction | Calms nervous dogs |
| Coat Health | Keeps fur shiny and healthy |
Nail Caps for Extremely Sensitive Dogs
Ever tried nail caps for your pup’s ultra-sensitive paws?
They’re a lifesaver for those dodging traditional clipping.
These nifty nail cap types easily slide over nails, reducing scratches and keeping your home intact.
With a little practice, nail cap application is straightforward.
Besides, they’re a fun, colorful alternative to nail cap alternatives, like dreaded clipper confrontations.
Combining Methods for Optimal Results
Ditch the nail clippers-only routine for a nail grinder combo to get the best of both worlds—control and comfort.
Combine home trimming with professional grooming for the best results, especially if your pup’s a tough nut to crack.
Nail caps add an extra layer of safety, ensuring those overgrown nails don’t cause any trouble again.
Frequently Asked Questions (FAQs)
How do you trim overgrown dog nails?
Start by trimming small sections of the dog’s nail, keeping just in front of the quick to avoid pain.
Use a file to smooth edges.
Stick to a regular schedule to prevent overgrowth again.
What causes nails to grow down at the tips?
Nails grow down at the tips if they’re overgrown or lack wear from walking on hard surfaces.
This can lead to curling into the paw, causing discomfort or infections.
Regular trimming prevents this snaggle-tooth situation.
Can you chop off an overgrown Dog Nail?
You can trim an overgrown dog nail, but take it slow and cut small sections.
Overgrown nails risk hitting the quick, causing pain and bleeding.
Use treats for distraction and calmness during this process.
What should I do if my dog has overgrown nails?
Pick up your dog’s paw and gently extend the nail.
Trim just the tip to avoid hitting the quick.
Repeat gradually over time to encourage the quick to recede, ensuring your dog’s comfort and safety.
How do you fix severely overgrown dog nails?
Like taming a wild beast, fixing overgrown dog nails requires patience.
Start with weekly trims, cutting small sections to avoid the quick.
Gradually work back, rewarding your pup with treats.
You’ll have those claws under control in no time!
How do you cut overgrown dog nails that are curled?
Tackling curled dog nails requires patience and precision.
Start by using scissors-style clippers, trimming small bits at a time.
Avoid the quick to prevent bleeding.
For severely curled nails, consider seeking a vet’s expertise for safe, painless trimming.
How do you cut a dog’s nails when they’re really long?
You’ll need patience and precision to trim those long nails.
Start by cutting small sections, working slowly in the direction of the quick.
Use a grinder to smooth edges.
Reward your pup with treats, making it a positive experience.
Are overgrown nails painful for dogs?
Overgrown nails can be a real pain for your furry friend.
They’ll cause discomfort when walking, potentially curling into paw pads, and even lead to infections.
Think of it as walking on stilettos all day – not fun!
How often should you trim overgrown dog nails?
While quick trimming might seem tempting, it’s a recipe for disaster.
Clip overgrown dog nails weekly to gradually recede the quick.
Once at a healthy length, maintain with weekly trims.
Your pup’s paws will thank you!
What are signs of nail trimming anxiety?
Your dog’s body language speaks volumes.
Look for trembling, excessive drooling, panting, or growling during nail trims.
They might pull their paw away or even snap.
These red flags signal it’s time to hit the pause button.
Can diet impact nail growth in dogs?
Diet plays a key role in your dog’s nail health.
A balanced, nutrient-rich diet promotes strong, healthy claws.
Omega-3 fatty acids, biotin, and vitamins A and E can boost nail growth and strength.
Consider high-quality food supplements for the best results.
How to choose the right nail clipper?
Consider your dog’s size when selecting nail clippers.
For small pups, choose scissors-style clippers.
Larger dogs need plier-style with more force.
Make sure the blades are sharp for clean cuts and that there’s a safety guard to avoid the quick.
What to do if nail trimming causes injury?
Great Caesar’s ghost! Don’t panic if you’ve nicked your pup’s quick.
Stay calm and apply direct pressure to stop the bleeding.
It’s not serious, but act fast.
Use styptic powder or a pen for quick relief.
Conclusion
Tackling overgrown dog nails might seem intimidating, but you’ve got this!
By following our quick and easy 5-step guide, you’ll be trimming like a pro in no time.
Remember, patience is key when learning how to trim dog nails that are overgrown.
With practice, you’ll boost your confidence and your pup’s comfort.
Keep up with regular trims to prevent future overgrowth, and don’t hesitate to seek professional help if needed.
Your furry friend’s paws will thank you for the extra care and attention!
