This site is supported by our readers. We may earn a commission, at no cost to you, if you purchase through links.
You trim carefully, one clip at a time, and suddenly there’s blood everywhere. Your dog yelps, pulls away, and now you’re panicking while a steady drip forms on the floor. Cutting into the quick—the bundle of nerves and blood vessels inside each nail—happens to even experienced dog owners, and it bleeds more than you’d expect from such a small wound.
The good news is that you can stop the bleeding in under five minutes with the right supplies and technique. Styptic powder works fastest, but cornstarch, baking soda, or even a bar of soap can clot the blood when you need a quick fix.
Knowing exactly what to do transforms a scary accident into a manageable moment, and understanding why nails bleed helps you avoid it next time.
Table Of Contents
- Key Takeaways
- Why Dog Nails Bleed During Trimming
- Immediate Steps to Stop Dog Nail Bleeding
- What to Do if Bleeding Won’t Stop
- Preventing Dog Nail Bleeding in The Future
- Preparing for Nail Trimming Emergencies
- Frequently Asked Questions (FAQs)
- What to do if I cut my dog’s nail and it bleeds?
- What is a good substitute for styptic powder?
- Will Vaseline stop dog nail from bleeding?
- How to make quick stop bleeding?
- How often should I trim my dogs nails at home?
- What is the best way to calm my dog during trimming?
- Can I use human nail clippers on my dogs nails?
- How do I choose the right nail clippers for my dog?
- What are the benefits of using a nail grinder on dogs?
- How long does nail bleeding typically last untreated?
- Conclusion
Key Takeaways
- Cutting into the quick—the nerve and blood vessel bundle inside your dog’s nail—causes immediate bleeding, but you can stop it in under five minutes using styptic powder, cornstarch, baking soda, or bar soap applied with firm pressure.
- If bleeding continues past 10-15 minutes despite pressure and clotting agents, or if you notice signs of infection like pus, swelling, or foul odor, you need to contact your veterinarian right away.
- Trimming only 1-2 millimeters at a time while watching for the chalky white ring on dark nails or stopping before the pink zone on light nails prevents cutting the quick and keeps your dog safe during grooming.
- Building a regular trimming routine every 3-4 weeks with sharp clippers, a calm environment, and positive reinforcement helps the quick recede naturally and turns nail care into a stress-free experience for both you and your dog.
Why Dog Nails Bleed During Trimming
Understanding why your dog’s nail bleeds during trimming starts with knowing what’s happening beneath the surface. The nail itself has a living center called the quick, and when you accidentally cut into it, bleeding happens.
Let’s break down the nail anatomy, the most common reasons for bleeding, and how to spot a bleeding nail before it becomes a bigger problem.
Anatomy of The Nail and Quick
Understanding your dog’s nail anatomy helps you trim safely. Each nail consists of a hard keratin shell protecting the quick—a pink triangle visible in light-colored nails but hidden in black ones. The quick contains bundled nerves and blood vessels that supply the nail. When you cut into this vascular core, bleeding occurs immediately.
Dewclaws attach higher on the leg and need attention too. Regular trimming prevents potential nail infections.
Common Causes of Nail Bleeding
Knowing what triggers bleeding helps you avoid it next time. Over-trimming during grooming accounts for most incidents—cutting the quick happens in up to 59% of clipping complications.
Here are the main culprits:
- Over-trimming: Single misplaced snips during fidgeting cause bleeding in 80% of at-home trims
- Physical trauma: Broken nails from snags represent nearly 24% of paw injuries
- Breed predispositions: Chihuahuas show 2.21 times higher nail clipping needs
- Tool errors: Dull clippers crush nails, causing splits in 30% of attempts
- Health factors: Bacterial infections affect 20% of single-nail injury cases
Various factors can lead to nail issues, including bacterial or fungal infections.
How to Recognize a Bleeding Nail
Spotting bleeding early makes treatment faster. Watch for visible blood dripping from the nail tip—the most obvious sign. Your dog might yelp suddenly or start limping immediately after the cut.
Look for swelling, redness, or warmth around the nail bed. If bleeding continues past five minutes despite pressure, you’re dealing with a significant quick exposure that needs immediate attention.
Immediate Steps to Stop Dog Nail Bleeding
When you accidentally cut the quick, blood appears fast and your dog will likely react with a yelp or pull away. Don’t panic—this happens to even experienced groomers, and you can handle it at home with a few simple techniques.
Here’s exactly what you need to do, step by step, to stop the bleeding quickly and keep your dog calm through the process.
Staying Calm and Reassuring Your Dog
Your anxiety flows straight down the leash, so take a deep breath before you touch your dog’s paw. Studies show calm pet owners reduce their dogs’ stress by nearly half during nail trimming.
Your calm demeanor directly reduces your dog’s stress during nail trimming—anxiety truly travels down the leash
Use a gentle voice tone, reassure with soft words, and offer treats—this builds trust slowly through positive reinforcement and gentle handling techniques, transforming a tense moment into cooperative care.
Applying Pressure to The Nail
Once bleeding starts, grab a clean cloth or gauze pad and press firmly against the nail tip for 10 to 15 minutes without peeking. This steady pressure compresses blood vessels, slowing blood flow and allowing clot formation to seal the quick.
Keep your dog still during this time—moving disrupts the clot. If bleeding continues after 15 minutes, you’ll need veterinary help.
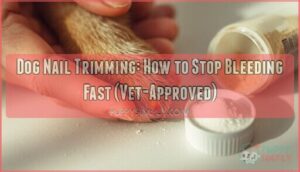
Using Styptic Powder or Styptic Sticks
For rapid clotting, styptic powder containing ferric subsulfate is your first-line option. Here’s the application technique:
- Clean visible blood from the paw before applying the cauterizing powder.
- Pinch a small amount between your fingers or use a cotton swab.
- Press firmly onto the bleeding nail tip for 30 to 60 seconds.
- Avoid wiping for several hours so the clot stays intact.
Styptic sticks (including styptic pencils) offer more precise application but may sting more than powder. Both work within minutes by causing protein coagulation at the quick.
Storage guidelines recommend keeping them in tightly sealed containers at room temperature, away from moisture. Safety concerns include mild stinging during use and potential gastrointestinal upset if your dog licks large amounts, so monitor closely after treatment.
Home Remedies: Cornstarch, Baking Soda, Soap, Super Glue
When styptic powder isn’t on hand, your kitchen holds effective alternatives for stopping dog nail bleeding. Cornstarch and baking soda both absorb blood and promote clotting—dip the nail directly into the powder, press firmly for several minutes, and repeat if needed. Bar soap works for lighter bleeding, while super glue (cyanoacrylate) can seal minor wounds but requires veterinary guidance first.
| Home Remedy | How It Works |
|---|---|
| Cornstarch | Absorbs blood, aids clot formation when dipped and pressed |
| Baking soda | Similar absorption action; can be mixed with water into paste |
| Bar soap (unscented) | Creates temporary plug over bleeding spot for light flow |
| Super glue | Forms strong seal on contact with fluids; vet approval needed |
| Application duration | Press firmly 2–5 minutes; reapply if bleeding continues past 10–15 minutes |
What to Do if Bleeding Won’t Stop
Most of the time, you’ll get the bleeding under control within a few minutes using pressure and styptic powder.
But sometimes, despite your best efforts, the bleeding just won’t quit. When that happens, it’s time to recognize the red flags that signal you need professional help.
When to Seek Veterinary Care
If bleeding hasn’t stopped after 10–15 minutes of constant pressure and styptic use, contact your veterinarian or an animal hospital. Persistent bleeding, intense pain like crying when you touch the paw, or extensive nail damage near the base all warrant emergency vet care.
Dogs with systemic risks—clotting disorders, liver disease, or anticoagulant medications—need prompt veterinary care.
When unsafe homecare prevents you from restraining your dog safely, professionals can manage the injury under controlled conditions.
Signs of Complications or Infection
Even a small nick can turn into something bigger if bacteria move in. Watch for pus discharge, foul odor, or chronic swelling around the nail bed over the next few days.
Nail deformity, worsening pain, or mobility changes signal a wound infection that needs veterinary care. If your dog licks obsessively at the toe or you see red streaks spreading, call for dog wound treatment right away.
Special Considerations for Blood Disorders
If your dog has inherited coagulopathies like hemophilia A or platelet disorders, even a tiny nail trim can trigger serious, prolonged bleeding. Hemophiliac dogs lack essential clotting factors, and vWD considerations mean some breeds struggle to form a stable blood clot.
Medication risks, including aspirin or clopidogrel, further disrupt the coagulation process. Always discuss pre-procedure screening with your vet before trimming nails if bleeding tendencies exist.
Preventing Dog Nail Bleeding in The Future
The best way to handle nail bleeding is to avoid it altogether. With the right techniques and tools, you can trim your dog’s nails confidently without hitting the quick.
Let’s look at practical steps that’ll help you master safe nail trimming and keep those stressful moments to a minimum.
Safe Nail Trimming Techniques
With proper nail trimming safety, you can avoid the quick entirely. The key is taking small cuts and watching for visual quick cues as you work. Here’s your gradual trimming approach:
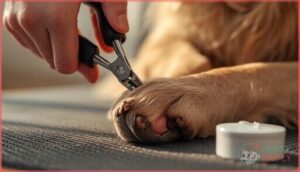
- Trim only 1–2 millimeters at a time, especially when starting out
- Stop several millimeters before the pink zone in light-colored nails
- Watch for a chalky white ring on dark nails—that’s your signal to stop
- Support the paw firmly without twisting joints during each cut
- Schedule trims every 3–4 weeks to keep the quick receding naturally
Safe dog nail trimming means patience wins over speed every time.
Choosing The Right Tools
Your clipper choice directly impacts safety and success. Guillotine-style clippers work well for small to medium dogs, while scissor-style clippers offer the leverage needed for thick nails on large breeds. Nail grinders reduce the risk of cutting into the quick but require gradual desensitization to noise and vibration.
| Tool Type | Best For |
|---|---|
| Guillotine clippers | Small, medium dogs with thinner nails |
| Scissor clippers | Large breeds; thick nails needing leverage |
| Nail grinders | Owners wanting smooth edges, less quick risk |
| Safety-guard clippers | Beginners; prevents overcutting |
| Styptic powder | Every kit—stops bleeding in 30 seconds |
Sharp stainless steel blades prevent crushing and splitting, so replace dull ones regularly. Keep styptic agents within arm’s reach during every session—ferric subsulfate powder constricts vessels fast when accidents happen.
Tips for Trimming Black or Dark Nails
When black nails hide the quick, you’ll rely on visual inspection instead of guesswork. Trim just 1/16 inch at a time, checking the cut surface after each clip—a chalky white ring means you’re safe to continue, but a dark center or small shiny dot signals you’ve reached the quick.
Position clippers at a 45-degree angle and apply downward pressure to prevent splits.
Establishing a Regular Grooming Routine
Once you’ve mastered dark nails, consistency becomes your biggest ally. Schedule trims every 3–4 weeks—most dogs need monthly sessions, though pavement-walking pups can stretch to six weeks.
Keep clippers sharp, reward cooperation with treats after each nail, and watch for audible clicking on hard floors as your cue.
Weekly micro-trims help an overgrown quick recede, restoring safe nail length over time.
Preparing for Nail Trimming Emergencies
The best way to handle a nail trimming accident is to be ready before it happens. You don’t need an elaborate setup, just a few key supplies and a little preparation.
Let’s walk through what you should have on hand, how to set up your space, and how to get your dog comfortable with the process.
Essential First Aid Supplies to Have Ready
Think of your first aid kit as your safety net during nail trimming sessions. Keep styptic powder front and center—it’s the best practice for stopping bleeding within minutes.
Stock gauze pad types like non-adherent Telfa pads and 4×4 squares for pressure application. Include antiseptic solutions such as saline or diluted hydrogen peroxide for cleaning.
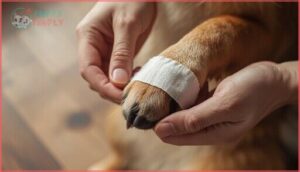
Add vet wrap for bandaging techniques, plus alternative agents like cornstarch or flour as backups.
Creating a Calm and Safe Trimming Environment
Your surroundings matter more than you might realize during dog nail trimming. A quiet location minimizes distractions, while calming sounds like classical music can reduce restless behaviors by up to 30%.
Follow these low-stress handling practices:
- Choose a familiar room with safe surfaces like non-slip mats
- Keep clippers and styptic powder within arm’s reach
- Play soft background music to mask sudden noises
- Build positive associations with treats throughout each grooming routine
Training Your Dog for Cooperative Nail Care
Teaching your dog to accept nail trims willingly takes patience, but choice-based training builds lasting cooperation. Desensitization protocols break the process into small steps—touching paws, introducing clippers, then trimming one nail—paired with high-value treats.
| Training Stage | Goal | Duration |
|---|---|---|
| Paw Touch | Accept gentle handling | 3–7 days |
| Clipper Presence | Remain calm near tools | 5–10 days |
| Single Nail Trim | Allow one clip without stress | 7–14 days |
| Multiple Nails | Complete partial session | 2–4 weeks |
| Full Trim | Cooperative grooming routine | 1–3 months |
Low-stress handling during each nail trimming session prevents fear, while owner education ensures long-term maintenance of dog nail care skills. These dog grooming tips transform stressful moments into positive dog grooming experiences.
Frequently Asked Questions (FAQs)
What to do if I cut my dog’s nail and it bleeds?
Stay calm and apply firm pressure to the nail tip with clean gauze for several minutes.
Use styptic powder to promote clotting, or try cornstarch or baking soda if you don’t have styptic on hand.
What is a good substitute for styptic powder?
When you’re caught without supplies, necessity becomes the mother of invention. Cornstarch, flour, or baking soda pressed firmly into the nail works effectively.
Bar soap or even super glue can seal minor bleeds as home remedy alternatives.
Will Vaseline stop dog nail from bleeding?
No, Vaseline doesn’t stop bleeding from a dog’s nail because it lacks clotting agents.
Instead, rely on styptic powder, cornstarch, or flour as your first-aid home remedy to control bleeding effectively.
How to make quick stop bleeding?
You can stop quick bleeding by packing styptic powder or flour directly onto the nail tip, then applying firm pressure with gauze for 5–10 minutes until clotting occurs.
How often should I trim my dogs nails at home?
Think of nail care like mowing a lawn—check every 3 to 4 weeks for most dogs. Breed nail growth, activity level impact, and nail length cues matter.
Prevent overgrowth health risks through home monitoring tips.
What is the best way to calm my dog during trimming?
Creating a calm space with non-slip mats, soft music, and dog-appeasing pheromone sprays can reduce stress by 30–40%.
Use positive reinforcement with high-value treats during each step to help your dog stay relaxed throughout trimming.
Can I use human nail clippers on my dogs nails?
You shouldn’t use human nail clippers on your dog’s nails. Canine nails are thicker and curved, so human clippers can crush or split them, increasing bleeding risk. Always choose breed-specific dog nail trimmers.
How do I choose the right nail clippers for my dog?
Pick clippers based on your dog’s size: scissor-style for small breeds, guillotine for medium dogs, and plier-style for large breeds. Look for stainless steel blades, ergonomic design, and safety features.
What are the benefits of using a nail grinder on dogs?
Nail grinders offer injury reduction by preventing quick cuts and deliver a smoother finish that minimizes snags. They suit all nail types, including thick or dark nails, and provide stress reduction for anxious pets.
Additionally, nail grinders support long-term health benefits through precise trimming.
How long does nail bleeding typically last untreated?
Bleeding from a dog nail injury often continues for 10 to 20 minutes without intervention. However, factors such as activity, injury severity, and clotting ability can extend bleeding well beyond typical thresholds, sometimes requiring veterinary care.
Conclusion
A bleeding nail doesn’t have to derail your entire grooming routine. With styptic powder in your cabinet and the right technique in your back pocket, you’re equipped to handle the unexpected clip with confidence.
Mastering dog nail trimming how to stop bleeding transforms you from a panicked owner into a prepared one. Your dog depends on your steady hands and quick thinking, and now you’ve got both covered when accidents happen.
- https://vcahospitals.com/know-your-pet/first-aid-for-bleeding-in-dogs
- https://www.hillspet.com/pet-care/routine-care/styptic-powder-for-dogs-and-cats
- https://www.whole-dog-journal.com/care/how-to-stop-dog-nail-bleeding/
- https://www.petmd.com/dog/grooming/how-stop-dogs-nail-bleeding
- https://www.fourpaws.com/pets-101/grooming-gateway/how-to-stop-a-dogs-nail-from-bleeding

