This site is supported by our readers. We may earn a commission, at no cost to you, if you purchase through links.
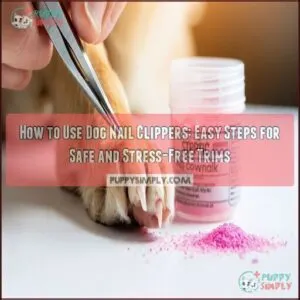
Get your pup comfortable by handling their paws regularly and offering treats. Identify the quick, that pinkish vein inside the nail, and trim only small bits to avoid cutting it.
Hold the paw gently but securely, clip at a slight angle, and focus on control rather than speed. If you’re nervous, imagine it like sharpening a pencil—small adjustments go a long way.
Keep styptic powder handy for accidents, and smooth rough edges with a file. Ready to try it confidently?
Table Of Contents
- Key Takeaways
- Choosing Right Clippers
- Using Dog Nail Clippers
- Preparing Dog for Trimming
- Trimming and Smoothing Nails
- Safety and Aftercare Tips
- Frequently Asked Questions (FAQs)
- How do you use Dog Nail clippers?
- How to use regular clippers for puppy nails?
- What are the different types of dog nail clipping tools?
- Can you use a human nail clipper on a dog?
- Do you cut dog nails straight or at an angle?
- What position should I cut my dog’s nails in?
- What is the proper way to use dog nail clippers?
- How do you cut a dog’s nails for beginners?
- What is the correct way to use dog nail clippers?
- What angle to hold dog nail clippers?
- Conclusion
Key Takeaways
- Handle your dog’s paws gently but securely, trim small amounts at a 45-degree angle, and avoid the quick to prevent pain or bleeding.
- Use scissor-style clippers for thick nails, guillotine clippers for small nails, and always keep blades sharp for clean cuts.
- Prepare your dog with desensitization by rewarding calm behavior and letting them associate clippers with positive experiences.
- Keep styptic powder handy for accidents, file rough edges after trimming, and reward your dog to build trust and ensure stress-free grooming.
Choosing Right Clippers
Choosing the right clippers guarantees a smoother trimming experience for both you and your dog.
By understanding the differences in clipper types, sizes, and quality, you’ll make nail care much easier.
Understanding clipper types and quality transforms nail care into a smooth, stress-free experience for both you and your dog.
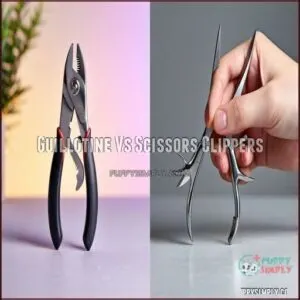
Guillotine Vs Scissors Clippers
Deciding between guillotine clippers and scissor clippers depends largely on your dog’s nail thickness and your grooming confidence.
Each tool has unique strengths and ideal applications:
- Guillotine Clippers: These precision tools have a loop where you insert the nail and a blade that slides to cut. They’re perfect for small to medium nails but can struggle with thick or tough ones.
- Scissor Clippers: With a design resembling regular scissors, this style provides greater power and control, making it ideal for dogs with large, thick nails.
- User Comfort: Confirm the clipper handles are ergonomic and easy to grip for smoother, safer use.
For best results, pair sharp, stainless steel blades with proper nail trimming techniques. Consider also where to purchase these essential grooming tools. Choosing the right nail clipper type confirms safety for your dog and stress-free grooming for you.
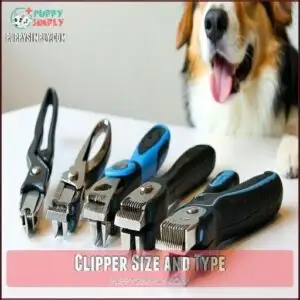
Clipper Size and Type
Choosing the right size and type of dog nail clipper guarantees a safe, stress-free trimming experience.
Small breeds do best with compact scissor-style clippers, while large breeds need heavy-duty designs with durable nail clipper blades.
For medium-sized dogs, guillotine clippers provide precise results with their single-blade mechanism.
Consider clipper ergonomics—handles should feel comfortable in your grip for better control.
Also, look for high-quality materials like stainless steel, which maintain blade sharpness and prevent splitting.
If dark nails make cutting tricky, nail grinders are great alternative tools for smoother, safer finishes.
Safety features like quick sensors are vital.
Matching clipper types to your dog’s breed nail variations is essential for easy grooming.
Clipper Quality and Maintenance
After selecting the right nail clipper type, keeping it in top shape is a must for safe trims.
Maintaining clipper sharpness and durability guarantees smooth cuts and reduces discomfort for your dog. Regular cleaning clippers and proper clipper storage keep bacteria and rust at bay. Replace blades when dull using sharpening tools or get guillotine clippers resharpened.
- Sanitize with alcohol after every use.
- **Store in dry, safe spots.
- Check blade sharpness frequently.
- Replace worn-out blades for effective cuts and smoother experiences.
Using Dog Nail Clippers
Using dog nail clippers correctly keeps your pet’s nails healthy and prevents discomfort.
By mastering the right techniques and staying aware of safety tips, you can make the process quick and stress-free for both you and your dog.
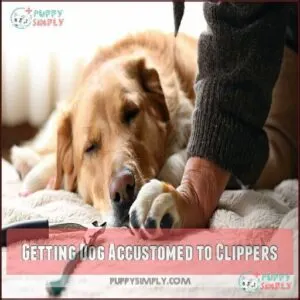
Getting Dog Accustomed to Clippers
Help your dog relax by focusing on desensitization techniques. Start with gentle paw handling during calm moments, rewarding cooperation with treats.
Focus on calm paw handling and treat rewards to build trust and make nail trimming stress-free for your furry friend.
Gradual introduction matters—let your dog sniff the dog nail clipper without cutting to build positive association. Create a calm environment, using a reward system to encourage trust.
Slowly touch the clipper to their nails, praising every calm response. Remember to begin by touching paws briefly to ease your dog into the process.
These dog nail trimming tips guarantee a smooth clipper introduction without added stress, ensuring a successful and calm experience with gentle handling.
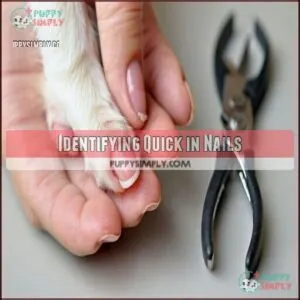
Identifying Quick in Nails
Spotting the quick in dog nails helps prevent painful cuts.
Knowing your dog’s nail anatomy makes this process safer, especially with darker nails where the quick is harder to see.
Here are steps to locate it:
- For light nails: Identify the pink quick visible through the semi-transparent nail.
- For black nails: Use a flashlight to see a faint pinkish center or white dot.
- Underneath nails: Look for where hard nail meets softer tissue.
- Test gently: Apply light pressure for sensitivity.
- Consistent trimming: Overgrown quicks shrink gradually with regular trimming.
Trimming Technique and Safety
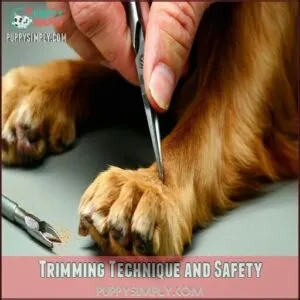
Once you’ve identified the quick, it’s time to start trimming with precision and care. Hold your dog’s paw gently but securely to keep them steady.
Position the dog nail clipper at a 45-degree cutting angle and trim in small sections, taking care to avoid the quick. Cutting dog nails this way minimizes pain and supports nail trimming safety.
Pay attention to your dog’s cues—if they pull back or seem stressed, stop and reassure them with treats or a calm voice. Keep styptic powder handy in case of an accidental cut.
Regular trimming helps maintain healthy paws, while smooth, confident movements guarantee a comfortable experience for both of you.
Preparing Dog for Trimming
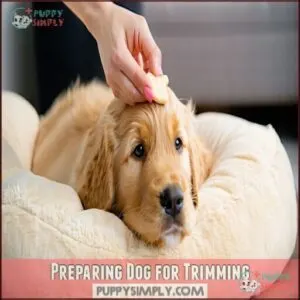
Before you start trimming, make sure your dog feels calm and comfortable in their environment. Handle their paws gently and reward them with treats to build trust and reduce stress.
Creating Calm Environment
Creating a calm environment is key to making dog nail trimming a stress-free experience for both you and your pup. Choose a quiet space in your home where your dog feels safe and secure. Lower the lights if needed, and play soft, relaxing music to help ease any tension.
Start by setting up a comfortable mat or blanket for your dog to sit or lie on. Make sure you have everything—dog nail clippers, styptic powder, and treats—within easy reach so you’re not scrambling mid-trim. Stay calm yourself; your dog will mirror your energy and remain more relaxed.
- Use stable footing like a non-slip mat to avoid sliding.
- Keep treats handy for positive reinforcement.
- Organize supplies to eliminate interruptions.
Desensitizing Paws and Rewarding
Anxious dogs can relax during nail trims with desensitization and positive reinforcement.
Daily paw massages comfort them while preparing for handling.
Follow these steps for stress-free nail care:
- Gently massage paws for two minutes each day, using circular motions.
- Place the dog nail clipper nearby during calm moments.
- Lightly tap clippers to their paws while offering treats for positive association.
- Hold paws gently for 5-10 seconds, rewarding calm behavior.
- Use praise and patience to create a trusting bond during preparation, which is key to successful nail care.
Acclimating to Trimming Process
Helping your dog feel at ease with nail trimming takes time, patience, and a calm environment. Start by introducing nail clippers during relaxed moments. Let your dog sniff them, rewarding their curiosity with treats.
Gradually handle their paws more often, using positive reinforcement at each step. Mimic clipping motions without trimming to build their trust.
Here’s a quick guide:
| Step | Action | Why It Matters | Tip |
|---|---|---|---|
| 1. Show Clippers | Let them sniff and explore | Reduces anxiety | Use treats during exploration |
| 2. Handle Paws | Gently massage and hold their paws | Builds trust | Pair handling with verbal praise |
| 3. Mimic Motion | Pretend to cut without trimming | Desensitizes to the process | Helps if repeated in short sessions |
| 4. Reward Progress | Offer treats after each step | Reinforces positive behavior | End sessions on a happy note |
Short sessions and a gradual introduction are key for stress-free dog nail care. This approach ensures your dog becomes comfortable with the process, making it easier to trim their nails. By following these steps, you can help your dog feel more at ease, which is essential for their overall well-being and your peace of mind.
Trimming and Smoothing Nails
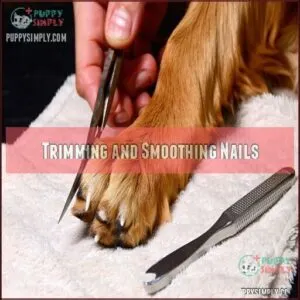
Trimming your dog’s nails in small sections helps avoid the quick and keeps the process safe.
After clipping, use a nail file or grinder to smooth rough edges and prevent snags.
Trimming Small Amounts at Time
Now that your dog feels relaxed and ready, it’s time to focus on trimming their nails carefully. A gradual approach makes a big difference in making this task stress-free and safe.
Follow these steps for effective dog nail trimming:
- Trim 2-3mm at a time using a dog nail clipper. Hold it at a 45-degree angle, following the nail’s natural curve.
- Check for the pink quick inside lighter nails and stop cutting before reaching it. For black nails, cut slowly and monitor the nail’s texture carefully.
- Reward your pup with treats and praise between nails to build positive associations with frequent trimming.
Patience and safe cutting prevent accidents, ensuring better dog nail care. Regular trimming can also help prevent painful infections, which is a key aspect of dog nail care and helps in maintaining better health.
Smoothing Rough Edges and Filing
Once you’ve trimmed your dog’s nails, it’s time to tackle those rough edges. Smoothing them out isn’t just about looks—it prevents snags on furniture, fabrics, or even skin, keeping life hassle-free for everyone.
Nail filing gives a clean, polished finish that’s comfortable for your pup and easier on your home. You can use a manual nail file or an electric nail grinder, depending on your dog’s tolerance and your comfort with the tool.
Always work gently, filing in one direction at a 45-degree angle to protect the nail’s structure.
- Avoid over-filing: Stick to short, 30-60 second sessions per nail.
- Choose the right tool: Nail grinders with safety guards work great for beginners.
- Reward consistently: Treats make nail filing a positive experience.
A good option is to think about a quality dog nail file for this purpose. By focusing on edge rounding and tool maintenance, you’ll prevent snags and make certain smoother nail care ahead.
Trimming Dew Claws and Handling
After filing those nail edges, don’t forget the often-neglected dew claws. These digits require special attention during your grooming session.
Gently bend the dew claw away from the leg for better access. Use scissors-type dog nail clippers for more control. Trim carefully to avoid cutting into the quick, which can cause bleeding and pain.
| Dewclaw Location | Handling Resistance | Safe Removal Technique |
|---|---|---|
| Front legs | Hold firmly | Cut at 45° angle |
| Rear legs | Use treats | Trim small amounts |
| Loose attachment | Partner assistance | Isolate from fur |
| Growing inward | Lay dog on side | Check for quick |
| Normal growth | Drape over body | Reward after trimming |
Safety and Aftercare Tips
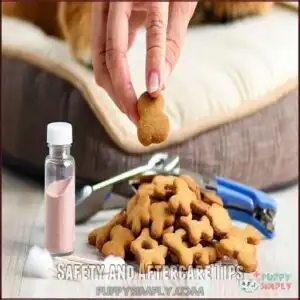
You’ll need to protect your pup during and after nail trims by keeping styptic powder handy for accidental cuts and watching for signs of stress.
After trimming, examine the nails for rough edges that could snag on fabric, and reward your dog with treats to reinforce positive associations with the grooming process.
Preventing Accidents and Injuries
Every successful nail trim depends on four essential safety measures to protect your pet:
- Maintain quality clipper maintenance by keeping blades sharp for clean, precise cuts
- Master safe positioning by holding your dog’s paw firmly but gently, like a jeweler examining a precious gem
- Practice gradual introduction, taking tiny amounts with each cut to avoid hitting the quick nail
- Confirm proper lighting for accurate quick identification, especially with dark nails
Work in a calm environment where you won’t be startled. Hold dog nail clippers comfortably like a pencil for better control.
Always recognize limits—if your dog becomes overly stressed, try again later rather than risking injury. Nail bleeding prevention starts with patience, not speed, and requires careful consideration of your dog’s comfort and well-being.
Stopping Bleeding With Styptic Powder
Accidents happen—sometimes you cut the quick while trimming, and your dog’s nail starts bleeding. Don’t worry! Styptic powder can quickly stop dog nail bleeding by sealing the exposed quick blood vessel.
To apply, press the bleeding nail gently into the powder while applying pressure for 30 seconds. This allows the powder to clot the blood effectively.
If you’re caught without styptic powder, powder alternatives like cornstarch or flour can help temporarily. Consider various product options for your dog’s first aid kit.
Keep in mind dosage concerns; a small pinch is usually enough. Never skip wound cleaning before application. Heavy bleeding? Seek veterinary advice immediately.
Staying prepared with styptic powder guarantees you’re well-equipped for nail-trimming mishaps and helps keep your dog calm and healthy.
Recognizing Discomfort and Stress Signs
After addressing any bleeding, pay attention to your dog’s body language to confirm they’re comfortable.
Common signs of stress include panting, lip licking, whale eye (wide, anxious eyes), a tucked tail, or avoidance behaviors such as pulling their paw away or turning their head. These cues often mean your dog is scared of trimming or experiencing pet anxiety. One common cause of anxiety can be negative memories.
Follow these steps to ease anxiety:
- Pause and Offer Comfort: Use gentle words and pet them to calm their nerves.
- Shorten Sessions: Trim only a few nails at a time to avoid overwhelming dog resistance.
- Reward Good Behavior: Give treats, reinforcing trust and making the experience less stressful.
Patience builds confidence, creating positive nail care experiences.
Frequently Asked Questions (FAQs)
How do you use Dog Nail clippers?
Properly position and prepare for precision. Hold your dog’s paw gently yet firmly, angle the clippers at 45 degrees, and trim small amounts, avoiding the quick.
Reward them with treats and praise for a successful, stress-free experience.
How to use regular clippers for puppy nails?
Hold your puppy’s paw gently, use sharp clippers, and trim small portions at a 45-degree angle.
Avoid the quick—spot the pink area if visible.
Reward your puppy with treats and praise for staying calm!
What are the different types of dog nail clipping tools?
You’ve got a few options!
Scissor-style clippers work well for large dogs’ tough nails.
Guillotine clippers are ideal for smaller dogs, and nail grinders or files help smooth edges or for dogs preferring quieter grooming.
Can you use a human nail clipper on a dog?
Even though it may seem convenient, don’t use human nail clippers on your dog.
They’re not sharp enough for thicker nails, can leave jagged edges, and might hurt your dog.
Proper dog clippers guarantee safety.
Do you cut dog nails straight or at an angle?
Cut dog nails at a slight angle, around 45 degrees, to match the nail’s natural curve.
Avoid cutting straight across.
This helps prevent splitting and guarantees you don’t accidentally cut the sensitive quick inside.
What position should I cut my dog’s nails in?
Position your dog comfortably in a calm, well-lit space.
Small dogs can sit on your lap or a table, while larger dogs should lie on their side.
Keep their paw steady, but avoid squeezing.
What is the proper way to use dog nail clippers?
Hold your dog’s paw gently but firmly, position the clippers at a 45-degree angle, and trim small amounts at a time.
Avoid the quick, reward your dog with treats, and file rough edges.
How do you cut a dog’s nails for beginners?
Start with calm, gentle paw handling to help your dog relax.
Trim tiny amounts at a 45-degree angle, avoiding the quick (pink area).
Reward them after each nail to build trust and guarantee a positive experience.
What is the correct way to use dog nail clippers?
Using dog nail clippers involves gently holding your dog’s paw, isolating the nail, and trimming small sections at a 45-degree angle.
Avoid the quick, reward your dog with treats, and smooth edges with a file.
What angle to hold dog nail clippers?
In the context of dog nail trimming, imagine "hitting the nail on the head.
Hold clippers at a 45-degree angle to the nail, ensuring a clean cut while avoiding the quick for a painless experience.
Conclusion
Think of nail trimming as updating your dog’s "paw-dicure" routine—modern pets deserve neat nails.
By understanding how to use dog nail clippers and creating a calm environment, you’ll keep the process safe and stress-free for you and your pup.
Remember to trim in small amounts, avoid the quick, and always have styptic powder ready for accidents.
Over time, regular handling and treats will help your dog feel comfortable. With practice, you’ll master confident, effective trims.

