This site is supported by our readers. We may earn a commission, at no cost to you, if you purchase through links.
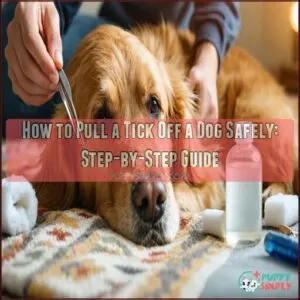
Spread your dog’s fur and grasp the tick as close to your pet’s skin as possible. Pull upward with steady, even pressure—don’t twist or jerk, as this might leave tick parts behind.
After removal, clean the bite area with alcohol and wash your hands thoroughly. Don’t use petroleum jelly, matches, or nail polish on the tick, as these old wives’ tales can actually increase infection risk.
Your furry friend might squirm during the process, but staying calm helps them stay calm too. Those tiny hitchhikers can carry some surprising diseases.
Table Of Contents
- Key Takeaways
- Identifying Ticks on Dogs
- Pulling Ticks Off Dogs
- Tick Removal Tools
- Safe Removal Techniques
- Removing Ticks Step by Step
- Post Removal Care
- Preventing Tick Bites
- Tick Borne Diseases
- Aftercare and Monitoring
- Frequently Asked Questions (FAQs)
- Will rubbing alcohol remove a tick from a dog?
- Can I just pulled a tick off my dog?
- How do you draw a tick out of a dog?
- What kills ticks on dogs instantly?
- How to get a tick off a dog that’s embedded?
- How do you remove a tick from a dog?
- How to remove a tick bite?
- How do you remove a tick?
- What happens if you remove a tick from a dog?
- How do you get a tick out of a dog’s mouth?
- Conclusion
Key Takeaways
- Use fine-tipped tweezers or a specialized tick removal tool to grasp the tick as close to your dog’s skin as possible, pulling upward with steady pressure—don’t twist or jerk.
- Don’t use petroleum jelly, matches, or nail polish on ticks, as these methods are ineffective and can increase infection risk by causing the tick to release more saliva.
- After removal, clean the bite area with soap and water followed by an antiseptic, then monitor the site for signs of infection like redness, swelling, or unusual discharge.
- Prevent future tick problems by keeping your grass short, creating barriers between lawns and wooded areas, and performing regular tick checks on your dog, especially in hidden areas like ears, armpits, and between toes.
Identifying Ticks on Dogs
When you check your dog for ticks, look for small, wart-like bumps that might feel like tiny seeds or skin tags.
They’re often found in hidden spots like under the legs, around the ears, or between the toes, which is a critical area to inspect.
Tick Characteristics
Ticks may look tiny, but understanding their anatomy and behavior helps with proper identification.
These pests thrive in diverse habitats and latch onto hosts for a blood meal.
Here’s what you should know:
- One-piece bodies with barbs for feeding.
- Eight crablike legs for movement.
- Varying size—from tiny seeds to grape-like blobs after feeding.
- Over 200 species in the U.S.
- Lifecycle includes feeding on mammals, birds, and insects.
The key aspects of ticks, including their diverse habitats, are crucial for effective management and prevention strategies.
Common Tick Types
Dog ticks aren’t all alike, and recognizing their differences helps with tick identification.
From the small Deer Tick to the Lone Star Tick with its trademark white dot, each tick species has unique looks and risks.
Some thrive in grass and woodland, while others invade homes.
Knowing regional variations, host preferences, and disease vectors like Lyme disease or Rocky Mountain Fever is essential.
Tick Environments
Finding dog ticks can feel like looking for a needle in a haystack, especially since they adapt to many tick habitats.
Finding those sneaky ticks on your dog can feel like hunting for invisible intruders in a forest of fur.
These creatures thrive in surprising places:
- Tick-dense areas like woods and tall grass.
- Lawns and backyards, thanks to urban ticks.
- Shady spots with moist soil, perfect for tick survival.
- Places affected by climate impact or regional variations.
Pulling Ticks Off Dogs
When you notice a tick latched onto your dog, it’s essential to act swiftly but carefully to avoid complications like tick saliva risks or embedded mouthparts.
Removing ticks from your dog requires precision. Use a tick removal tool or fine-point tweezers to grasp the tick near the skin, pulling slowly and steadily.
After removal, it’s important to disinfect the bite site with rubbing alcohol.
Here’s a quick comparison to stay on track:
| Dos | Don’ts |
|---|---|
| Use a tick removal tool. | Don’t use your fingers to pull it out. |
| Disinfect tools before and after. | Don’t crush the tick’s body. |
| Pull straight without twisting. | Avoid pulling too quickly. |
| Check the tick’s head is removed. | Don’t use heat or chemicals. |
| Calm your dog during the process. | Refrain from rushing the removal. |
Remember, tool sterilization tips and steady hands are key to pain-free removal!
Tick Removal Tools
You’ll need the right tools to remove ticks from your dog safely and effectively.
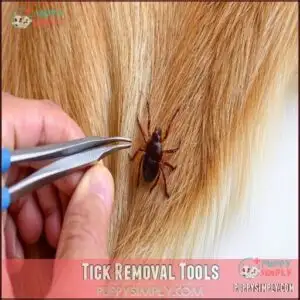
Fine-point tweezers, specialized tick removal hooks like Tick Tornado, or a simple tick removal kit can make the job much easier than trying to use your fingers or household tweezers.
Fine Point Tweezers
When dealing with those unwelcome passengers on your furry friend, fine-point tweezers are your best first-line defense. Unlike household tweezers, their precise tips allow you to grasp the tick close to your dog’s skin without squeezing its body.
- Your heart might race when you spot that tiny parasite on your beloved pet
- That sigh of relief when the tweezers grip exactly where needed feels incredible
- Nothing beats the satisfaction of removing the entire tick, head and all
- The worry that builds when regular tweezers crush the tick too easily is unbearable
- The confidence of having the right tool in your first-aid kit brings peace of mind
Always sterilize your tweezers before and after tick removal to prevent infections. Remember to disinfect the bite site after removing the tick. While finepoint tweezers offer precision for tick removal techniques, they do require a steady hand compared to some alternatives.
Tick Removal Devices
When faced with an embedded tick, specialized removal devices can make extraction substantially easier than tweezers.
Tick hooks like the Tick Tornado work by sliding under the parasite and twisting upward. Other effective tools include tick removal cards and curved forceps.
After using any device, proper tool disinfection is vital. You can find various tick pullers online.
Many veterinarians recommend plastic tick removers over metal ones for their gentleness on your dog’s skin.
Alternative Methods
Beyond specialized tools, several household items can serve as tick removal alternatives.
You can use a credit card with a small "v" cut to scrape the tick off your dog’s skin. Dental floss works by looping it around the tick’s mouthparts for extraction.
Some pet owners gently heat a needle near the tick’s head to encourage it to back out.
Many people also buy specialized removal tools.
Commercial tick kits often include curved forceps for difficult-to-reach areas, providing a useful alternative to household items for effective tick removal with specialized tools.
Safe Removal Techniques
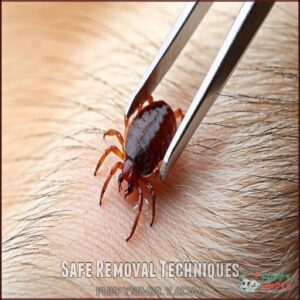
You’ll need to grasp the tick firmly with tweezers or a removal tool as close to your dog’s skin as possible, then pull straight upward with steady pressure.
Don’t twist or jerk the tick, as you might leave mouthparts behind that can cause infection and further problems for your furry friend, which can lead to infection.
Grasping The Tick
The proper grasp makes all the difference when removing ticks from your dog.
Place your tick removal tool as close to your dog’s skin as possible, aiming to secure the tick’s mouthparts.
Maintain a firm grip without squeezing the tick’s body, which could inject harmful fluids.
The angle matters too—position your tweezers or tick removal device parallel to the skin surface for maximum control and effectiveness.
A specialized tick tool can aid in this process with a specialized tool.
Pulling The Tick Straight
Pull straight up with steady pressure when removing ticks from your dog.
Hold the skin down on either side to prevent it from rising with the tick. Apply firm upward motion at a proper angle to avoid leaving embedded mouthparts.
Don’t twist or jerk during tick removal – think of it like pulling a nail straight from wood. Your tick removal tool works best with consistent, gentle force, using a steady approach to ensure safe removal.
Avoiding Common Mistakes
Now that you know how to pull correctly, let’s talk about what not to do.
Avoid squeezing ticks with your fingers, as this can inject more disease-carrying saliva into your dog.
Never try suffocation methods using petroleum jelly or nail polish—they don’t work!
Don’t burn ticks off with matches or heat, and if the head breaks off, don’t dig for it.
These tick removal methods cause more harm than good, and it’s essential to avoid them to ensure your dog’s safety and prevent further disease-carrying issues.
Removing Ticks Step by Step
You’re about to become a tick-removal expert with these simple, effective steps that’ll have your furry friend tick-free in no time.
With the right technique and a steady hand, you’ll safely remove these unwelcome hitchhikers without leaving behind any harmful parts.
Step 1: Prepare The Area
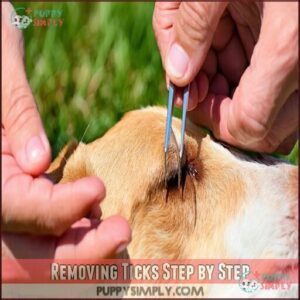
Now that you understand the right technique, let’s get set up properly. First, gather your tick removal tools and find a well-lit spot.
Put on disposable gloves to protect yourself. Have someone gently hold your dog to keep them calm.
Carefully spread your dog’s fur around the tick to fully expose it. Good lighting makes all the difference when removing ticks from dogs.
Step 2: Use The Removal Tool
Using the removal tool correctly is your ticket to success. Grasp the tick as close to your dog’s skin as possible with your fine-point tweezers or specialized tick removal device.
Apply steady pressure and pull straight upward—don’t jerk or twist unless using a specific twisting method tool.
Alternative tools like tick hooks work well too, providing excellent grasp precision during the tick removal procedure.
Step 3: Dispose of The Tick
Now that you’ve removed the tick with your tool, proper disposal is next. Never crush a tick with your bare fingers as it may release infectious material.
Here are safe tick disposal methods:
- Drop the tick into a small jar with rubbing alcohol to instantly kill it
- Wrap it tightly in clear tape for easy identification later
- Flush it down the toilet for quick elimination
- Seal it in a container if your vet might need to test it, which could involve examining the tick for further analysis.
Post Removal Care
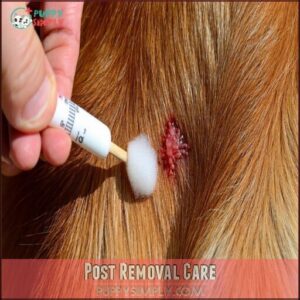
You’ll need to clean the bite area with soap and water.
Then apply a dog-friendly disinfectant to prevent infection.
Watch the area for signs of redness, swelling, or unusual behavior in your dog, which could indicate a tick-borne illness requiring veterinary attention.
Cleaning The Bite Site
Once you’ve successfully removed the tick, proper cleaning is your next priority.
Gently wash the bite site with warm, soapy water, then apply an antiseptic solution specifically safe for dogs.
Dab—don’t rub—the area with hydrogen peroxide or diluted povidone-iodine to prevent infection.
For extra irritation relief, consider dog-friendly aloe vera.
Keep the area clean until healing is complete, watching for redness that might indicate complications.
Disposing of The Tick
After successfully extracting the tick from your furry friend, proper disposal is essential for safety.
Never crush the tick with your fingers, as this can release potentially infected fluids.
Instead, submerge it in rubbing alcohol, seal it in a plastic bag, or wrap it tightly in tape before flushing it down the toilet.
For potential identification later, consider preserving the tick in a labeled, sealed container to ensure proper disposal and safe handling.
Monitoring for Infection
After removing a tick, watch the bite area closely for infection signs.
Check daily for redness, swelling, or unusual discharge around the bite site. Your dog might show lethargy, fever, or loss of appetite if something’s wrong.
Don’t ignore these warning signs – they could indicate long-term effects from tick-borne diseases. When in doubt about tick bite aftercare, vet consultation is always the safest choice.
Preventing Tick Bites
You’ll substantially reduce your dog’s chance of tick encounters by keeping your lawn trimmed short.
This simple habit can save you both the stress of tick removal and protect your furry friend from potentially dangerous tick-borne diseases, making these simple habits part of your routine can also include performing regular tick checks after outdoor adventures.
Keeping Grass Short
After cleaning the bite site, shift your focus to your yard—ticks’ favorite hideout. Keep your grass short to reduce tick habitat around your home. Mowing frequency matters when battling these tiny parasites.
One should also consider pet safe lawn fertilizer to maintain a healthy, tick-resistant lawn.
- Maintain grass height below 3 inches to discourage tick settlement
- Create a 3-foot gravel or wood chip barrier between lawns and wooded areas
- Remove leaf litter and yard debris where ticks hide
- Consider strategic weed control to minimize additional tick-friendly zones
To ensure a comprehensive approach, remember that tick habitat reduction and lawn maintenance are crucial for a tick-free environment.
Regular Dog Checks
A thorough check of your dog’s coat is your first line of defense against tick troubles.
After outdoor adventures, run your fingers through your pup’s fur daily, paying special attention to hidden areas like ears, armpits, and between toes.
Grooming impact is significant—regular brushing reveals hitchhikers before they attach.
Seasonal variation matters too; increase tick checks during warmer months when these parasites are most active, as this is a critical time for tick troubles.
Tick Borne Diseases
You’ll need to act quickly when removing ticks from your dog since these tiny parasites can transmit serious diseases like Lyme disease, ehrlichiosis, and Rocky Mountain spotted fever within 24-48 hours of attachment.
If you notice your dog showing symptoms such as fever, lethargy, or joint pain after finding a tick, it’s important to contact your veterinarian right away to discuss potential tick-borne illnesses and treatment options.
Diseases Transmitted to Dogs
Now that you’ve protected your pup, let’s talk about what those tiny hitchhikers might carry. Ticks aren’t just annoying—they’re mobile disease carriers that can leave your dog feeling under the weather.
The main tick diseases dogs face include:
- Lyme disease dog symptoms include fever, lameness, and swollen joints
- Ehrlichiosis symptoms appear within 3-6 hours of attachment, causing lethargy and decreased appetite
- Rocky Mountain Fever can become life-threatening if not treated quickly with antibiotics
These diseases are a serious concern for dog owners, and it’s essential to be aware of the symptoms to ensure prompt treatment and prevent long-term damage.
Diseases Transmitted to Humans
While you’re handling your dog’s tick situation, be aware that these tiny hitchhikers can transmit serious diseases to you too.
Lyme disease, Rocky Mountain Spotted Fever, Ehrlichiosis, Babesiosis, and Tularemia can jump from tick bite to human host.
Most cause flu-like symptoms that shouldn’t be ignored.
Quick tick removal reduces disease transmission risk, so you’re protecting both your furry friend and yourself with proper technique.
Aftercare and Monitoring
You’ll need to keep a close eye on the tick bite area for signs of infection like redness, swelling, or unusual discharge over the next few days.
If you notice your dog acting lethargic, developing a fever, or showing discomfort around the bite site, don’t wait to contact your veterinarian.
Watching for Infection Signs
Scrutinize your dog’s tick bite site daily for infection signs. Look for redness or swelling around the bite irritation, which may indicate a problem.
Monitor for unusual behavior, lethargy symptoms, or appetite changes in the days following tick removal. Some dogs become quieter or less interested in food when fighting an infection.
Record any changes in the bite appearance or your dog’s demeanor to share with your vet if needed.
Consulting a Veterinarian
While monitoring for infection signs, don’t hesitate to call your veterinarian if you notice any concerning changes.
Contact your vet immediately if your dog develops fever, lethargy, loss of appetite, or swelling around the tick bite area.
Veterinary advice is essential for proper disease diagnosis when symptoms persist more than 24-48 hours after tick removal.
Your vet can also recommend preventative medication and vaccination options to protect against future tick-borne illnesses.
Follow Up Care
After speaking with your vet, follow these ongoing steps for proper tick bite aftercare:
- Apply dog-friendly disinfecting alternatives like diluted hydrogen peroxide to prevent infection
- Monitor for signs of allergy watch, including unusual scratching or swelling
- Take preventative measures by checking the area weekly for scar prevention
- Document any changes for tracking long-term effects of the tick bite
Remember, diligent follow-up care prevents complications from tick removal dog encounters.
Frequently Asked Questions (FAQs)
Will rubbing alcohol remove a tick from a dog?
As luck would have it, rubbing alcohol won’t remove a tick from your dog.
It can actually make things worse by agitating the tick, potentially causing it to release more disease-carrying saliva.
Can I just pulled a tick off my dog?
No, don’t just pull a tick with your fingers.
Use fine-tipped tweezers or a tick removal tool, grab the tick close to your dog’s skin, and pull straight up with steady pressure.
How do you draw a tick out of a dog?
Just when you think ticks won’t budge, grab fine-tipped tweezers and grasp the tick close to your dog’s skin.
Pull straight up with steady pressure.
Don’t twist or squeeze the tick’s body, this is a critical step to avoid causing harm.
What kills ticks on dogs instantly?
You can use K9 Advantix II or permethrin-based sprays to kill ticks quickly on contact.
Oral medications like Simparica TRIO and NexGard also work fast, eliminating ticks within hours of your dog ingesting them.
How to get a tick off a dog that’s embedded?
The battle against that stubborn embedded tick isn’t rocket science.
Grasp it close to your dog’s skin with fine-tipped tweezers or a tick removal tool, then pull straight up with steady pressure.
How do you remove a tick from a dog?
Grasp the tick with fine-tipped tweezers close to your dog’s skin, then pull upward with steady pressure.
Don’t twist or jerk.
Clean the bite area afterward and monitor for signs of infection.
How to remove a tick bite?
Clean the bite area with rubbing alcohol or soap and water.
Monitor for redness or swelling. Apply antiseptic cream to prevent infection.
Watch for unusual symptoms like fever or rash in the following days.
How do you remove a tick?
Just as coincidences sometimes stick around, ticks do too.
You’ll need fine-tipped tweezers to grasp the tick close to the skin’s surface.
Pull upward with steady pressure until it releases its grip.
What happens if you remove a tick from a dog?
After removing a tick, you’ll need to clean the bite area and monitor it for infection.
Your dog might experience temporary irritation, but they’ll usually heal quickly with proper care and attention.
How do you get a tick out of a dog’s mouth?
Like defusing a ticking bomb, removing a tick from your dog’s mouth requires steady hands.
Use fine-tipped tweezers, gently grasp the tick near the skin, and pull straight out with steady pressure.
Clean afterward.
Conclusion
Imagine this: your furry friend nuzzling your hand, tick-free and happy.
Learning how to pull a tick off a dog properly is an essential skill for any pet owner.
With the right tools and technique, you’ll remove these pesky parasites safely, reducing disease risks for both of you.
Remember, stay calm, grasp close to the skin, and pull straight up.
Regular checks during tick season will keep your loyal companion healthy and your bond even stronger.
This process will help ensure your dog remains happy and healthy.


