This site is supported by our readers. We may earn a commission, at no cost to you, if you purchase through links.
 Cutting your dog’s nails doesn’t have to be a wrestling match. Start by gathering nail clippers (scissor-type for small dogs, guillotine for medium dogs), styptic powder, and treats.
Position your dog comfortably with good lighting. Hold their paw gently and identify the pink quick inside each nail—you’ll cut only the white tip beyond it.
Make quick, confident cuts at a 45-degree angle, rewarding with treats between nails. If you nick the quick, apply styptic powder immediately.
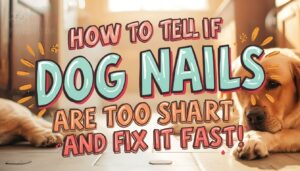
Most dogs need trimming every 3-4 weeks, but the secret lies in making it stress-free from the start, and doing it with good lighting.
Table Of Contents
- Key Takeaways
- Preparing for Dog Nail Trimming
- How to Cut Dog Nails Step by Step
- Getting Your Dog Comfortable
- Safe Grinding Techniques for Dog Nails
- Preventing Stress During Nail Trimming
- Addressing Accidents and Cut Quicks
- Maintaining Healthy Dog Nails
- Frequently Asked Questions (FAQs)
- What are the different types of nail clippers and grinders?
- How do I know if I’m cutting my dog’s nails too short?
- What should I do if I cut my dog’s nail too short and it starts bleeding?
- How often should I trim my dog’s nails?
- What if my dog has black nails only?
- Can I use human nail clippers instead?
- How do I trim extremely overgrown nails?
- What about dogs with missing dewclaws?
- Should I sedate my aggressive dog first?
- Conclusion
Key Takeaways
- Start with proper preparation – You’ll need the right clippers (scissor-type for small dogs, guillotine for medium), styptic powder for accidents, good lighting, and high-value treats to create positive associations.
- Master the cutting technique – You’ll cut at a 45-degree angle, trimming only the white tip beyond the pink quick, making quick, confident cuts while rewarding your dog between each nail.
- Take time to build comfort – You’ll need patience to gradually introduce tools, use positive reinforcement with treats and praise, and go slowly with anxious dogs rather than forcing the process.
- Maintain a regular schedule – You’ll trim every 3-4 weeks for most dogs, watch for clicking sounds on floors as a sign it’s time, and seek professional help if your dog becomes too stressed or aggressive.
Preparing for Dog Nail Trimming
Proper preparation transforms nail trimming from a stressful ordeal into a manageable routine for both you and your dog.
Having the right tools ready and creating a calm environment sets you up for success before you even touch your dog’s paws.
Gathering Essential Tools
Before trimming your dog’s nails, gather these essential tools: nail clippers (guillotine or scissor-type), styptic powder for bleeding accidents, treats for positive reinforcement, and nail files for smoothing rough edges.
Dog grinders offer an alternative to traditional pet nail clippers.
Having everything ready prevents stress and ensures safe, efficient nail trimming sessions.
It’s also vital to choose the right nail clipper types for your dog’s specific needs, which is crucial for a successful and efficient trimming experience.
Choosing The Right Nail Clippers or Grinder
Your clipper choice determines success from the start. Different dog sizes need specific tools for safe, effective trimming.
Here are the three main clipper types to examine:
- Scissor clippers – Best for small dogs with thin nails, offering precise control and comfortable grip for detailed work
- Guillotine clippers – Ideal for medium dogs with round nails, featuring a hole mechanism that guides nail positioning during cuts
- Nail grinders – Perfect for thick nails and nervous dogs, providing gradual filing action with less risk of quick injury
Choose clippers made from stainless steel or high-quality materials that won’t dull quickly. Your dog’s size and temperament should guide your selection.
When selecting the right tool, consider the importance of proper nail clipper maintenance for effective dog nail care.
Creating a Calm and Safe Environment
Your dog’s comfort starts with the right setup.
Choose a well-lit room with non-slip flooring where your dog feels secure.
Good lighting helps you see nail anatomy clearly, while stable footing prevents slipping.
Keep styptic powder nearby for safety.
A calm space reduces stress and makes nail trimming easier for both of you, promoting a calm environment.
Restraining and Positioning Your Dog
Position your dog with their back facing you to maintain better control during nail trimming calmness.
Use gentle holding techniques while supporting the paw firmly but not tightly.
For nervous dogs, try calming techniques like offering treats or having a partner provide comfort.
Proper dog positioning and restraint methods guarantee both safety and success during your dog nail clipping guide sessions.
Mastering nail trimming techniques is vital for a stress-free experience.
How to Cut Dog Nails Step by Step
Now you’re ready to trim your dog’s nails with confidence and precision.
The actual cutting process requires careful attention to nail anatomy and proper technique to keep your pup safe and comfortable.
Examining Nail Anatomy and The Quick

Understanding your dog’s nail anatomy prevents painful accidents during trimming.
Knowledge of nail anatomy is your dog’s best protection against painful trimming mistakes
Each nail contains a hard keratin shell surrounding the quick—a pink core housing blood vessels and nerves.
Here’s what you need to identify:
- White nails show the pink quick clearly through translucent keratin
- Dark nails reveal a grayish core when viewed from underneath
- Chalky white ring appears at the cut surface when approaching the quick
- Safe cutting zone exists in the curved white tip beyond the quick
The quick grows longer in untrimmed nails, making future cuts riskier.
Regular trimming causes the quick to recede naturally over time.
Identifying When Nails Need Trimming

Now that you understand nail anatomy, look for specific signs your dog’s nails need attention.
Check nail length regularly to maintain paw health and prevent nail damage.
Listen for clicking sounds on hard floors—this means it’s time for dog nail trimming.
You’ll also notice if nails extend past toe pads when your dog stands normally.
| Visual Signs | Audio Cues | Physical Indicators |
|---|---|---|
| Nails touch ground | Clicking on floors | Snagging on carpets |
| Extend past pads | Tapping sounds | Curled nail shape |
| Visible nail growth | Scratching noises | Paw licking/chewing |
| Dark/light nail color | Walking sounds | Changed gait pattern |
Most dogs need trimming every 3-4 weeks, though nail growth varies.
Active dogs on concrete surfaces may need less frequent nail trimming frequency adjustments.
Step-by-Step Nail Clipping Instructions

How do you actually cut your dog’s nails without turning it into a wrestling match?
Start with nail preparation by extending each nail gently, squeezing the toe’s top and bottom.
Position dog nail clippers perpendicular to the nail’s curve for clipper safety.
Cut vertically at a 45-degree angle, following proper trimming techniques and nail anatomy. Begin at the tip, making small cuts to avoid the pink quick inside.
Clipping Dewclaws Safely

Don’t forget the dewclaw—that fifth nail tucked on your dog’s inner leg.
Many owners skip this one, but dewclaw trimming requires the same careful approach.
Hold your dog’s leg steady and locate the dewclaw higher up on the paw.
Use your dog nail clippers to trim just the sharp tip, watching for the quick.
Regular dewclaw care prevents painful ingrown nails since these claws don’t touch the ground naturally.
Inspecting and Filing Nail Edges

After each clip, inspect the cut nail for rough edges or uneven surfaces.
Grind or file these sharp edges using gentle filing techniques to prevent snagging on carpets or scratching family members.
Proper nail shaping guarantees comfort while walking.
Check nail anatomy for splits or cracks that need attention before finishing your nail trimming guide.
Getting Your Dog Comfortable

Getting your dog comfortable with nail trimming takes patience and the right approach.
Start by introducing the tools gradually and using treats to create positive associations before you ever attempt to clip a single nail.
Introducing The Nail Clipper or Grinder
Start with baby steps when introducing your nail clippers or grinder.
Let your dog sniff and investigate the tool without any pressure.
Turn on grinders at a distance so they hear the sound first. Hold the clipper near their paws without cutting anything.
This gradual approach builds trust and prevents future nail trimming battles.
Using Positive Reinforcement
Transform nail trimming into a positive experience with consistent reward systems.
Offer treats immediately after touching each paw, creating nail trimming positive association through positive feedback.
Your gentle touch combined with praise builds canine motivation while maintaining nail trimming calmness.
This approach establishes effective nail trimming rewards, making nail trimming acclimation smoother.
A calm environment supports positive reinforcement throughout the process.
Gradual Progression for Anxious Dogs
For particularly nervous dogs, patience breaks barriers that force can’t. Building nail trimming confidence requires baby steps that honor your dog’s emotional state.
Gradual progression steps for anxious dogs:
- Day 1-3: Let your dog sniff and investigate the clippers without any pressure
- Day 4-6: Gently touch paws while offering treats, no clipping involved
- Day 7-9: Hold one nail briefly, then immediately reward with high-value treats
- Day 10-12: Clip just one nail per session, celebrating like you’ve won the lottery
- Week 3+: Gradually increase to 2-3 nails as your dog’s comfort grows
This nail desensitization approach transforms nail trimming anxiety into calm acceptance. Your gentle trimming methods create positive associations that last a lifetime.
Acclimating Puppies to Nail Care
Since puppies adapt more easily than adult dogs, early training sets the foundation for lifelong nail care success.
Begin puppy socialization by gently handling their paws daily, making nail handling a natural part of your routine.
Use paw desensitization techniques with treats and praise, gradually introducing clippers without cutting.
These calming techniques reduce dog nail trimming anxiety and establish positive associations for puppy nail care.
Safe Grinding Techniques for Dog Nails
Nail grinders offer a gentler alternative to clippers, smoothing edges while reducing the risk of accidentally cutting the quick.
You’ll need to master proper technique and positioning to keep your dog comfortable during the grinding process.
Selecting a Safe Grinding Tool

Choose grinder safety features over flashy designs.
Diamond bits prevent nail splintering better than standard sandpaper drums.
Look for protective guards, quick sensors, and overheat protection.
Whisper-quiet models under 50 decibels won’t spook nervous dogs.
Multiple speed settings let you adjust for thick or thin nails.
Cordless designs eliminate tripping hazards during pet grooming sessions.
When selecting a grinder, consider the nail grinder guide to guarantee the best results for your dog’s nail type.
Supporting The Dog’s Toe During Grinding

Hold your dog’s paw firmly but gently, extending the toe by squeezing the top and bottom.
Keep fur out of the way for clear nail visibility. Position the paw securely to prevent sudden movements during grinding.
Your steady grip provides essential toe support while maintaining the proper nail angle. This paw positioning guarantees grinding safety and maximizes dog comfort throughout the process, ensuring a smooth experience with proper nail angle.
Proper Grinding Technique

Apply steady, controlled pressure with your nail grinder while moving in smooth, consistent motions.
Keep grinding sessions brief to prevent overheating the nail and your dog’s discomfort. Work at a 45-degree angle, matching the nail’s natural curve.
Stop frequently to check progress and avoid grinding too much at once, which protects the quick from accidental exposure.
Understanding proper nail grinding techniques is essential for safe and effective dog nail care.
Smoothing Sharp Nail Edges

After grinding, rough edges need attention.
Nail filing removes sharp points that could snag on carpet or scratch skin.
Use gentle circular motions with a fine-grit file or your grinder’s lowest setting.
Edge smoothing prevents splits and makes nails comfortable for both you and your dog.
Proper nail buffing creates smooth, rounded tips through careful claw shaping techniques, ensuring edge smoothing is effective.
Preventing Stress During Nail Trimming

Nail trimming doesn’t have to be a wrestling match between you and your dog.
The key to stress-free sessions lies in patience, preparation, and making the experience positive for your furry friend.
Familiarizing Your Dog With Tools
Introduction wins the day in the area of dog nail trimming tools. Start by placing your nail clippers or nail grinder near your dog’s favorite resting spot for several days. Let them sniff and investigate these dog grooming tools naturally.
Next, practice gentle paw handling while the clippers sit nearby. This clipper desensitization process helps anxious dogs accept the tools.
Consider using calming aids like favorite toys during handle training sessions to create positive associations with your dog nail trimming tools. This approach is part of a broader dog grooming strategy that includes gradual introduction to the tools, making the process less stressful for the dog, and ultimately leading to successful nail trimming.
Using Treats and Praise
Reward systems transform nail trimming from stressful ordeal into positive experience.
Offer high-value treats throughout the process—before, during, and after each nail.
Praise methods like "good dog" paired with treat motivation create nail trimming positive association.
Establish calming techniques using consistent praise methods and nail trimming incentives.
This positive reinforcement builds nail trimming calmness, making your nail trimming routine establishment successful and stress-free.
Understanding nail trimming anxiety is essential for a smooth and safe dog nail cutting experience.
Distraction Methods for Nervous Dogs
Beyond positive rewards, distraction methods help nervous dogs forget their anxiety about nail trimming.
Spread peanut butter on a wall or lick mat—this calming aid keeps your dog focused while you work.
Take nail trimming breaks between toes, allowing gentle touch and slow introduction of clippers, creating a positive association through distraction rather than force, which is a key part of distraction methods.
Addressing Accidents and Cut Quicks

Accidents happen, even to experienced dog owners, so don’t panic if you accidentally cut the quick during nail trimming.
Having the right supplies and knowing how to respond quickly will keep your dog safe and help maintain their trust in future grooming sessions.
Recognizing Signs of Cutting The Quick
Despite your best preventive efforts, accidents happen. Recognizing when you’ve cut the quick helps you respond swiftly and effectively. Understanding nail anatomy and quick identification becomes necessary when bleeding control and pain recognition are needed.
Watch for these immediate signs:
- Sudden bleeding from the nail tip with bright red blood
- Vocal responses like yelping, whining, or sharp barks
- Paw withdrawal or limping as your dog avoids pressure
- Visible pink or red dot at the nail’s center, especially in light nails
Your dog’s reaction tells the story – they’ll often pull away instinctively when nail sensitivity kicks in. Quick identification in dark nails requires extra attention to behavioral cues since visual confirmation proves challenging. To minimize risks, it’s necessary to understand nail quick care and take preventive measures.
Using Styptic Powder to Stop Bleeding
When you accidentally cut the quick, stay calm and act quickly.
Apply styptic powder directly to the bleeding nail using gentle pressure with a cotton ball or clean cloth.
The powder works by contracting blood vessels and promoting clotting for effective bleeding control.
Hold for 10-15 seconds until bleeding stops completely, which is a crucial step for effective bleeding control.
Alternatives to Styptic Powder
When styptic powder isn’t available, common household items work effectively for bleeding control.
Cornstarch or flour create clotting by absorbing blood and promoting coagulation. Bar soap pressed firmly against the nail also stops bleeding through its waxy compounds.
Ice wrapped in cloth reduces blood flow while numbing pain.
These Pet First Aid alternatives handle nail trimming bleeding solutions until proper Wound Care supplies arrive, utilizing effective methods for bleeding control.
Comforting Your Dog After an Accident
After using styptic powder or flour to stop the bleeding, your dog needs emotional comfort and stress relief.
Stay calm yourself—dogs pick up on your energy, and speak in soothing tones to help calm them down.
Offer their favorite treats as positive reinforcement and give gentle pets and praise to rebuild trust.
This calming approach helps maintain your dog’s confidence for future nail trimming sessions and supports proper accident response.
Maintaining Healthy Dog Nails

Knowing when and how often to trim your dog’s nails prevents painful overgrowth and keeps their paws healthy.
Regular nail maintenance protects your dog from infections, joint problems, and walking difficulties that come with neglected claws.
Recommended Trimming Frequency
Most dogs need nail trimming every 3-4 weeks, but your dog’s lifestyle determines the ideal schedule.
Active pups on pavement wear nails naturally, stretching intervals to 6-8 weeks.
Trimming Schedules Based on Activity:
- Indoor/sedentary dogs: Every 3 weeks
- City dogs on pavement: Every 4-6 weeks
- Active outdoor dogs: Every 6-8 weeks
- Puppies: Every 1-2 weeks
- Senior dogs: Every 2-4 weeks
Regular trimming prevents health implications like joint stress and infections.
Signs of Overgrown Nails
Telltale signs reveal when your dog’s nails need attention.
Watch for clicking sounds on hard floors, which indicate excessive length.
Look for nail curling under paw pads, causing paw pain and potential infection.
Check if nails extend past toe pads when standing.
Notice nail damage like splitting or quick exposure, which creates nail fracture risks and serious dog nail problems requiring immediate dog nail maintenance.
Natural Nail Wear and Outdoor Activity
Active outdoor walking naturally files your dog’s nails against pavement and concrete surfaces.
Dogs with higher activity levels experience more nail wear, reducing trimming frequency.
Regular walks on hard surfaces promote nail hardening and paw health.
However, dogs primarily walking on soft grass or indoor surfaces need more frequent nail filing through manual trimming.
Understanding nail growth patterns is essential for effective dog nail care and maintenance.
Consequences of Neglected Nail Care
Neglecting nail care creates serious health risks for your dog.
Overgrown nails don’t just look bad—they cause real pain and lasting joint damage
Overgrown nails cause constant pain, forcing unnatural posture changes that lead to arthritis and joint problems.
Long nails easily catch and tear, causing nail fractures and bleeding.
When nails curl into paw pads, they create open wounds prone to paw infections.
These complications often require expensive veterinary treatment.
When to Seek Professional Help
When your dog becomes a wrestling champion during nail trimming sessions, it’s time to wave the white flag and seek professional grooming or vet assistance. Some battles aren’t worth fighting solo.
- Severe anxiety or aggression – Your dog turns into a furry tornado despite your best efforts
- Multiple nail trimming mistakes – You’ve hit the quick repeatedly, causing dog nail bleeding
- Infected or damaged nails – Swelling, discharge, or splits requiring veterinary advice or nail surgery
- Physical limitations – Arthritis, size differences, or your own mobility issues make safe handling impossible
Professional groomers handle nail trimming for anxious dogs daily, while emergency care covers accidents. Pet insurance often helps with costs.
Frequently Asked Questions (FAQs)
What are the different types of nail clippers and grinders?
Like choosing the right brush for your masterpiece, selecting nail clippers matters.
You’ll find guillotine-style clippers for precise cuts, scissor-type for thick nails, and rotary grinders that smooth edges while trimming—each tool serving different paw sizes and owner preferences.
How do I know if I’m cutting my dog’s nails too short?
Watch for the pink quick inside light-colored nails—stop clipping before reaching it.
For dark nails, look for the chalky white ring and stop there.
If you see bleeding, you’ve cut too short.
What should I do if I cut my dog’s nail too short and it starts bleeding?
Apply immediate pressure with styptic powder or cornstarch to stop bleeding.
Stay calm—this happens to experienced groomers too.
The quick will heal within minutes, and your dog will be fine.
How often should I trim my dog’s nails?
Despite thinking you can skip regular trims, you’ll trim your dog’s nails every 3-4 weeks. Active dogs on pavement need less frequent cuts, while indoor pups require consistent monthly maintenance.
What if my dog has black nails only?
Black nails require extra caution since you can’t see the pink quick inside.
Trim tiny amounts at a time, stopping when you see a chalky white ring.
This indicates you’re approaching the quick and should stop cutting.
Can I use human nail clippers instead?
Why risk your dog’s comfort when proper tools exist?
Human nail clippers aren’t designed for dogs’ thick, curved nails and can cause splitting, crushing, or painful tears.
Dog-specific clippers provide clean, safe cuts that protect your pup’s paws.
How do I trim extremely overgrown nails?
Trim extremely overgrown nails gradually over several weeks.
Start by clipping just the curved tips, then wait a few days before trimming more.
This lets the quick recede naturally, preventing painful bleeding and making future maintenance easier.
What about dogs with missing dewclaws?
Dogs with missing dewclaws actually make nail trimming simpler.
You’ll focus on the four main nails per paw instead of five.
Follow the same technique—trim at a 45-degree angle, avoid the quick, and reward with treats.
Should I sedate my aggressive dog first?
Never sedate your aggressive dog yourself—consult your veterinarian first. They’ll recommend safe sedation options or suggest professional grooming services that specialize in handling difficult dogs safely.
Conclusion
Studies show that 85% of dogs experience anxiety during nail trimming, yet regular maintenance prevents painful splitting and infections.
Mastering how to cut dog nails transforms this necessary task from stressful ordeal into routine care.
With proper tools, patience, and positive reinforcement, you’ll keep your dog’s nails healthy while strengthening your bond.
Remember that consistent practice makes perfect—both you and your dog will become more comfortable with each session.
Professional help remains available when needed, and it’s essential for routine care to prevent complications.