This site is supported by our readers. We may earn a commission, at no cost to you, if you purchase through links.

When you know how to build a dog house correctly, you create a space that regulates temperature, sheds water, and stands up to weather for years. The process involves more than nailing boards together—you’ll need to calculate dimensions based on your dog’s measurements, construct an elevated base that prevents moisture damage, and add ventilation that balances airflow without creating drafts.
With the right approach, you can build a durable structure that keeps your dog comfortable through every season.
Table Of Contents
- Key Takeaways
- How to Plan Your Dog House Build
- Preparing The Dog House Foundation
- Step-by-Step Dog House Construction
- Customizing for Comfort and Safety
- Maintaining and Caring for Your Dog House
- Frequently Asked Questions (FAQs)
- What are some good insulation materials to use?
- Should I elevate the dog house off the ground and if so, how?
- What is the ideal door size for my dog?
- What kind of flooring works best?
- Are there any safety concerns I should be aware of when building?
- What permits or regulations apply to dog houses?
- How do you move a dog house safely?
- Can multiple dogs share one dog house?
- Whats the best flooring material for inside?
- How do you train dogs to use it?
- Conclusion
Key Takeaways
- Proper dog house dimensions start with measuring your dog’s nose-to-flank and top-of-head-to-toe, then adding clearance to ensure comfort without wasting heat in winter or trapping it in summer.
- An elevated base raised at least 7 inches with pressure-treated lumber, gravel drainage, and a moisture barrier prevents rot, keeps the interior dry, and can lower summer temperatures by up to 20°F.
- Strategic ventilation placement at the roof peak opposite the door creates cross-airflow that regulates humidity and temperature without creating drafts that compromise warmth.
- Regular maintenance including weekly cleaning, annual weatherproofing checks, and seasonal bedding changes prevents costly repairs and health issues while extending the structure’s lifespan beyond a decade.
How to Plan Your Dog House Build
Before you start building, it’s important to think through a few key decisions. The choices you make now will shape how your dog’s house looks and works.
Here’s what you’ll want to think about before you pick up your tools.
Choosing The Right Size and Dimensions
Ever wonder how dog house size really impacts comfort? Start with Breed Sizing—measure your dog’s nose-to-flank and top-of-head-to-toe. Use the A-B-C method for dog house dimensions and space, ensuring proper Interior Clearance. Insulation Needs and Ventilation Standards matter, too. A well-sized house keeps your dog cozy, safe, and happy, no matter the breed. These charts often use imperial measurements for accuracy.
Selecting a Location (Sun, Shade, Drainage)
Once you’ve nailed down the right size, picking your dog house location makes all the difference. Look for shade availability—trees or a shade cloth keep sunlight exposure from turning the shelter into an oven. Raise the base for drainage solutions, and set it away from wind and noisy spots.
A key consideration is ensuring proper ventilation airflow to regulate temperature. Good weather protection and practical accessibility mean your dog’s outdoor shelter stays safe and comfortable.
Picking a Dog House Style and Features
Now that you’ve picked your spot, it’s time to weigh style considerations and dog house features. A-frame designs shed rain well and suit most climates, while igloo styles block wind for colder areas. Loft-style or box designs offer extra space or storage.
Think about size implications, climate suitability, and material selection—each choice shapes your dog’s comfort and daily experience.
Gathering Materials and Tools Needed
With your style and features sorted, it’s time to compare wood vs. plastic for dog house materials. Wood offers natural insulation, while plastic is lightweight and waterproof.
Your tools list should include a saw, drill, and essential safety gear. Store building materials dry and organized, and keep tools sharp—good tool maintenance saves headaches and helps with cost-benefit analysis down the line.
Preparing The Dog House Foundation
Getting the foundation right is key to a sturdy, comfortable dog house. Before you start building, you’ll want to think about how the base addresses weather, wear, and your dog’s needs.
Here are some options for a safe and lasting enclosure.
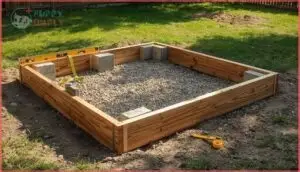
Building an Elevated, Weather-Resistant Base
Did you know a raised base can keep your dog’s house up to 20°F cooler in summer? Here’s how to build an elevated, weather-resistant base:
- Use a pressure-treated lumber base for longevity.
- Lay 4 inches of gravel for drainage.
- Add a moisture barrier for protection.
- Raise at least 7 inches.
- Drill drainage holes for dryness.
Selecting Durable and Safe Materials
When choosing dog house materials, look for pressure-treated lumber and exterior screws—they hold up against rot and pests. Metal roofing materials bring top-tier weather resistance and cut down on maintenance needs.
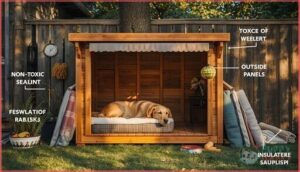
For dog safety, avoid toxic paints and sealers; zero-VOC finishes are best. Cedar resists fleas, while HDPE panels offer insulation options and won’t corrode, keeping your build sturdy and safe.
Ensuring Proper Drainage and Insulation
Even a sturdy dog house won’t keep your pet dry and warm without smart drainage and insulation. Slope the floor toward a trench drain placement for easy runoff—this prevents puddles and keeps bedding fresh. Pick insulation with a high R-value for your climate, and remember, regular drainage maintenance is key for hygiene. Weatherproofing matters more than fancy dog house roofing options.
- Slope floor ¼ inch per foot toward drain
- Use rigid foam or reflective insulation for best R-value
- Inspect and clean trench drains regularly
Step-by-Step Dog House Construction
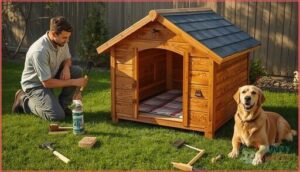
Now that your foundation is ready, it’s time to put the main structure together. Each step builds on the last, so you’ll see your dog house take shape quickly.
Here’s how you’ll tackle the frame, walls, roof, and finishing touches.
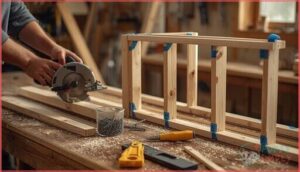
Cutting and Assembling The Frame
Ever notice how lumber warping can throw off your measurements? That’s why cutting and assembling walls as you go keeps things accurate.
Use pocket holes for strong joints, mitering corners for clean edges, and add corner braces for stability.
Stick to step-by-step instructions, label your frame pieces, and use wood screws—assembly timing matters when roof framing comes next.
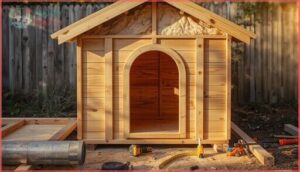
Adding Walls, Roof, and Door
Imagine this: wall paneling clicks together like puzzle pieces, speeding up dog house construction and saving you headaches. Secure each front wall with corner studs for stability, then add roof insulation—your dog’s comfort depends on it.
Door sizing matters; keep it snug for warmth, using weatherproofing materials around the frame.
Safety checks? Sand edges and hide fasteners, following step-by-step instructions.
Installing Windows or Vents for Ventilation
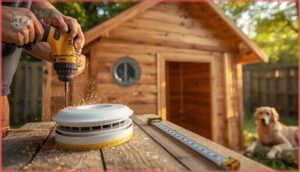
Good airflow isn’t just a luxury—it’s a lifesaver for your dog house design. Proper vent placement at the roof peak promotes ideal air exchange rates and humidity control, protecting your pup’s health.
For step-by-step instructions, remember:
- Use a 3-inch hole saw for vents
- Install dryer vent covers
- Position opposite the door for cross-ventilation
- Secure wiring for safety measures
Applying Exterior Weatherproofing
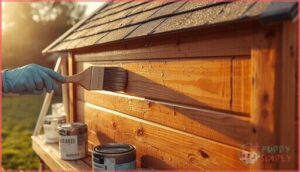
Now that ventilation’s sorted, it’s time to shield your build from the elements. Use exterior paint or vinyl siding for walls—these boost coating performance and resist mold. Asphalt roofing shingles offer solid protection, while raised bases improve insulation efficiency.
For weather conditions that change fast, flexible sealants around joints keep moisture out. Careful material selection means fewer repairs and longer-lasting comfort.
Customizing for Comfort and Safety
Once your dog house is built, it’s time to make it truly comfortable and safe for your pup. There are a few smart ways you can tailor the space to suit your dog’s needs.
Let’s look at some options that add extra comfort and protection.
Insulating for Extreme Temperatures
When you’re facing extreme climates, layering insulation materials with solid R-value metrics is key to dog comfort. Use rigid foam, foil-faced bubble wrap, or mineral wool for dog house insulation and weatherproofing. Add moisture barriers to prevent dampness. Keep a ventilation balance—seal cracks, but allow airflow.
These insulated dog house options help regulate temperature, making your dog house fit for different climates.
Adding Interior Bedding and Accessories
After insulating, focus on smart bedding and accessories to meet your dog’s needs. The right dog bed bolsters joints and sleep quality, while temperature-regulation keeps things comfy all year. Tidy up with washable options, and jazz things up with these:
- Orthopedic mat
- Cooling layer
- Chew-proof cover
- Dog toys
- Machine-washable liner
Comfort and hygiene both matter.
Installing Dog House Doors and Flaps
Once bedding’s in place, focus on your dog house door—this small detail makes a big difference. Compare Door Material Options: insulated plastic cuts drafts, while aluminum stands up to chewers. Consider Installation Cost Factors and look for Security Enhancements if wildlife’s a concern.
Weatherproofing Techniques and energy efficiency features, like magnetic seals, keep things cozy year-round—building instructions and dog house plans will lay it all out.
Decorating and Personalizing The Exterior
After you’ve secured the door, turn your attention to the dog house exterior. Choose zero-VOC exterior paint in colors that match your home—52% of builds now coordinate style with main houses.
Add a custom nameplate or themed exteriors like cottage or cabin looks. Landscaping features, weather-resistant trim, and material selection complete the design, blending function with curb appeal.
Maintaining and Caring for Your Dog House
Building your dog house is just the beginning—keeping it in good shape is what makes it a safe, comfortable home for years to come.
Regular upkeep prevents small problems from turning into costly repairs and keeps your dog healthy and happy. Let’s walk through the maintenance tasks that’ll protect your investment and your pup.
Regular Cleaning and Inspection
Your dog house needs regular attention to protect your dog’s health and comfort. Animal welfare guidelines recommend weekly cleaning to control bacteria, with deep monthly scrubs of the dog house interior addressing mold and pests. This routine greatly impacts pet health and dog care quality.
- Wash dog bowls daily with hot, soapy water
- Remove waste and leftover food immediately
- Check for damage, cracks, or moisture weekly
- Use pet-safe cleaning methods like vinegar solutions
Maintenance costs average $50–$100 yearly, but proper cleaning intervals meet dog needs while preventing costly health issues down the road.
Repairing Damage and Weatherproofing
When you spot a leak in your dog house roof or notice siding damage, act fast to prevent bigger problems. Minor repairs—fixing weathered shingles, sealing gaps—usually cost $50 to $300.
Focus on rot prevention through proper seam sealing and reapplying waterproof stain annually.
Check outdoor dog house insulation for moisture damage, especially around joints where your dog shelter meets the ground.
Seasonal Upkeep for Longevity and Comfort
Think of seasonal upkeep like rotating your tires—it keeps everything running smoothly year-round. Your DIY dog house needs different care as weather shifts to maintain proper insulation and temperature regulation in your outdoor dog house.
- Replace bedding every 1–2 weeks in cold, wet months to prevent mold and maintain warmth
- Adjust ventilation openings seasonally to balance airflow and avoid condensation buildup
- Inspect monthly for pest habitats, especially during spring and fall transitions
- Check for seasonal hazards like cracked weatherproofing or blocked drainage before extreme weather hits
Frequently Asked Questions (FAQs)
What are some good insulation materials to use?
Insulation makes all the difference between a freezing icebox and a cozy den.
You’ll want foam boards with R-5 values for extreme climates, fiberglass for budget builds, or natural materials like straw for eco-friendly options.
Should I elevate the dog house off the ground and if so, how?
Yes, you should raise your dog house one to two inches off the ground. This prevents moisture damage, improves airflow, and deters pests.
Use treated lumber, concrete blocks, or wooden pallets for a stable base.
What is the ideal door size for my dog?
Your dog’s door height should clear their shoulders by 1 to 2 inches. Measure the door width 2 inches wider than their chest. Larger dog breeds need taller openings, while small breeds require scaled-down dimensions.
What kind of flooring works best?
You’ll want flooring that combines thermal insulation with damage resistance. Sealed concrete, rubber mats, or vinyl work well for dog comfort and hygienic properties, while pressure-treated lumber base panels provide durability and proper elevation.
Are there any safety concerns I should be aware of when building?
Every year, over 53,600 electrical fires strike U.S. homes.
When building, watch for material toxicity, structural integrity issues, climatic hazards, physical hazards, and electrical risks—your dog house safety depends on protective measures that guarantee proper dog protection and care.
What permits or regulations apply to dog houses?
Most jurisdictions offer permit exemptions for small pet shelters under 120 square feet. However, your canine shelter must meet enclosure standards for weather protection, proper ventilation, and sanitation regulations to guarantee safe dog protection.
How do you move a dog house safely?
Moving a portable dog house isn’t a walk in the park. Start with weight assessment, use ergonomic lifting techniques, and employ mechanical aids like dollies.
Proper safety measures and injury prevention keep your back healthy during mobile dog house construction.
Can multiple dogs share one dog house?
Multiple dogs can share one dog house if you account for space requirements and behavioral compatibility. Calculate at least 6-8 square feet per medium dog, but watch for resource guarding and disease transmission risks.
Whats the best flooring material for inside?
Rubber flooring wins for material durability and cleaning ease, lasting 15-20 years with excellent insulation value. Vinyl offers a cost-effective alternative.
Skip carpet—it traps odors and moisture, compromising dog safety.
How do you train dogs to use it?
Start with initial outings and lure techniques using treats to create positive associations.
Gradual acclimation reduces anxiety—let your dog explore the dog house at their pace, rewarding dog comfort to build confidence in their new dog shelter.
Conclusion
A dog house isn’t just four walls and a roof—it’s your dog’s personal retreat from the storm. When you know how to build a dog house with proper ventilation, elevated floors, and weatherproofing, you’re giving them more than shelter.
You’re creating a space where they’ll willingly rest during summer heat and winter cold. The construction techniques you’ve learned here will keep that structure standing strong, season after season, protecting what matters most.
- https://www.princegeorgescountymd.gov/sites/default/files/media-document/dcv95_proper-shelter-for-your-dog-pdf.pdf
- https://www.homedepot.com/c/ah/how-to-build-a-diy-dog-house/9ba683603be9fa5395fab90ee228d32
- https://www.cabq.gov/pets/documents/awa-dog-house-version-1-3.pdf
- https://www.homeadvisor.com/cost/handyman/build-a-dog-house/
- https://www.petscare.com/news/faq/how-many-2x4-do-i-need-for-a-dog-house

