
This site is supported by our readers. We may earn a commission, at no cost to you, if you purchase through links.

Most dog houses fail the dog, not the build. They’re too small to turn around in, too hot in summer, too drafty in winter — and the dog ends up sleeping on the couch anyway.
Getting the size and structure right from the start is what separates a shelter your dog actually uses from one that becomes lawn furniture. That means taking real measurements, choosing materials that hold up to weather, and building a foundation that keeps moisture out.
What follows is a straightforward process that works for any breed, any size — from a compact beagle to a full-grown Great Dane.
Table Of Contents
- Key Takeaways
- Plan The Right Dog House Size
- Choose Location, Style, and Materials
- Build The Raised Foundation
- Assemble Walls, Roof, and Door
- Weatherproof, Insulate, and Maintain
- Frequently Asked Questions (FAQs)
- What are some good insulation materials to use?
- Should I elevate the dog house off the ground and if so, how?
- What is the ideal door size for my dog?
- What kind of flooring works best?
- Are there any safety concerns I should be aware of when building?
- What permits or regulations apply to dog houses?
- How do you move a dog house safely?
- Can multiple dogs share one dog house?
- Whats the best flooring material for inside?
- How do you train dogs to use it?
- Conclusion
Key Takeaways
- Size your dog house by adding 18 inches to body length and 12 inches to body width, then set the door height at 75% of your dog’s shoulder height to guarantee a snug, stress-free fit.
- Raise the foundation 4 to 6 inches off the ground with a moisture barrier and gravel layer underneath, because that gap is what keeps rot, pests, and cold from creeping in.
- Use non-toxic, low-VOC exterior paint and seal every wood surface before your dog moves in, then wait 7 to 14 days for it to fully cure so your dog isn’t breathing harsh chemicals.
- Cut ventilation holes on opposite walls and pack every wall cavity with insulation, because airflow and thermal protection together are what turn a wooden box into a shelter your dog will actually choose.
Plan The Right Dog House Size
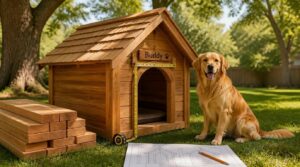
Getting the size right is the most important thing you’ll do before cutting a single board. A house that’s too small leaves your dog cramped, and one that’s too large won’t hold heat when the weather turns cold. Here’s what you need to measure and plan before you build.
Measure Your Dog Correctly
Before you cut a single board, grab a flexible tape measure and get your dog standing square on flat ground. Using a flexible fabric measuring tape will help you achieve the most accurate results.
Measure chest girth behind the front legs — snug but not tight. Then find the withers height from floor to shoulder. Take each reading twice and average them. Consistent numbers now mean a house that actually fits later.
Once you have those measurements, cross-check them against brand-specific harness sizing guides — manufacturers vary more than you’d expect.
Calculate Length and Width
Now that you have your dog’s measurements, put them to work. Add 18 inches to body length for the floor’s total length, and 12 inches to body width for the total width.
To double-check your floor space, multiply those two numbers — length times width gives you the area. A snug fit causes stress; these margins keep your dog comfortable.
Size The Doorway Safely
The doorway height should be 75% of shoulder height, and width needs to clear the shoulder blades by 2 to 4 inches. Too narrow, and your dog will scrape through every time.
Keep the threshold flush or beveled — no raised lips that catch paws. A high-contrast frame edge helps your dog spot the opening quickly, especially in low light.
Allow Proper Overhead Clearance
Once you’ve nailed the doorway, think upward. Your dog needs 9 to 15 cm of clearance above its head when standing inside — enough to move comfortably without bumping the ceiling. Measure from the top of your dog’s head to the floor, then add that margin. A tight roof turns a shelter into a trap.
A tight roof turns a shelter into a trap — leave 9 to 15 cm above your dog’s head
Choose Large-breed Dimensions
Most large breeds tip the scales at 50 to 90 pounds, with shoulder heights running 23 to 26 inches.
That’s why a 4-foot by 4-foot footprint is your baseline — enough floor space to protect joints and let your dog turn around freely. Total house height should reach at least 1.25 times your dog’s full standing height.
Choose Location, Style, and Materials
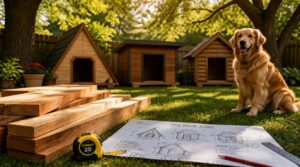
Before you cut a single board, you need to nail down three things: where the house will sit, what it’ll look like, and what it’s made of. Get these decisions right early, and the build goes a whole lot smoother. Here’s what to think through before you start.
Pick a Dry, Shaded Spot
Where you place the house matters as much as how you build it. Look for a high, flat area with natural shade from trees or a building — somewhere the ground stays cool and dry without much direct sun hitting the roof all day.
Do a quick sun mapping check: watch the spot at different times to confirm it stays shaded for most of the day.
Avoid Wind and Pooling Water
Wind hits harder than you’d expect, especially on open ground. Position the doorway away from prevailing winds to stop cold air rushing straight inside.
Raise the base at least 4 inches above grade so pooling water can’t creep under the floor. A natural windbreak from a fence or wall cuts exposure a lot — your dog stays warmer without any extra heating.
Select Safe Exterior Materials
The material you pick affects your dog’s safety directly.
- Fiber cement siding resists rot, termites, and fire
- Vinyl siding stays flexible in freezing temps without cracking
- Stone veneer moderates interior temperatures naturally
- Aluminum cladding won’t warp, rot, or attract pests
Whatever you choose, seal it with non-toxic, low-VOC paint so your dog isn’t breathing harsh chemicals every day.
Choose Roof Style
A gable roof is your best starting point — that classic triangular sloping roof sheds rain fast and frames up simply. If you’re in a windy spot, a hip roof holds up better since every side slopes down.
Aim for a 4:12 to 6:12 pitch for solid drainage. Asphalt shingles work well on either style and won’t break your budget.
Gather Tools and Fasteners
Before you swing a single board into place, your tool list will make or break the build.
Grab a circular saw, electric drill, hammer, and measuring tape. For fasteners, use 1-1/4 inch and 3-inch galvanized wood screws — galvanized coatings resist rust, which matters outdoors. Pick up 1-inch nails for siding. Everything’s available at your local hardware store.
Build The Raised Foundation
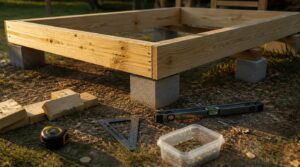
The foundation is where everything starts, and getting it right makes every step after this much easier. Before you frame a single wall, you need a solid, level base that’ll keep your dog dry and the structure stable for years.
Here’s how to build it the right way, from clearing the ground to checking that the floor won’t budge.
Clear and Level The Ground
Start by pulling out any rocks, roots, and debris from the dog house footprint. Mark the area with stakes and string, then use a long level to check for dips or high spots — you want no more than 1–2 cm variation across the surface.
Shave down high spots with a shovel and pack low areas with compacted earth. A hand tamper firms the soil so it won’t shift later. Slope the ground slightly outward to keep water draining away from the base.
Frame The Wooden Base
With the ground packed and level, you can lay your sill plate — use pressure-treated 2x4s so moisture from the soil won’t rot the wood.
Assemble the perimeter into a square rectangle, then drive 3-inch galvanized screws at every corner joint. Tight 90-degree corners keep the whole base square, which means your walls will line up cleanly when you get there.
Elevate for Drainage
Lift that base 4 to 6 inches off the ground — that gap does real work. It keeps groundwater from wicking into your floorboards and lets air move underneath to fight moisture buildup.
Here’s how to do it right:
- Lay a UV-resistant moisture barrier flat on the prepared soil
- Place wooden pallets, bricks, or pre-cut blocks at each corner
- Spread a thin gravel layer beneath the base for drainage
- Dig a shallow swale around the perimeter to redirect runoff
- Keep the gap clear of debris so airflow stays consistent
Rot starts where dampness lingers.
Add Sturdy Plywood Flooring
With your base elevated, the floor panel goes on next. Cut 3/4-inch exterior-grade plywood to fit your frame exactly — it aids weight, resists moisture-induced swelling, and won’t cup under your dog’s weight.
Fasten it using ring-shank screws every 6 inches along the edges. Pre-drill near corners to avoid splitting. Seal every surface with a non-toxic waterproof coat before your dog steps on it.
Check Base Stability
Push each corner firmly — that’s your stability shake test. If anything shifts, tighten the screws before moving on.
Apply lateral pressure to opposite sides to detect wobble. Check every joint for early corrosion, especially where treated lumber meets metal fasteners.
After rain, look for ground settling signs like sinking or tilting. A solid structural foundation now prevents bigger headaches later.
Assemble Walls, Roof, and Door
With the foundation solid underfoot, it’s time to build the walls, roof, and door — the parts that actually turn a wooden frame into a real shelter. Each step here builds on the last, so working in order keeps everything square and tight. Here’s what to tackle first.
Cut Wall Frame Pieces

Start by marking your stud locations on both top and bottom plates before any cutting begins. Space studs 16 inches on center throughout each wall panel. Use a sharp blade and keep hands clear of the path.
Cut every piece, then verify each one against your plan. A framing square confirms right angles before you commit to nailing anything together.
Attach Plywood Siding
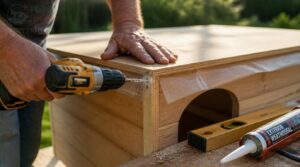
Tack a moisture barrier behind each panel before anything else — it blocks water from wicking into the wall cavity.
Press your plywood flat, align it with a level reference line, then fasten with galvanized screws every 6 inches along edges. Seal all end cuts with exterior-grade sealant. Leave a small gap between panels so wood can expand without buckling.
Frame The Dog Door
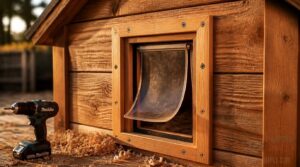
Cut your inner frame pieces first, then press them flush against the door opening and drive screws in a star pattern to prevent warping. Secure the outer frame from the opposite side, sandwiching the wall surface between both panels.
Leave a 1 to 2 millimeter gap around the flap so it swings freely. Press weatherstripping into the frame rebate, then test a magnetic closure to confirm the flap seals shut between passes.
Build The Sloped Roof
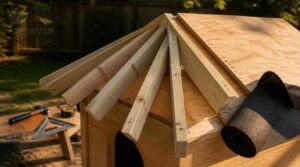
A sloped roof sheds rain the way a good jacket sheds cold — quickly and completely. Aim for a 4:12 to 8:12 pitch, then work through these steps:
- Install a ridge board at the peak to align your rafters
- Space rafters 12 to 24 inches apart across the span
- Nail plywood sheathing firmly over the frame
- Lay roofing underlayment flat across the deck
Keep all framing square before moving on.
Install Shingles and Drip Edges
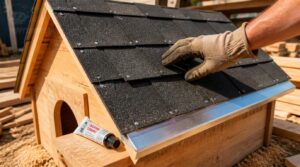
Shingles won’t protect your dog if water sneaks underneath them. Nail the metal drip edge along the eaves first, every 12 inches, so water sheds cleanly off the edge.
Layer 3-tab shingles upward from the bottom, overlapping each row. Seal corner joints with roofing cement to close any gaps. That’s what keeps the inside dry when the rain hits hard.
Weatherproof, Insulate, and Maintain
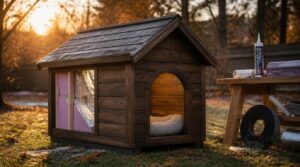
A well-built dog house is only as good as the protection it holds in. Once the structure is up, a few finishing steps will keep your dog warm, dry, and comfortable through every season. Here’s what to tackle next.
Add Covered Wall Insulation
Insulation is what turns a wooden box into a real shelter. Pack it tight into every wall cavity, then cover it with plywood.
- Mineral wool — fire resistant, experiences moisture
- Fiberglass batt — affordable, fits standard cavities
- Rigid foam — prevents thermal bridging
- Spray foam — air and vapor barrier
Put the vapor barrier on the warm side before nailing each plywood panel down.
Install Vents or Air Holes
Once the insulation is sealed behind plywood, your dog needs fresh air — not just warmth.
Cut two circular openings, 2 to 4 inches for small breeds or up to 6 inches for large dogs, on opposite walls to create cross ventilation. Position each vent 6 to 12 inches above the floor. Fit rust-resistant metal grilles with insect screens so pests stay out.
Seal With Non-toxic Paint
With the vents in place, it’s time to protect the wood from rain, sun, and rot.
Use water-based acrylic exterior paint labeled zero or low VOC — it cures to a tough film and won’t off-gas harmful odors near your dog. Wait 7 to 14 days before letting your dog move in. Recoat every two to five years to keep the weatherproofing strong.
Add Bedding and Door Flap
The paint’s dry — now make it cozy. Lay 2 to 4 inches of fleece or microfiber bedding inside. Choose a washable, removable cover so cleaning stays simple.
For the door, attach a flexible vinyl flap using water-resistant screws. Consider these options:
- Magnetic edges for a snug seal
- Canvas flaps for harsh winters
- Standard 8×12-inch openings for most breeds
- Microchip-sensor automatic door flaps
- 1–2 inch clearance around the frame
Inspect and Clean Regularly
Your dog’s health depends on what you catch early.
Check for pests, droppings, and damp spots weekly inside the shelter. Wash bedding at 60°C to kill parasites, and wipe walls with a non-toxic disinfectant every week.
| Task | Frequency | Why It Matters |
|---|---|---|
| Wash bedding | Weekly | Kills bacteria and parasites |
| Inspect for pests | Twice monthly | Prevents infestations early |
| Seasonal deep clean | Every season | Resets odor and moisture |
Frequently Asked Questions (FAQs)
What are some good insulation materials to use?
Rigid foam boards like EPS or PIR offer great thermal regulation. Mineral wool resists moisture and fire. Sheep wool buffs humidity naturally. Avoid fiberglass unless it’s fully covered — dogs will chew exposed batts.
Should I elevate the dog house off the ground and if so, how?
Yes, lift it 2 to 4 inches off the ground. This keeps moisture out, blocks pests, and reduces cold transfer from the soil — small pallets or rot-resistant lumber legs work well.
What is the ideal door size for my dog?
Your dog’s door doesn’t need to be oversized — just precise. Measure the shoulder width, then add 2 inches per side. Height should clear the shoulders by 2 to 3 inches for a snug, draft-free fit.
What kind of flooring works best?
Sealed plywood or rubber flooring works best. Both resist moisture, clean fast, and hold up against claws. Rubber adds grip so your dog won’t slip. Raise the floor panel to block cold ground transfer.
Are there any safety concerns I should be aware of when building?
Safety matters before you pick up a single tool. Inspect power tools for damaged cords, wear gloves when handling lumber, and use non-toxic exterior paint so your dog stays safe once they move in.
What permits or regulations apply to dog houses?
Most backyards don’t need a building permit for a dog house, but animal welfare laws and rental contract rules still apply. If you own a dangerous breed, local authority permission may be required.
How do you move a dog house safely?
Moving a dog house starts with securing your dog first. Place them in a crate or quiet room, attach a current ID tag, and assign one helper to monitor them throughout.
Can multiple dogs share one dog house?
Yes, two dogs can share one house if it’s sized right. Each dog needs room to stand, turn, and lie flat. Social compatibility and enough floor space — over 24 square feet per dog — matter most.
Whats the best flooring material for inside?
Vinyl or sealed plywood works best — it’s scratch-resistant, waterproof, and easy to wipe clean. Lay a dog bed or bedding on top for warmth and comfort underfoot.
How do you train dogs to use it?
Start with consistent cue words like "go potty" right as your dog eliminates. Reward within one second. Use the same spot daily and stick to a fixed schedule tied to meals and waking.
Conclusion
A dog house that fits is like a key cut to the right lock — it works because the details were right from the start. You measured carefully, built a raised, weatherproof foundation, and framed walls that will hold through seasons.
That’s how to build a dog house your dog will actually choose over the couch. Every screw you drove, every sealed edge — that’s care made physical. Your dog doesn’t know the word shelter. But they’ll feel it.